

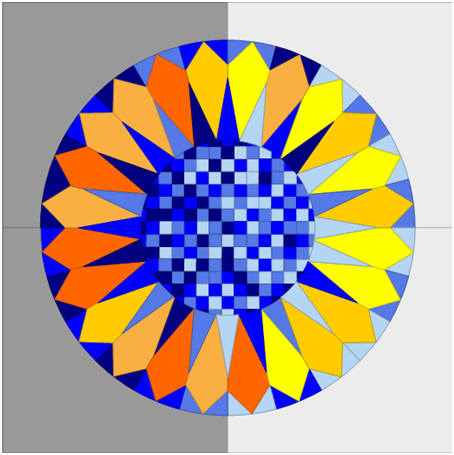
We are already halfway through in this Block of the Month quilt!?! This Spiked Dresden is the eighth of the sixteen blocks that will make up the Round the Year Quilt. The block is 18″ square with a 15″ inset circle, like the other blocks of this quilt,
When I was designing this quilt, I wanted to include all the blocks that I loved, but was too lazy to make a whole quilt with. One on that list was this Spiked Dresden that I encountered on pinterest. When drafting the block for the quilt, I modified it a bit, including the wedges on which the blade points rest. I also thought this was a great block to introduce you to foundation paper piecing with freezer paper. You can also piece it with regular foundation paper and even without a foundation paper piecing template. Complicated as it looks, this particular Dresden needs only as many seams as a regular Dresden! The blade, the spike and the wedge are all attached in one go. Those of you who are still apprehensive of attempting these blocks – this really is a piece of cake! This block was tested by fellow Desi Quilter Caroline Nagar and she had a lot of useful suggestions, which I have tried to incorporate here! Thanks, Caroline!
The downloadable Template files ( two this time) and the Instructions File can be found at the end of this post. So here we go!
Fabric requirement ( For Orange petalled Dresden)
| Fabric | Blades | Spikes | Outer Ring | Centre | Background** |
| #1 Dark grey | 11” x 13” | ||||
| #2 Light Grey | 11” x 13” | ||||
| #4,5,6,7 Blues | 4” x 10” each | 2” X 17” each | 8” square | ||
| #8,9,10,11 Yellow, gold, light orange, deep orange | 5” x 18” each | ||||
| **For background – Use 11” x 25” if using single fabric. | |||||
| You could also use a 19.5” square ( will be trimmed to 18.5″ after appliquéing circle). | |||||
Cut all fabric strips from width of fabric.
Step by Step Instructions

Templates and Printing
- Print the Instructions file.
- Print the two templates files at 100% or actual size in portrait mode on A4 size freezer paper.
For printing on freezer paper, refer to this link.
- Template File 1 :
For the Template A Circle, please add an additional ¼” seam allowance to make total of ½” seam allowance.
For the Template B (Pieced Dresden quadrant), cut exactly to size. Use a scale and score lines on the printed lines on the semi circular template with a paper knife or any sharp edged object, to get sharp creases at each seam. I used my trusted friend Jack (the Ripper) for this. Take care so that you do not tear the paper. Sobana of thequiltbug.blogspot.com recently used the freezer paper method for piecing the Dresdens in her quilt. She recommends needle punching the seam lines – I am quite happy with creases!

Important! We piece this Dresden using the freezer paper technique. If freezer paper is not available, regular foundation paper piecing may be done, in which case, you would need to print/trace the Template B to get 4 copies of it.
Template C (background) glue the two parts of the template on edge as indicated. You need four fabric pieces using this template.
Template File 2 –
Contains the templates D ( blade/ petal), E (spike) and F (outer ring piece).
Cutting Instructions
We cut:
6 petals/ blades from each of 4 fabric strips (5”x 18”) using Template D= Total 24
6 spikes from each of 4 fabric strips (4”x 10”) using Template E = Total 24
6 outer ring pieces (wedges at base of petal point ) from each of 4 fabric strips ( 2” x 17” ) using Template F= Total 24

I cut 4 layers of fabric using the rotary cutter. I pressed the freezer paper template to the top layer and cut the fabric so…

You could iron the freezer paper templates D, E, F (for the petal/ blade, spike and outer ring piece) on card / stiff paper and cut it out to make sturdier, reusable templates.


Or you could use template plastic to trace and make stencils!
For the Spikes
Use template E and cut like you did the petals. Press the pieces into half lengthwise, right side outside.
For the inner circle
A reminder! Cut a circle from the 8” square – use template A, add an additional ¼” allowance all around – the template gives only ¼” allowance and cut circle.

Background.
11” x 25” if using single fabric.
You could also use a 19.5” square ( will be trimmed to 18.5after appliquéing circle).
Piecing and Assembly
Preparing the Blades/ Petals
Here is a great tutorial I referred to – http://www.vanessachristenson.com/2013/02/v-and-co-how-to-make-dresden-plate.html. So if anything is unclear here, that is where I suggest you head!
- Fold the petals lengthwise, right side inside and sew ¼” seam along the top edge.

Remember to lock your stitch when you begin and end each seam, if your machine gives you the option, or you may end up with what happened here.

If your machine does not have the locking option, reduce the stitch length. I do not recommend a back-stitch, as it adds bulk.

2. You can chain stitch all the petals at one go!


- Clip apart the blades. Trim the seam to about 1/6” and clip the `pointy’ corner.

Clip seam and point to reduce bulk and turn inside out - Turn inside out. Use a toothpick or even your embroidery scissors to get a nice point.


5. Now comes the last step in getting the blades ready for piecing. Press them to ‘centre the point’. Lightly crease the blade on the vertical centre line as shown and align the centre seam line with it. Press ( not iron). A bit of spray starch does great here.

Preparing the Spikes
Fold the spikes along the central vertical `spine’, right side outside, aligning the longer edges. I do not recommend using your iron, you do not want a crease down the centre.
Piecing with Freezer Paper Template B
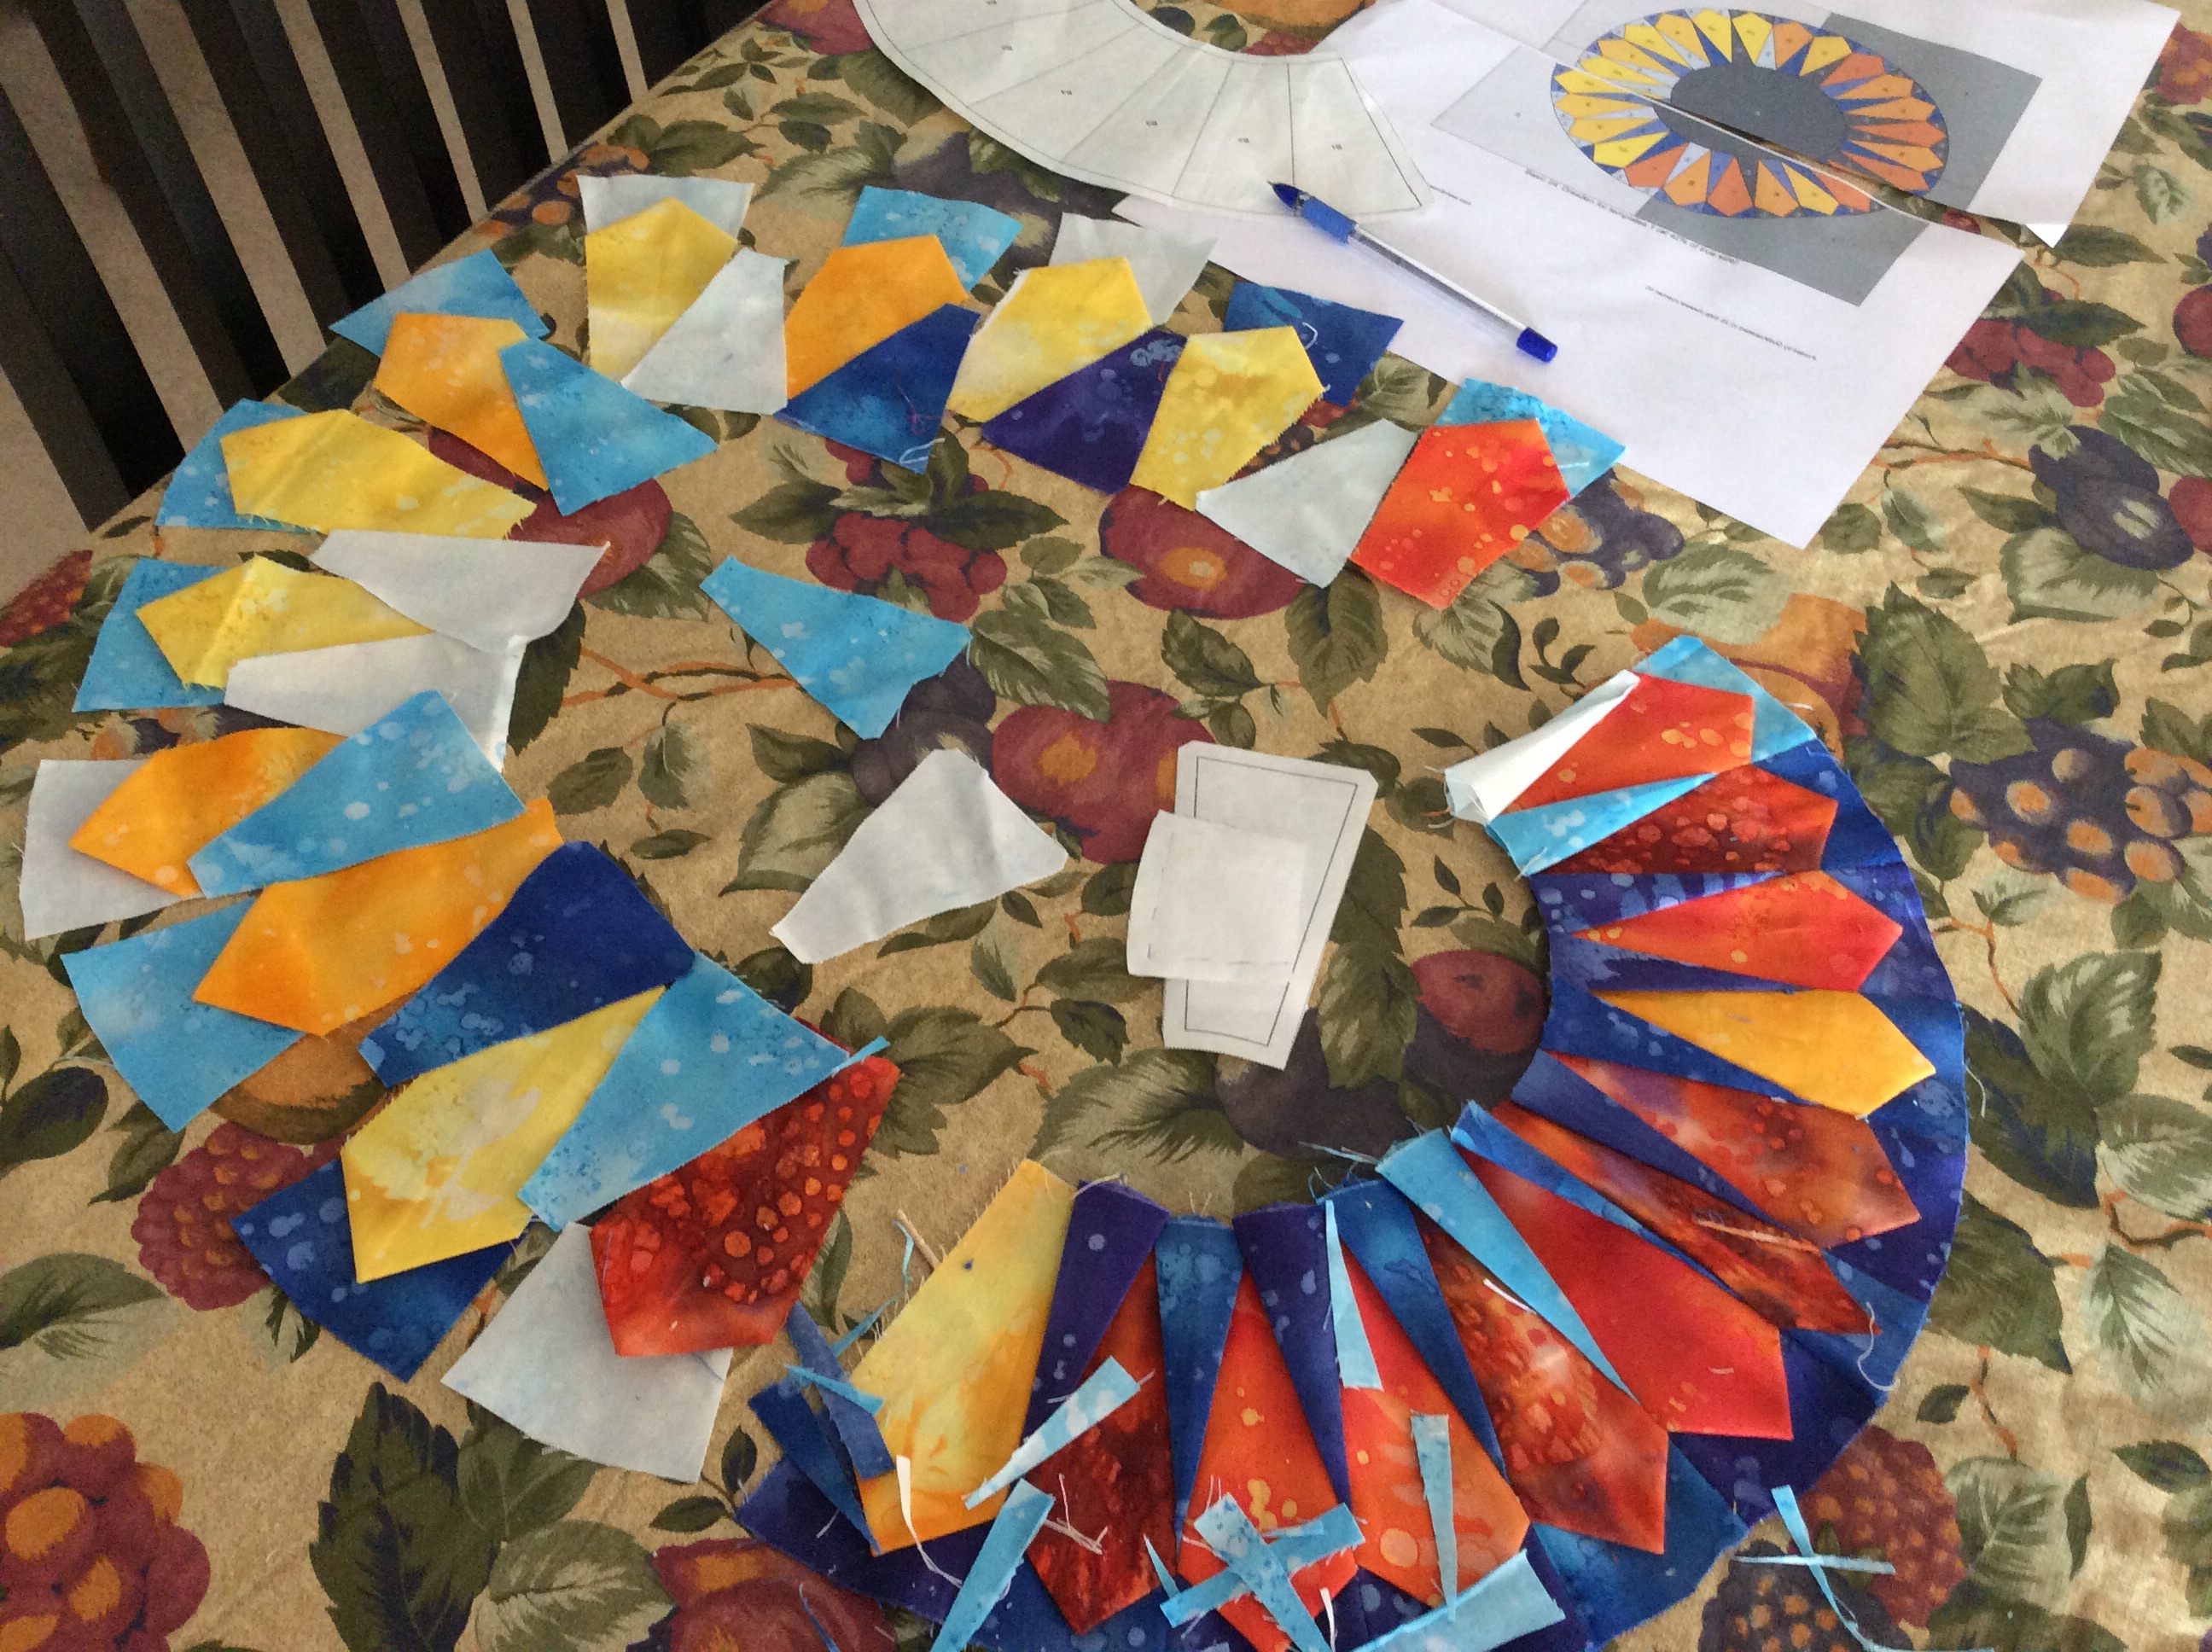
- Arrange all the petals, spikes and wedges in a circle for an auditioning. I am sorry I forgot to take a picture of this stage!

Any kind of foundation paper piecing can be confusing, as the final picture is a mirror image of what you began piecing with! I had this mirror image of my block to help me along the way!
Decide on a starting point, label the Blade#1, and start piecing anti-clockwise, if you are looking at the mirror image.
2. Now use the freezer paper template ( also used earlier) to piece the Dresden quarters. I find that using a template takes out the guesswork from piecing a Dresden – I needed sometimes 21 and at other times only 18 petals for a 20-petal Dresden, when I did not use paper piecing. The block lies flat and neat with this technique!
Remember we have to include the folded spike fabric at each seam, matching at the edge at the inner ( smaller) circle of the paper template. I used this turorial http://laren.blogspot.in/2012/04/tutorial-tuesday-spike-dresden-plate.html for adding the spikes.
3. Place the fabric pieces in this order on B1 section of the piecing template.
First – Template E #1 right side up at outer edge of template. Press down to freezer paper.

Second – Blade #1 right side up, aligned at inner edge of template. The blade point should be about ¼” inside the edge of paper, at the final seam line.
Press on to freezer paper.

Third– Spike#1. Aligned at inner edge of template. The spike will stick out beyond the paper edge by about a ¼”. Pin to hold in place temporarily.

Fourth – Blade #2 face down, aligned over blade#1. Repin as shown.

Fifth – Wedge #2 comes face down, aligned over wedge #1.

Pin to hold everything in place. Fold away the freezer paper at crease ( seam line beteen B1 and B2) line, turn over.
Repin from this side, if you like. You will have ¼” seam allowance visible beyond the paper.

Sew just along the edge of the paper, taking care not to stitch over the paper. Trim the seam to ¼”.

.Peel away the freezer paper and press open the seam.
You would not be able to press open the seam if piecing with regular foundation paper; this is one of the advantages of freezer paper piecing that I love!

Now press the pieced portion back on to the freezer paper. Press the spike open, so that it is centred between the two blades as below.

We are now ready to add the next pieces.
Note: If not using freezer paper, just sew on seam line on printed side of paper, as usual (without creasing, folding away the template.)
4. Place Spike #2 in place – it has to stick out beyond edge of paper!

… Follow with blade #3 aligned with blade #2. Pin in place…

…and finally wedge #3. Flip around and sew.

Again trim and press open seam. Press down on freezer paper.
5. Join the next three pieces – Spike #3, Blade#4 and wedge #4.
6. Join 2 more sets, till Spike #5, Blade#6 and wedge #6.

7. Press and trim all sides to size, before you remove the freezer paper Template B totally.
8. Pin a post it note on Spike #6 with its name, and set it aside!
So one quadrant is pieced!
9. Now , we are ready to piece the 2nd quadrant. Proceed as for Quadrant 1. Before removing the freezer paper, sew Spike #6 in place between Quadrant 1 and Quadrant2, to get a semi circular ring. Put aside Spike #12
The freezer paper template is reusable. But if you are piecing with regular printer paper, you need fresh templates for each of the other three quadrants.
10. Similarly piece Quadrants 3 and attach Spike# 12 between Seme-circle1-2 and Quadrant 3..
11. Finally piece Quadrant #4 and add spike #24 between the last blade (#24) and Blade#1 from the first quadrant to complete your ring!
Assembly
Applique the ring to your background.
Finally add the centre circle in place. The simplest way to do this is: Machine tack ( largest stitch setting) about 1/8 to 1/6” inside edge of the fabric circle, leaving a long length of thread on either side. Trim your template B to the seam line and iron it to the centre of the fabric. Now pull the thread to gather the fabric nicely over the paper circle. You have a perfect 7” circle. Pin in place over the centre of your block and appliqué by hand or machine. Trim away the background fabric behind the centre, and remove the freezer paper.
Here are the downloadable .pdf files with the instructions and templates. You need Adobe Reader (available for free online) on your computer, to be able to view these files.
1. Instructions Spiked Dresden Block08 of the Round the Year Quilt
2. Template File 1 Spiked Dresden Block08 of the Round the Year Quilt
3. Template File 2 Spiked Dresden Block08 of the Round the Year Quilt
You can access the links to the other blocks from this quilt here.
Please note that the downloadable patterns with paper piecing templates and instruction files for the Dreamcatcher Round the Year quilt blocks are being migrated to my store MadsPatch and will not be available for download for free from 15th November 2020 onwards.

I wish there was a master template for this block, so I could use it as a coloring sheet to try out different choices. Thank you so much for doing all this work and sharing it with us. I have been thoroughly enjoying these blocks.
Thank you! And for your feedback too—will correct the link the next time I am on my laptop! Will also check then if I can provide a master template.
Do share pics of your blocks on my FB page. I would love to see them as would others, I am sure. 😊