From 2019 is this quilted portrait, meant as a gift for a daughter who had lost her mother…a precious memory from happier times, stitched onto fabric…
I made this quilt as a gift for someone who wanted to gift it to a friend who had recently lost her beloved mother to cancer…
I began with a coloured image, simplified it by removing the background and cropping it to focus on the faces, converting it to black and white and playing around with the contrast till I had an image that held your attention. I then posterised it on Pinetools, a free website, where you can do several great things with your pics online!
Here are some of the steps of the collage and quilting process…
In the absence of a design wall, I worked on a thermocol board!
I used the freezer paper method for the collage. I printed one copy of the posterised image full size on regular paper and glued it together. This is the guide. Since there were two figures, I worked on them one at a time.
I printed another copy of the image on freezer paper and cut out pieces from it, use them as templates to build the collage on muslin.
Building up the mother’s image…
You can see that I have skipped the really tiny curves on the templates. I was working only with glue, no fusible, so this was the way to go. If you have your fabric prepped with two-way fusible, you can cut out much finer detail on your templates.
The coloured clothes add interest to the monochromatic collage.
The figures are assembled and time to start on the quilting. I chose a dark background so that focus stayed on the mother-daughter duo.
Contour quilting…The mother is done, except for a tiny detail…That blue earring adds a lovely 3-D effect to the quiltThe quilting for the daughter’s hair
And an earring for the daughter too!
Something to jazz up the daughter…I was really happy with that striped t-shirt, which was also collaged.I shaded out the quilting on the background too
Though the background quilting was a simple meander, I shaded it out from the figures, changing threads from black, through blues to white.
Here is the back!
Admire the quilting from the back!
And here is the final quilt!
A Precious Memory
Hope you enjoyed looking at the process as much as at the final product!
A quilted portrait of a beautiful couple setting sail on to a new adventure together, where only the sky is the limit!
This is a recent portrait I completed. There was a bit of a hurry as my dear, dear friend P wanted to gift it to her daughter N and son-in-law A for their wedding anniversary.
This time, I had some problem in coming up with the final image I was going to work with. In the original pic, the couple was standing on a boat against a stunning backdrop of rocks and sea, but I had to get rid of that. I removed all the background and decided to concentrate on the faces, as there was a size constraint too; P asked that I stay within 24”x 24”. What I really regretted removing was N’s hand from A’s shoulder —it was so sweet! But never mind, we work with what we have to work with.
While finalising the vectorised and posterised image I was going to use as my base, I spent a lot of time on various apps, none of which seemed to give a satisfactory result. The free version of Vector Q which I have been very happy with so far, now seems to give highly simplified and unsatisfactory results. I was not happy with what Poster Shine gave me either. I got something I like from Prisma, but that needed to be further modified. I took that to Chat GPT and Google Gemini and combined elements from both set of images. Warning: Do not rely on their ‘numbering according to value’! It is all wonky. You end up doubling your work. Guess how I know?
And finally, would you believe it, what seemed to work best was the picture edit menu of good old MSWord!!
Chat GPT gave me this image, which I modified using Gemini and MSWord
I printed some of the elements on commercial prepped printable fabric, cut them out and collaged them to the picture. This included the straw hat, as it was too complicated to collage and would have taken up a great deal of time to do, without adding any value to the portrait. The other was the sunglasses, with their reflections. Of course, I painted over these with my Inktense pencils to add brightness to the printed fabric. I have used hand-dyed fabrics by Kalindi’s Quilts and a couple of batiks from my stash for the skin tones. Kalindi’s bundle seems to be perfect for our Indian skin tones and hair, though I do add a bit of burnt orange and vermillion from my Inktense box as I love the warmth they add and how they merge the edges without muddying them. I painted the lips (again with Inktense) as I could not find the right tones in my fabric stash.
Happy with how it looked, I did the quilting, using a tight meander for the faces, changing thread colour with every change of fabric. I skipped my black tulle (otherwise a constant for my quilted collages) as there did not seem to be too much fraying and it seemed to dull down the portrait.
Quilting down the collage
Lesson learnt: ‘Steam a seam’ works great. For one , it stays put while you get the collage together and fuses beautifully. But…yes, there is a ‘but’…I prefer the feel of Misty Fuse. It is not as heavy and does not gum up the needle at all. So if there are several layers, I would go in for Misty Fuse. For a single, or a lesser number of layers, steam a seam would be the preferred choice.
In the meanwhile, I kept sharing black and white pics of the portrait with dear P, because that is what I had told her I would be doing! (I can imagine her delighted surprise when from the parcel emerged a coloured portrait!)
So without much ado, a few pics of the finished quilt…
I thoroughly enjoyed adding the salt and pepper to A’s beard! 😁A close-up of A’s shirt collar
I always love to add a 3-D element to the portraits I do. I searched Amazon till I came up stuff similar to what they were wearing in their original picture. So A got his platinum (!) chain and N got her gold and diamond(!😄) nose-ring and earrings! The thick chain was impossible to stitch to the fabric or insert into it, like I did with N’s jewellery. So I ended glueing it up with super-glue.
I also love that little ‘band’ of fabric on A’s hat. It adds such a ‘holiday fun’ look to the picture!
The finished portrait
Here is a video which explores the portrait in greater detail. (Please ignore the stray threads; I did ask my friend P to clip them off before she gifted the portrait to her bachchas).
The Sky is the Limit—Sail on!
I quite love the way it turned out. Don’t you get that outdoorsy feeling when you look at it? Wide blue skies and endless horizons?
So now, one is ready to launch the next project! Happy Quilting to all my quilter friends.
A portrait quilt—all in colour—of a joyful young couple, using fabric collage against a pieced background, with lots of thread-painting.
Last year, a dear friend entrusted me with the task of making a wedding anniversary gift for her daughter (whom I shall simply call A). It was to be a portrait of A and her husband, to be called, what else, H!
I chose to combine two pictures, taking the gorgeous couple’s faces and figures from one and placing them against a background of a yellow maple tree during fall. The couple had met and fallen in love in Canada, so this seemed only appropriate!
The quilt which turned out to be much more difficult than what I had envisaged. For one, both of my subjects were smiling broadly!
That gorgeous smile! H’s smile Falling in Love portrait quilt
H’ s eyes were behind his glasses and getting that shading right is always a problem.
Details of the thread painting!
H had a delightful dimple, but how do I portray that in a fabric collage? Not to forget getting that beard right.
The full face —with the dimple!
Then there was A’s beautiful long shiny, silky hair with highlights in reds, auburn like the colours of fall around her!
Glowing with happiness!
Let us not forget the clothes and the accessories.
Details of A’s leather jacket with its zipperThe Adidas strap!
The maple tree in the background was not easy!
The maple tree in fall—I appliquéd some branches and leaf cut-outs randomly on the pieced background
I wanted to show some sunlight peeping through the tree, to reflect the joy on this couple’s face.
The sky peeps out from between the yellow leaves.
Despite the long, long hours it took, it was all worth it and I had quite a sense of satisfaction and achievement when it was finally done! ( I do not recall exactly the dimensions of the quilt, but I vaguely remember it was about 32” x 40”)
So I now leave you with a couple of videos of the quilt.
Falling in Love— the gorgeous couple! May they continue to smile together lifetime after lifetime!
I hope A and H love the quilt as much as I enjoyed making it.
I am overwhelmed with emotion when I try to write anything about this portrait of my daughter…I will try to just stick to photos of how it was done!
This photo, so quintessentially my Tana, was my inspiration for the quilt! I started working on it in January 2022, about a year from when she passed on.
Vectorization done on the Vector Q app
The collage came up pretty quickly!
What followed were a couple of trips—one exploring Rajasthan and another one in to Gujarat! Finally got back to working on it, hoping to finish it by her birthday in April!
Sadly, didn’t feel quite done on her birthday. Needed a lot of more quilting to add depth to it!
( Note that I am trying ‘contour quilting’ quilting on it, where the quilting follows the face contours)
This looks better, right? But I don’t like the way some of the lighter threads stand out against the darker areas! Gives it a harsh look! Not for my gentle darling, it wouldn’t do!
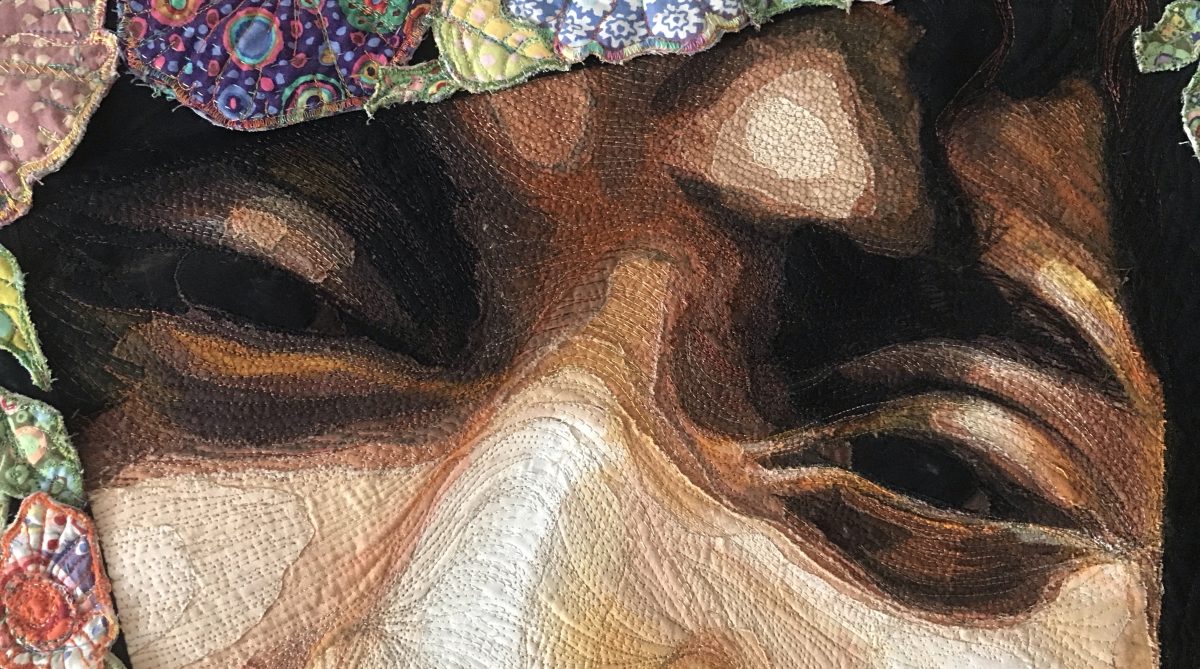
I used Inktense pencils to reduce contrast in the in-between areas and darken some stitching lines so that the threads matched the fabric!
Tip: A bit of Cadmium Orange or Burnt Orange does wonders to soften harsh contrasts in portraits, especially with our Indian skin types! It is great for lip-colour too!
A close-up of her smile
See the Inktense at work!!
The hair…
Were those the most beautiful eyes in the world that mirrored the purest soul that ever lived?
I cut out a poncho I had made for her and used it to dress her! The flowers and leaves were also cut out from the poncho.
The quilt was mounted on a ( mounted) canvas, which makes it easy to hang. It now lives in my living room where I can look at her while watching TV…
…or touch her, talk to her, smile at her every time I walk past her!
Another quilt-a wall hanging that I finished this year, but did not get around to sharing…
I wanted to make something special for my son and daughter-in-law for their fifth wedding anniversary and thought this would make a great gift. Many of you have asked me how I put together the portrait, so I will try to do a brief summary here. But before I do that, I must record my thanks to a generous friend and wonderful artist, Manju Narain, who is a master of portrait quilts and who worked as my guide and sounding board as I created this portrait.
The choice of picture is important. Take a high resoltion picture so that you do not lose out on the details. Mentally remove any extraneous elements in the background as you weigh the pros and cons of a particular picture. Does the picture speak to you, tell you something about the person behind the face? I went through several photos, changing them to black and white, checking for contrast and drama before I zeroed in to this one. My daughter-in-law, M’s, smile is a blinder and (of course!) I think, my son has a very sweet smile too.
Once the picture was finalized, I reduced the number of colours to five- black, white and three greys . I don’t have Photoshop and was not satisfied with the result obtained with Paint, so I searched online and found a great site which works beautifully well.
I enlarged the picture to 30″ x 40″; then took two full size prints-out, one on plain paper and the other on freezer paper and pulled out black, white and grey solids to work with. I trimmed away the background from the freezer paper print. The plain paper picture would work as a guide. I also kept a print-out of the original picture in colour, for reference.
The prints-out on plain paper and freezer paper
4. I traced the outer outline of the figures and the garments on the white background fabric- this will help me in the final placement of the figures on it. No pictures of this!
5. I began work on my DIL’s (daughter-in-law’s) face and neck first. I built the portrait in layers, like one does with oil paints.
I decide to use the medium grey fabric as a base for the face on which the features will be built up. I ironed the freezer paper on the right side of the fabric which will form the lowermost layer. I built up the various layers, using the freezer paper templates as guides. For the really tiny pieces, I ironed a two-sided fusible on the wrong side of the fabric before cutting out the pieces. They could then be ironed in place. (The details, such as the white highlights on the nose, teeth and eyes would come in last after most of the quilting had been done).
For the hair, I used black as the base and pinned the highlights in the dark grey over it . (I later regretted not adding a fusible under the highlights as the thin strips frayed before I could stitch them down. Another good option would have been to cut and place them just before I was ready to quilt down the piece.)
Auditioning the fabric face on the plain paper print out.
Now I was ready to create Son’s face. Here, the base would be the dark grey.
The base for this face is the dark grey
The basic shapes finished, I stitched DIL’s face in place on the background, using my pencil tracing as a guide.
I referred to the coloured picture to get the highlights and shadows on the picture right.
The great thing about having freezer paper templates is that you can iron them on the background fabric to make sure you are stitching pieces in the right place!
Coming alive!
The deadline for finishing the quilt approached, but we had guests over whom I had to take shopping! That is where I found the perfect danglers for DIL!
The perfect earrings!
Son’s jacket was a bigger problem. He is wearing a light blue jacket in the photo and I wanted to use their garments to add colour and zing to the portrait. Instead, I found this brown furnishing fabric-the texture seemed perfect! I also found the perfect buttons in my mother-in-law’s collection; they came from a coat that belonged to my father-in-law almost half a century ago.
The jacket is furnishing fabric! The buttons are from his grandfather’s coat.
Now I was thinking about DIL’s saree. Also, I needed colour here! That is when I remembered how fond DIL was of orchids and had insisted on purple orchids for her jaimala (garlands exchanged by bride and groom) on her wedding. So we went orchid-hunting! I finally managed to find these silk orchids, so pretty, don’t you think?
White silk and purple orchids for DIL?
Meanwhile, I add more details to Son’s face…
I add more details to the Son’s face
…and find the loveliest black tissue brocade in my stash for DIL’s saree. I auditioned gold tissue for her blouse, but settled on black.
Saree in black silk tissue brocade
This is looking good now!
Love the way it is coming up!
Black brocade saree in tissue silk for DIL
Now that everything is in place, comes the difficult question-to quilt or not to quilt. I began tentatively…
Scared I’ll ruin it! Oh God! What have I done to it? Should I rip it out?
But, what the heck! Let us jump right in!
My only hope is that quilting the background will improve it!
Well, lots of more quilting-and here we are. I finally decided to add five orchids to the quilt, four in DIL’s hair and one in Son’s buttonhole for it was five years of married life they would be celebrating!
All ready except for the final highlights and the binding
The binding was done, dots of white Inktense pencil inks added to the teeth and noses, hanging sleeve attached and I was ready to share the pictures of their gift with the children on their wedding anniversary. I brought it with me when I travelled to the US to visit them. Here is the portrait on their dining room wall. Incidentally I used the ‘Hang-it-Dang-it’ hanger to hang it and it worked wonderfully well!
A final close look at the portrait before I say goodnight!
In its home!
(For those of you who have been waiting, I did not take enough pictures, so a detailed tutorial will have to wait till I do my next portrait quilt.)



You must be logged in to post a comment.