A portrait quilt—all in colour—of a joyful young couple, using fabric collage against a pieced background, with lots of thread-painting.
Last year, a dear friend entrusted me with the task of making a wedding anniversary gift for her daughter (whom I shall simply call A). It was to be a portrait of A and her husband, to be called, what else, H!
I chose to combine two pictures, taking the gorgeous couple’s faces and figures from one and placing them against a background of a yellow maple tree during fall. The couple had met and fallen in love in Canada, so this seemed only appropriate!
The quilt which turned out to be much more difficult than what I had envisaged. For one, both of my subjects were smiling broadly!
That gorgeous smile! H’s smile Falling in Love portrait quilt
H’ s eyes were behind his glasses and getting that shading right is always a problem.
Details of the thread painting!
H had a delightful dimple, but how do I portray that in a fabric collage? Not to forget getting that beard right.
The full face —with the dimple!
Then there was A’s beautiful long shiny, silky hair with highlights in reds, auburn like the colours of fall around her!
Glowing with happiness!
Let us not forget the clothes and the accessories.
Details of A’s leather jacket with its zipperThe Adidas strap!
The maple tree in the background was not easy!
The maple tree in fall—I appliquéd some branches and leaf cut-outs randomly on the pieced background
I wanted to show some sunlight peeping through the tree, to reflect the joy on this couple’s face.
The sky peeps out from between the yellow leaves.
Despite the long, long hours it took, it was all worth it and I had quite a sense of satisfaction and achievement when it was finally done! ( I do not recall exactly the dimensions of the quilt, but I vaguely remember it was about 32” x 40”)
So I now leave you with a couple of videos of the quilt.
Falling in Love— the gorgeous couple! May they continue to smile together lifetime after lifetime!
I hope A and H love the quilt as much as I enjoyed making it.
Finally it can be revealed…the foundation paper pieced autorickshaw I made for a visiting quilter friend!
I used my friend’s favourite Kaffe Fasset fabrics for this little 18″ x 18″ quilted wall hanging.
The Purple Autorickshaw – the quilting from the back.The Purple Autorickshaw – foundation paper pieced!A close-up of the quilting.The driver was an afterthought, as I thought the empty autorickshaw looked abandoned and a bit forlorn!The cheeky looking auto driver is modeled after a free online image.A closer look at the back!Do not miss the registration number ( from the fabric selvedge)!The label! Like real autorickshaw s, it carries the date of ‘registration’, the ‘owner’s name’ and the name of the ‘manufacturer’ too!As you can probably see, I had a lot of fun making this little purple and green autorickshaw, but the best fun was the expression on my friend’s face when she read the owner’s name on the label!
I am one of those people who jump headlong into a project and the enthusiasm peters out in no time. I often don’t start a great looking new quilt, because I don’t know if I’ll finish it. Who doesn’t hate the thought of adding to those sad orphan blocks calling out to them to do something, anything with them!? Besides, what a waste of money and effort, which most of us cannot readily spare. I don’t want that to happen to any of you lovely people out there who embark on “Round the Year”, my Block of the Month Quilt! So I decided to pattern all my blocks to be versatile, stand alone blocks. At any stage, you can say, “Okay, that’s enough, I am not going to make any more of these!” (Though I do hope you won’t!). There are lots of ways you can use them, just as many as you end up with. I was playing around with my laptop and here are the options I came up with. (One of the advantages is that we have fairly big blocks which finish at 18″ with a 15″ inset circle.)
So what if you decide to make only one block?
Quilt it and make into a small table topper 18″ square. Incidentally, this is a test block made by my online quilter friend Nikhat Syeda– hasn’t she done a marvellous job? Reduce the size of the square to 15″, which is a great size for cushion cover. You could make a set of cushion covers depending on how many blocks you end up with. Add a border, quilt it to make a stunner of a wall hanging! Another quilter friend Sobana tested the same block. (She has even blogged about it here – you must see the other wonderful work she has done!). She is going to use it as the centre of a quilt she is planning! I am waiting to see what she comes up with – but this does give you an idea of what you can do with a single block! I almost forgot to remind you of what I did with a single block – in fact , with a little less than a single block… I skipped the outer square and quilted the pieced circle into a pretty, round table top. This is my friend Aliya Mir’s test block , which I have photoshopped to show you the look. Well, tomorrow evening I give the fabric requirements for the full quilt, do tune in! But before that, tomorrow morning I am experimenting with various quilt layouts here on this blog!
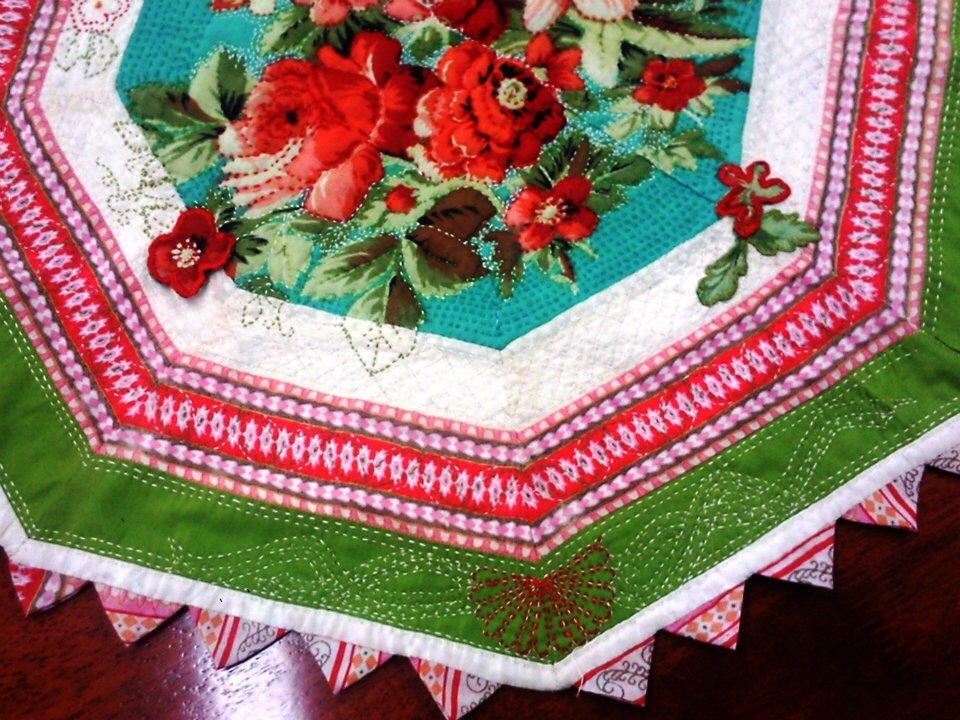
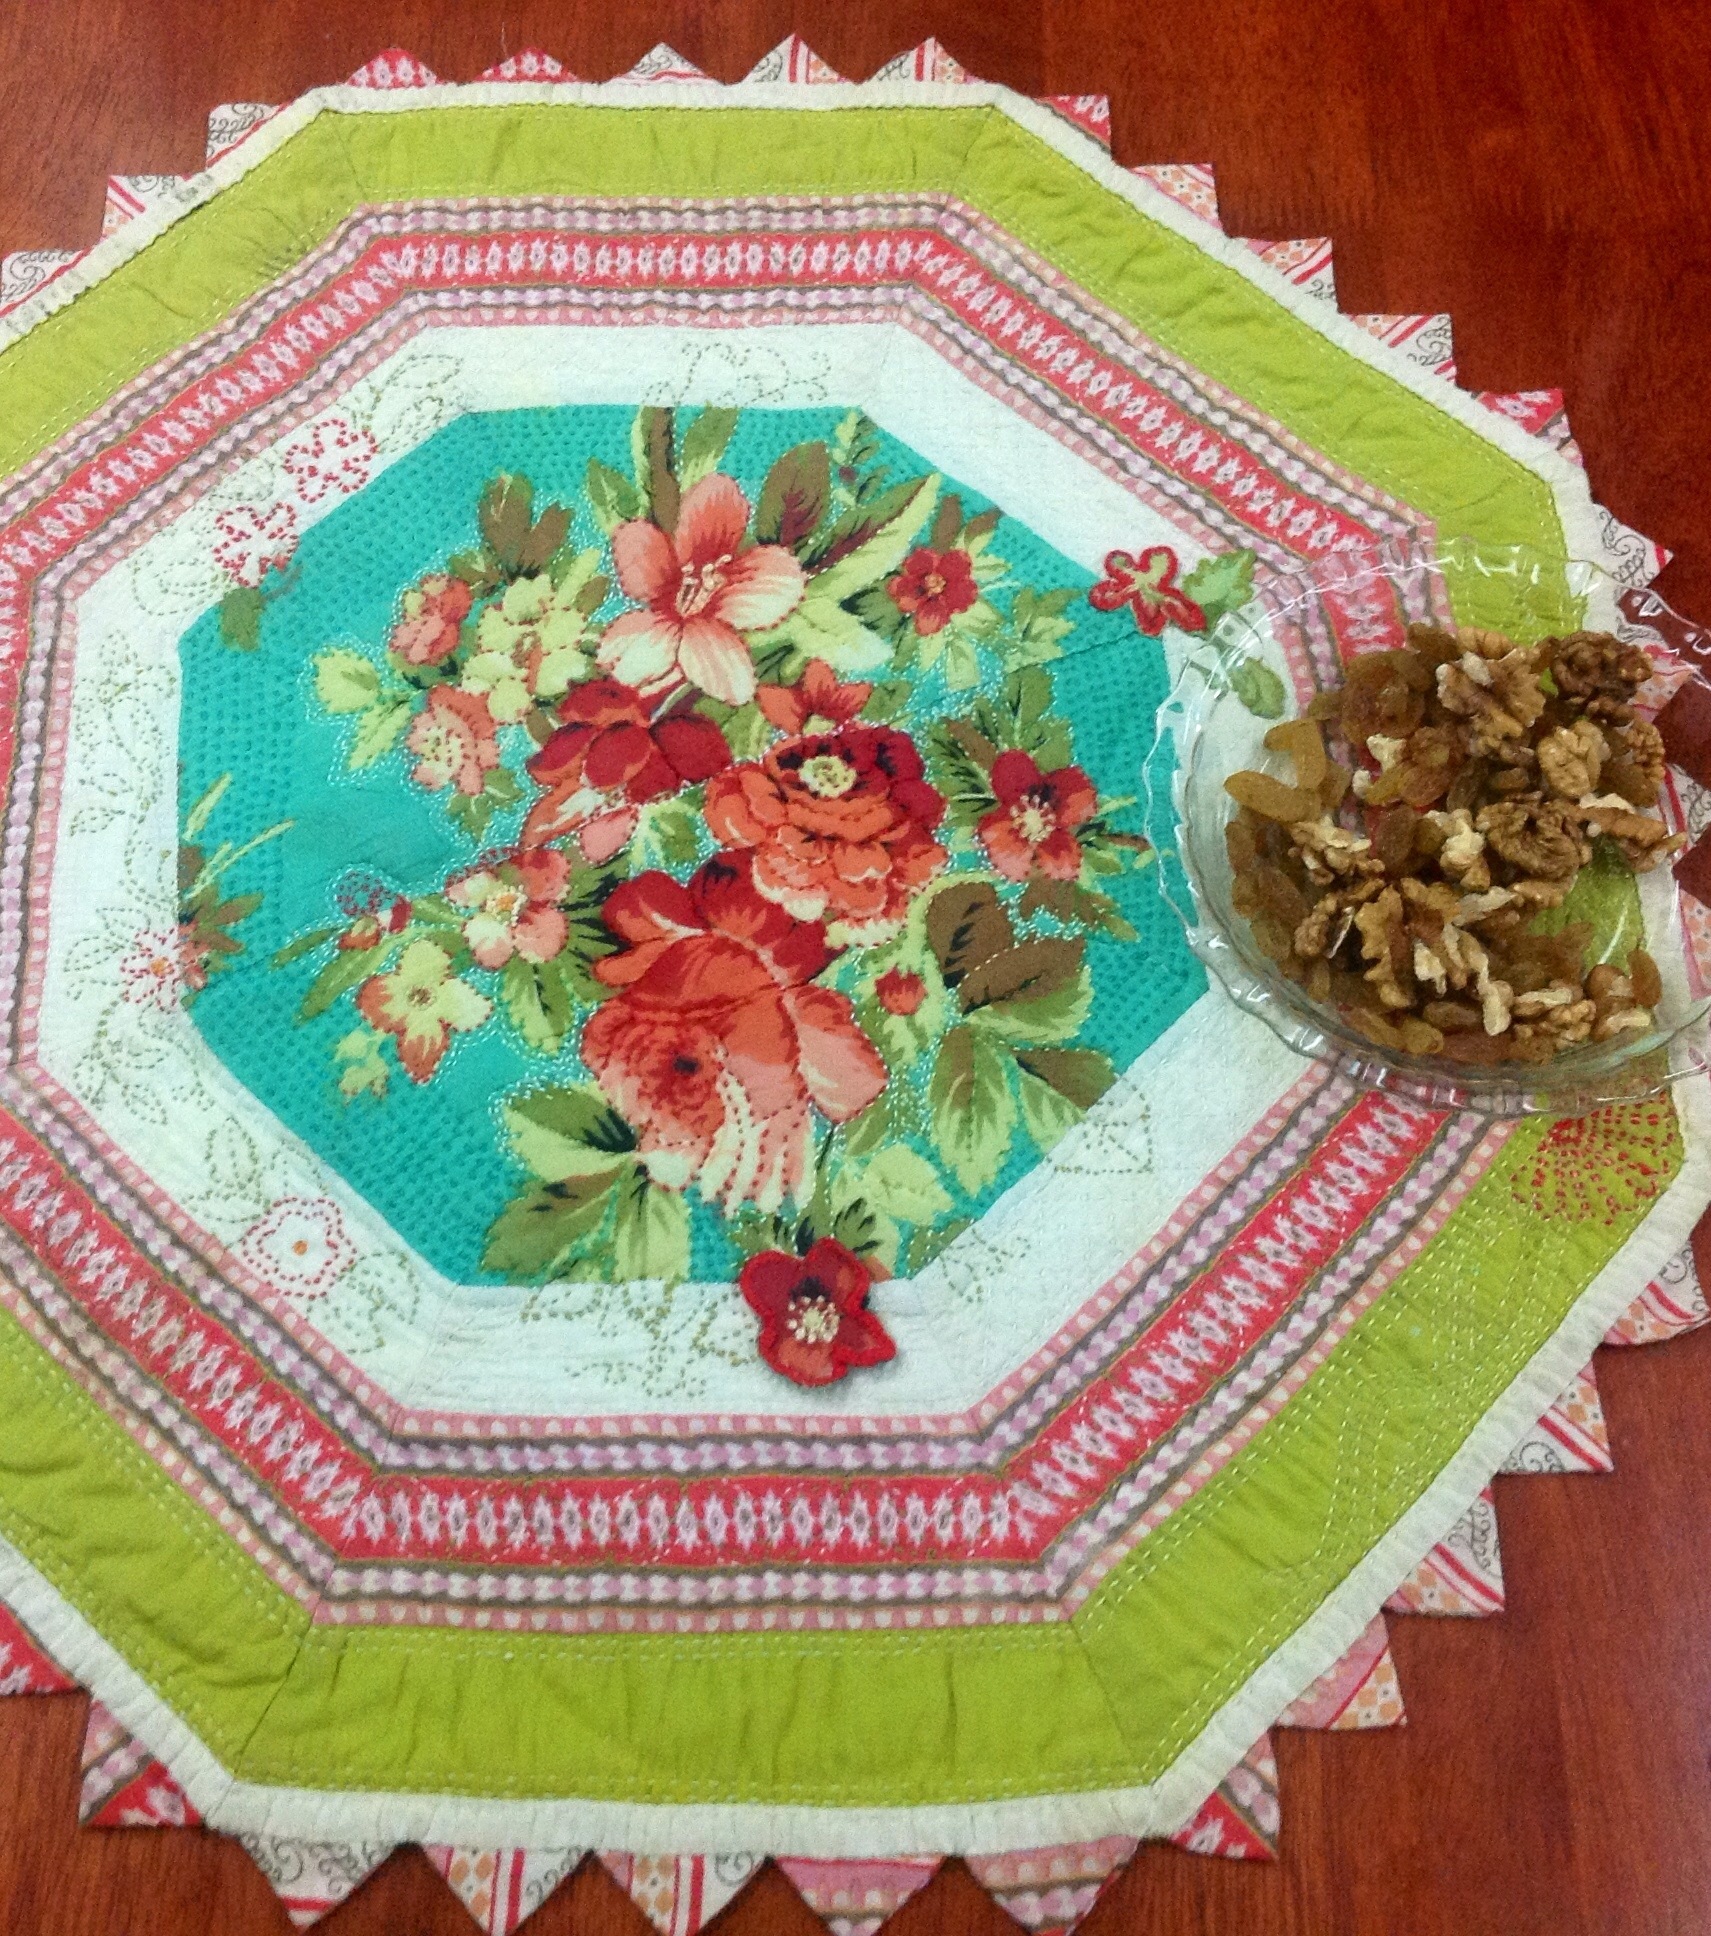
I am sharing today a small quilt made by me almost 3 years ago! I had no idea then what a wealth of information was available on the net, so much of this was trial and error.
It is just about 15″ across. The roses are two pieces of muslin left over from another project which is, sadly, still a UFO ( unfinished object for the uninitiated!). The pink was fabric from an old salwar which was no longer wearable. The white and green muslins came from my stash.
I remember a lot of Maths went into calculating the length of the strips at each stage and angles at the edges. And then to make accurate 67.5 degree angles on the strips using a small protractor was going to be even tougher! I was further handicapped by the fact that I had only so much of the centre focus fabric so could not play around with the size too much.
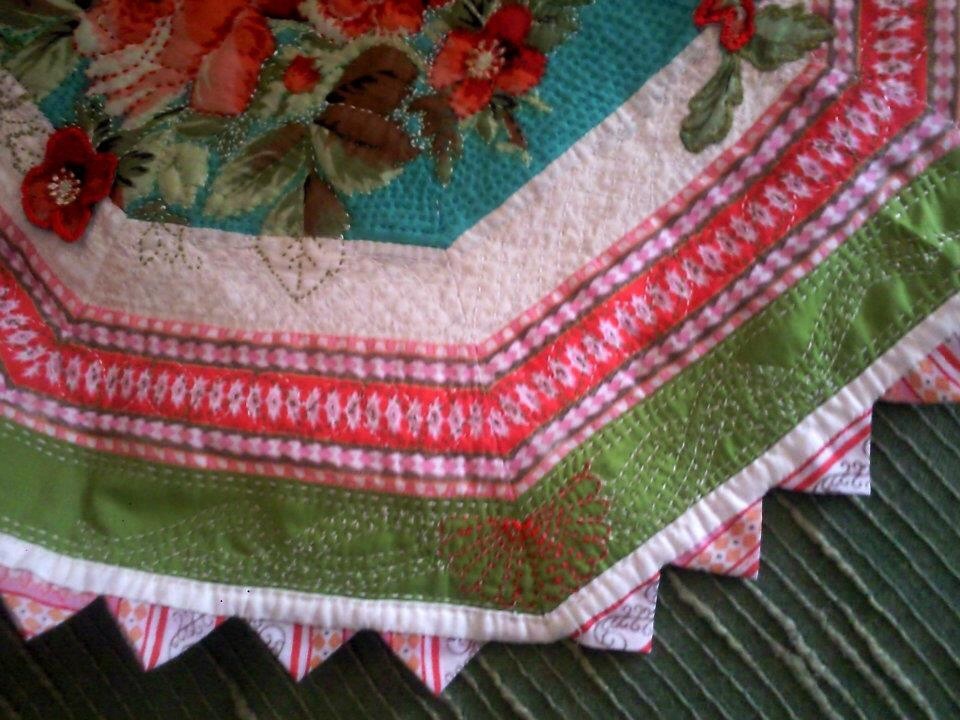
What I finally did was to make 8 strip sets, somewhat larger than needed. I cut the octagon on flannel from a newspaper template, then marked the ‘spokes’ on the flannel. Using that as a guide, I stitched on the strip sets directly on the flannel. Wasn’t easy to ensure accurate points! But I am quite happy with the result 🙂
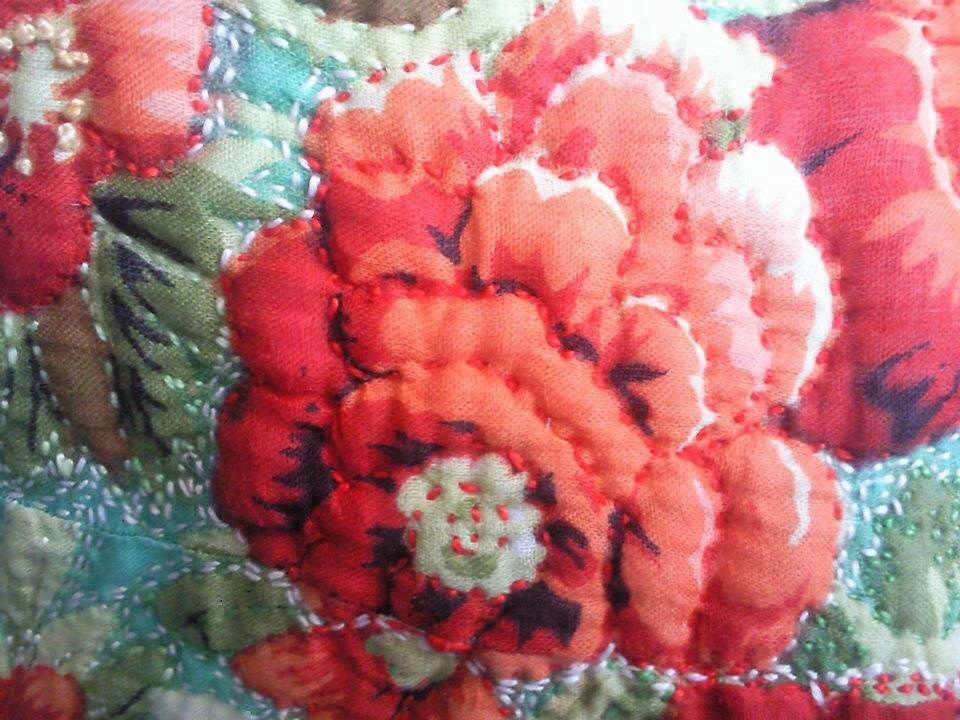
Once the strips were all in place, I did the hand quilting. I had had the foresight to add a layer of poly fibre under the flower panel, so I could get a trapunto look to the roses.
I had great fun quilting this – I particularly love the trellis on the white strip! By the time I reached the outermost strip, I was so exhausted that I decorated only one of the corners!
But the quilt looked unfinished, so I thought I would add the prairie points which I had seen in a quilting book! But how on earth was I going to bind it?!? And then there was the back to be taken care of too, as I did not care much for the white flannel. I solved the problem by inserting the prairie points between the quilted front and backing fabric and attaching two separate bindings – one for the front and other for the back.
All that was left now was to add a few flowers and leaves to give a three dimensional effect to the little quilt. I used a double layer of the fabric to secure the petal and leaf edges. Surprisingly, these have withstood several washings!
The quilt is much faded today, but much loved still…
My online quilting forum Desi Quilters’ monthly challenge for January was to come up with a quilted wall-hanging for my sewing place with text in it! And the entries were to be anonymous too – for the group.
I thought long and hard and hit upon hippie art, very popular when I was growing up! And I had the perfect fabric for it, with bright flowers and paisleys! The text had to be pieced according to the challenge rules, and what word better than `PIECE’ to piece? I love playing around with words, so the first part of the quilt was designed with a peace symbol! I used Elizabeth Hartman’s (of Oh,Fransson!) method to piece the text, using lightweight stabilizer – the pieces are ready at 1/2″.
Peace / Piece Block 10″X 17″
For the pieced ring border of the Peace symbol, I did something I thought was super clever! I’ll talk about that later! I quilted this block with a kind of paisley pattern in contrasting yellow and pink , using the walking foot. I quilted as I went (QAYG), as I had long wanted to try this method ! (Also, wanted the quilt to be be in an almost- ready position to be submitted at the deadline, in case I could not complete all the blocks 😉 !)
When we were teenagers, a favourite doodle was a name or slogan written in a circle in this `font’! ( We were all in love with Rhett Butler of Gone with the Wind, so our rough notebooks were full of imaginatively decorated doodles of `Rhett’ in circles and hearts!) So this bit of art was a must for my quilt! After much brainstorming, I hit on SEWL – a play on SOUL! (DH thinks the word-play is incomprehensible; I am quite proud of it, sew there!) So in went the `SEWL’ into a circle with rays radiating from it.
Soul / Sewl Block 17″ X 17″
To construct the rays block, I used an 18″ square freezer paper. I marked the centre of the paper and drew drew three concentric circles, at 5″, 7″ and 9″ . A protractor was used to draw the rays – there are 24 rays in all, 15 degree angles. I pieced the block in halves, using the freezer paper technique, folding away each ray as I pieced it. I wish I had taken pictures 🙁
Now came the brilliant part (IMNSHO – where H stands for humble!) I cut out the smaller ring (5′ inner and 7″ outer radius) and used it to border my `PEACE’ symbol! This ring had to be raw edge appliqued.
The rays were ready to be used as the background on which I appliqued the SEWL circle, after turning in the edges. I fussy cut the highlighter fabric to decorate the block, using raw edge machine stitched applique. I quilted around this applique to highlight and raise it, but this was a disaster of sorts! It made the work look terribly untidy. 🙁
So I had PIECE and I had SEW, but wanted something more! After browsing through hippie slogans a hundred times, the brain wave struck…tranquility! So the final block was designed.
Tranquility / Tranquilty block 27″ X 11″
For this block, I was inspired to attempt Chenille quilting, explained so beautifully by by the talented quilter Vani Roy in a Chenille Quilt Along on the Desi Quilters’ facebook forum. The block was designed as a long narrow horizontal panel below the other two blocks, to give a feeling of expansiveness. The oversized full moon linked up the three blocks. I also wanted to add a bodhhi tree, but TRANQUILTY is a huge (pseudo)word! I quilted the whole text, and fused the letters QUILT on it. I did minimum quilting on this block, because I did want it to look to busy. The wall hanging is now a perfect size for my sewing corner!
Hippie Art Quilt – ready for my sewing Corner
Do feel free to make your own wall quilt inspired by my quilt! But I would love it if you would link back your quilt to me 🙂


 Quilt it and make into a small table topper 18″ square. Incidentally, this is a test block made by my online quilter friend Nikhat Syeda– hasn’t she done a marvellous job? Reduce the size of the square to 15″, which is a great size for cushion cover. You could make a set of cushion covers depending on how many blocks you end up with.
 Add a border, quilt it to make a stunner of a wall hanging!
 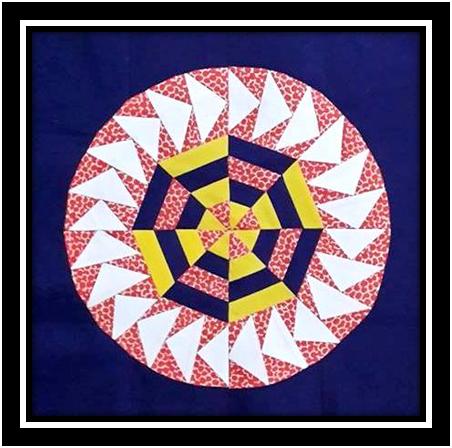 Another quilter friend Sobana tested the same block. (She has even blogged about it
 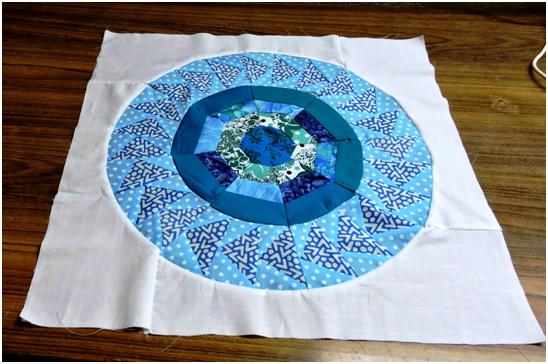 She is going to use it as the centre of a quilt she is planning! I am waiting to see what she comes up with – but this does give you an idea of what you can do with a single block! I almost forgot to remind you of what I did with a single block – in fact , with a little less than a single block… I skipped the outer square and quilted the pieced circle into a pretty, round table top.
  This is my friend Aliya Mir’s test block , which I have photoshopped to show you the look. Well, tomorrow evening I give the fabric requirements for the full quilt, do tune in! But before that, tomorrow morning I am experimenting with various quilt layouts here on this blog!


You must be logged in to post a comment.