


Am I excited and relieved at the same time, or what, to present the sixteenth and final block of the DreamcatcherRound the Year Quilt !?! This 24-spoke Mariner’s Compass is foundation paper pieced and is, like the other blocks of this Block of the Month quilt, drafted as a 15″ (finished) circle set in an 18″ (finished) square. I learnt to draft this block from a workshop by Adina Sullivan, “Mastering the Maddening Mariner” in “Quiltskills – Workshops from The Quilters’ Guild Australia” (published by The Patchwork Place, 1998). Adina has the most fabulous quilts based on the Mariner’s Compass and I had been gathering the courage to attempt these since the last six years or so, when I bought this book. You may recall that Southward Bound was also drafted using the method taught by Adina. She uses the English paper piecing method to construct her blocks, mine is completely machine pieced!
Please note that the downloadable patterns with paper piecing templates and instruction files for the Dreamcatcher Round the Year quilt blocks are being migrated to my store MadsPatch and will not be available for download for free from 15th November 2020 onwards.
I used Quilt Assistant, a great free quilt design software for designing the block. The pattern instructions and paper piecing templates can be downloaded in PDF format from the links at the end of this post.
Fabric Requirement

This block uses 2 shades of blue and 4 contrasting colours in the yellow-gold-light orange spectrum for the Compass, set in a third shade of blue for the background.
Trivia – This block contains 269 pieces! But don’t worry, we will be working with strips, so that you need not worry about cutting dozens of pieces.
| Fabric Code | Colour | Fabric Required | Cutting Instructions |
| 1 | Pale Blue |
19″ square* |
|
| 2 | Medium Blue |
6″ WOF |
Cut 3 strips WOF 2″ wide |
|
2 squares 4.5″ |
Cut along both diagonals to get 8 QSTs |
||
| 3 | Deep Blue |
6″ WOF |
Cut 3 strips WOF 2″ wide |
| 4 | Deep Orange |
3″ x 30″ |
|
| 5 | Gold |
3″ x 30″ |
|
| 6 | Yellow |
3.25″ x 30″ |
Cut into strips 2″ x 30″ 1.25″ x 30″ |
| 7 | Light Orange |
3″ x 24″ |
*I have given a template for joining the background by piecing, but for this block I suggest appliqueing the compass on a square.
Do remember to spray starch and press your fabric before cutting it. I do not have access to spray starch, so I make my own by adding two capfuls of the locally available liquid fabric stiffener (sold by the name of Revive) to 100ml of water in a spray bottle.

Printing Instructions
Print the Templates File at 100% / actual size in portrait mode. Cut out the templates. I suggest you ignore the background template AG( in two parts), as we will be appliqueing the compass on a background square. It may prove useful for marking the circle on the background fabric.
Print the Instructions File, which includes the Fabric Requirement chart and Master Template, and keep at hand for piecing and assembly.
Step by Step Piecing Instructions
If you are attempting a block from this quilt for the first time, or even if you have not foundation paper pieced for a while, you may like to see this blogpost for decoding the paper piecing patterns for this BOM and this one, which reminds you of certain do’s and don’ts for paper piecing these blocks. If you are new to paper piecing itself, there are several great tutes online on the subject!
Outer Ring
First we piece the spokes of the outer ring (Templates A to X), using (majorly) the chain strip piecing method, that we have used for several earlier blocks. To avoid confusion and efficient use of fabric, the following order of piecing is suggested. We start with templates A to F and fabric strips which will come at piece#1 and piece#2 ( Fabric Codes#4 and #3 respectively). The following photos will explain how we chain piece the templates to the strip pair.


We are now ready to add the strip which will come in at Piece#3 (Fabric Code#2).
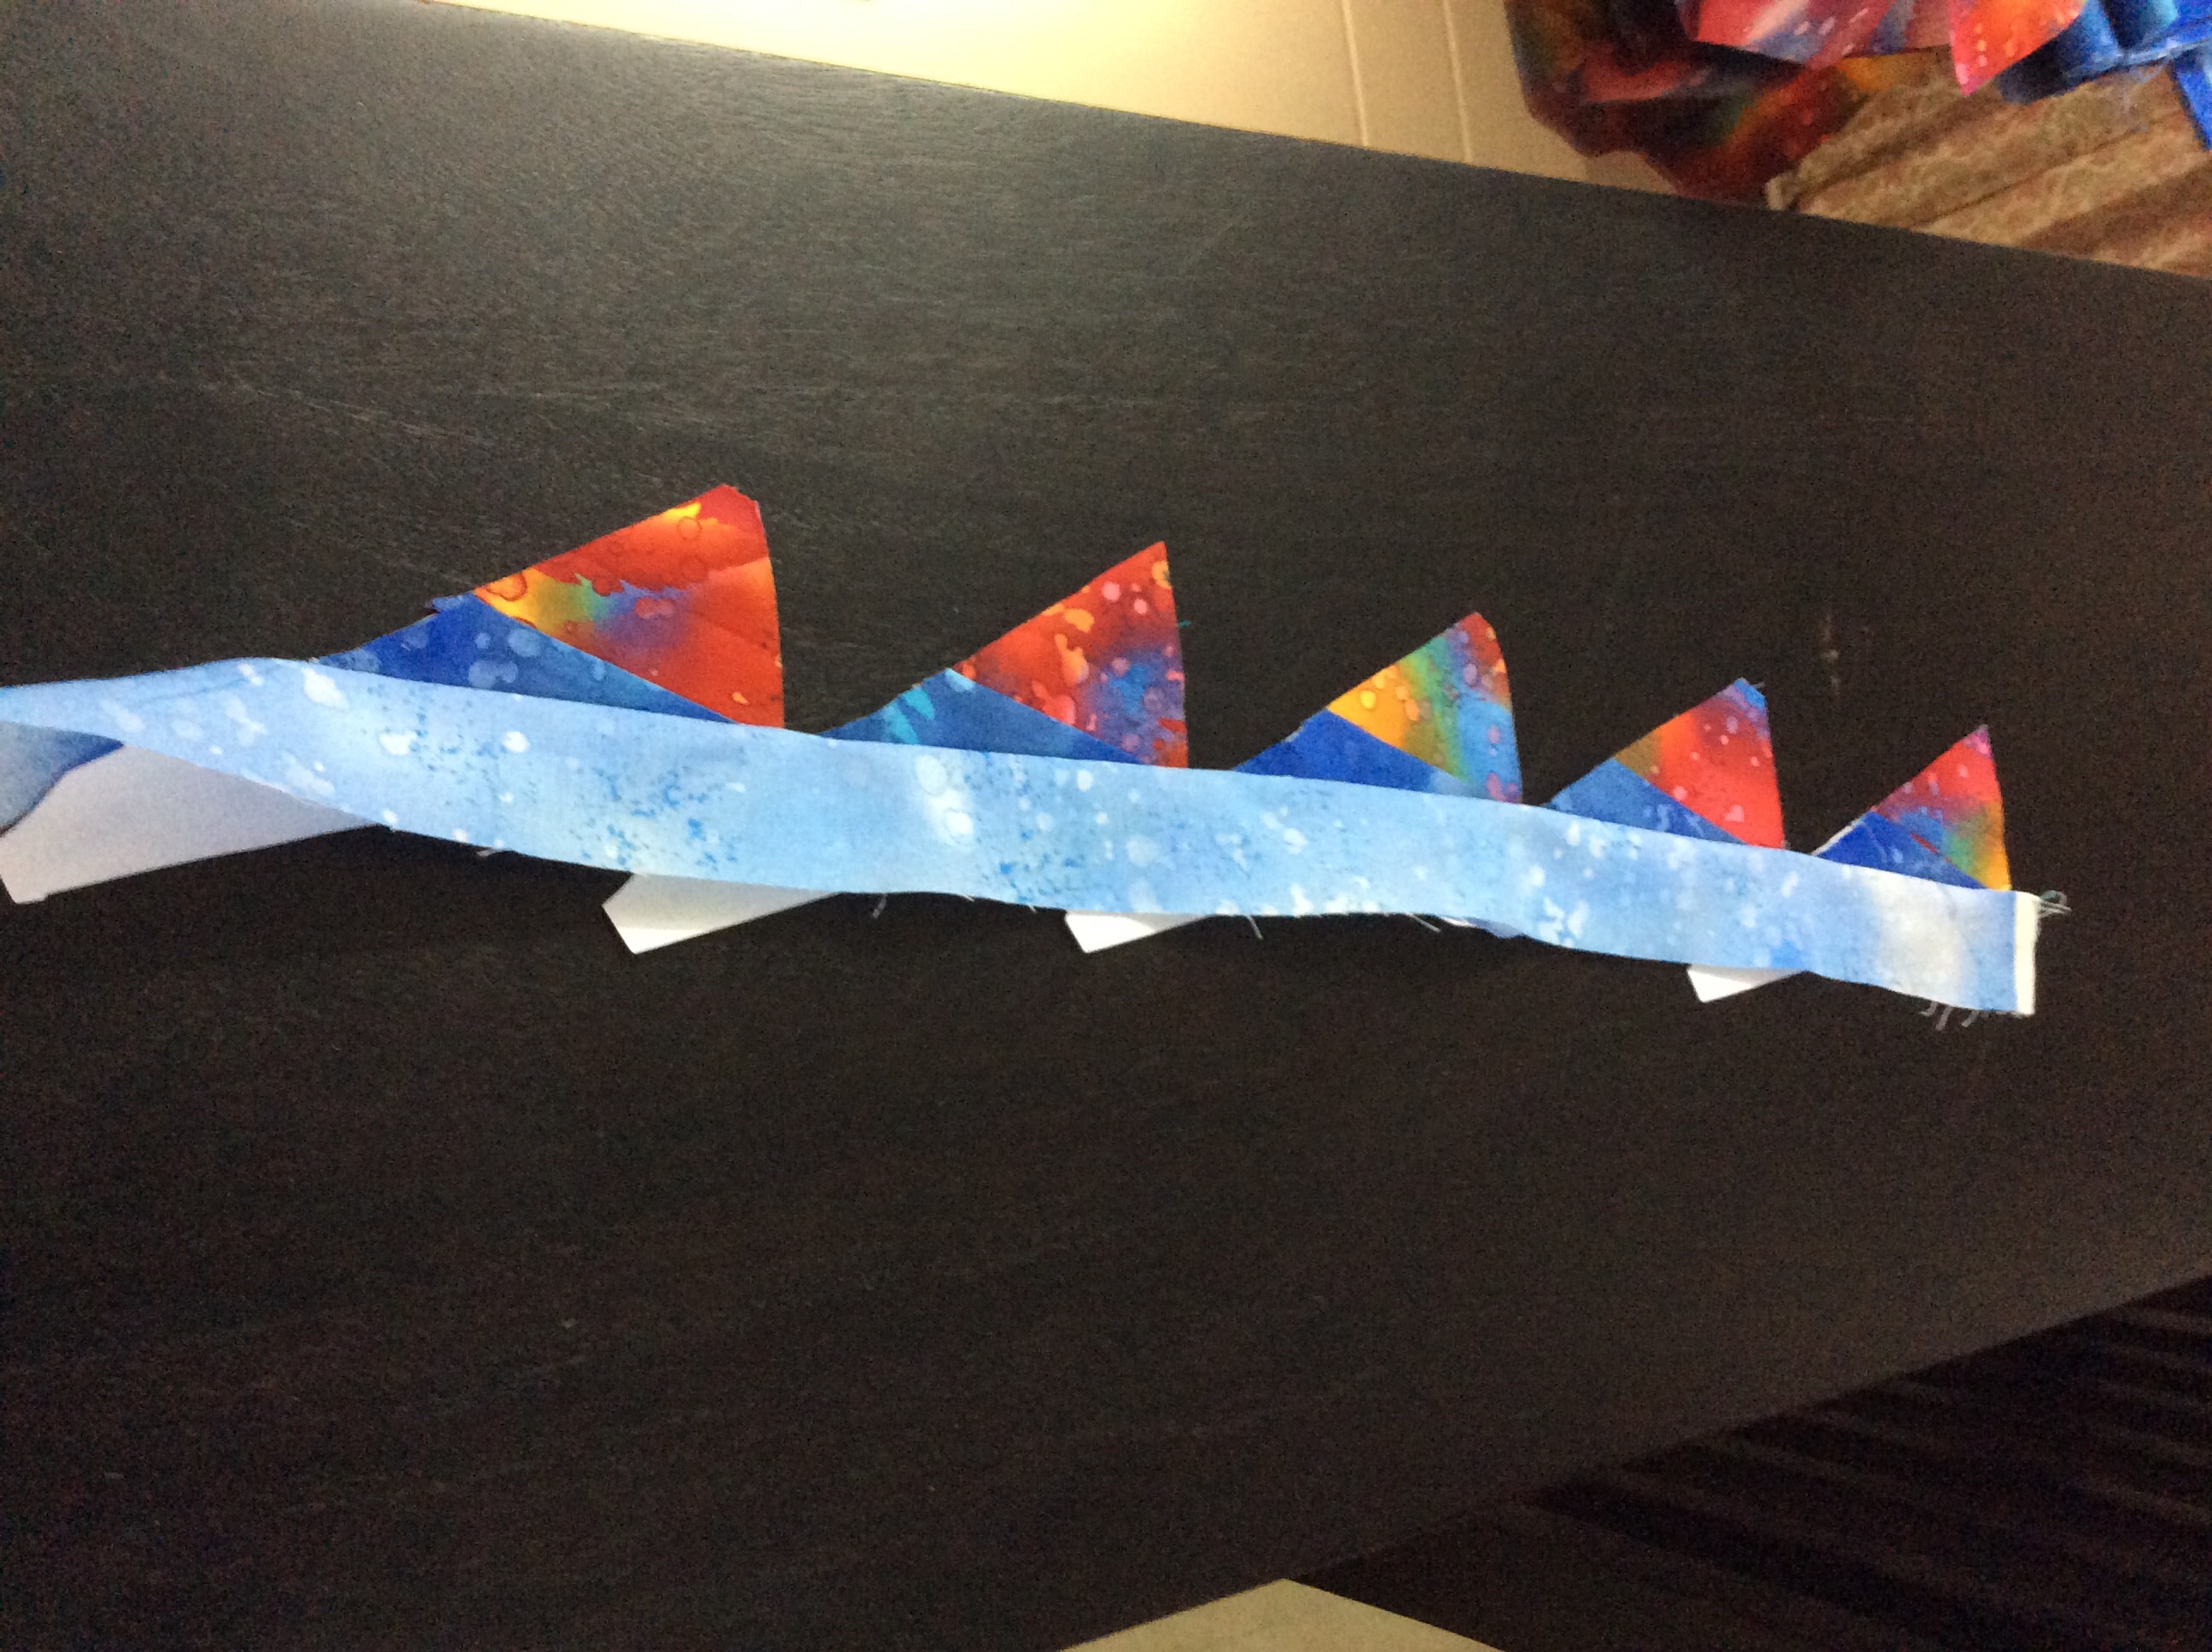

We are ready to add piece #4, for which we can use the trimmings from before! Similarly, piece templates G to L up to piece#4, i.e G1 to G4, H1 to H4…L1 to L4. Piece templates M to R up to piece#4, i.e M1 to M4, N1 to N4…R1 to R4. Piece templates S and T up to piece#4 Piece templates U and V up to piece#4 Piece templates W and X up to piece#4 Now, all our templates for the outer ring our pieced up to Piece#4.
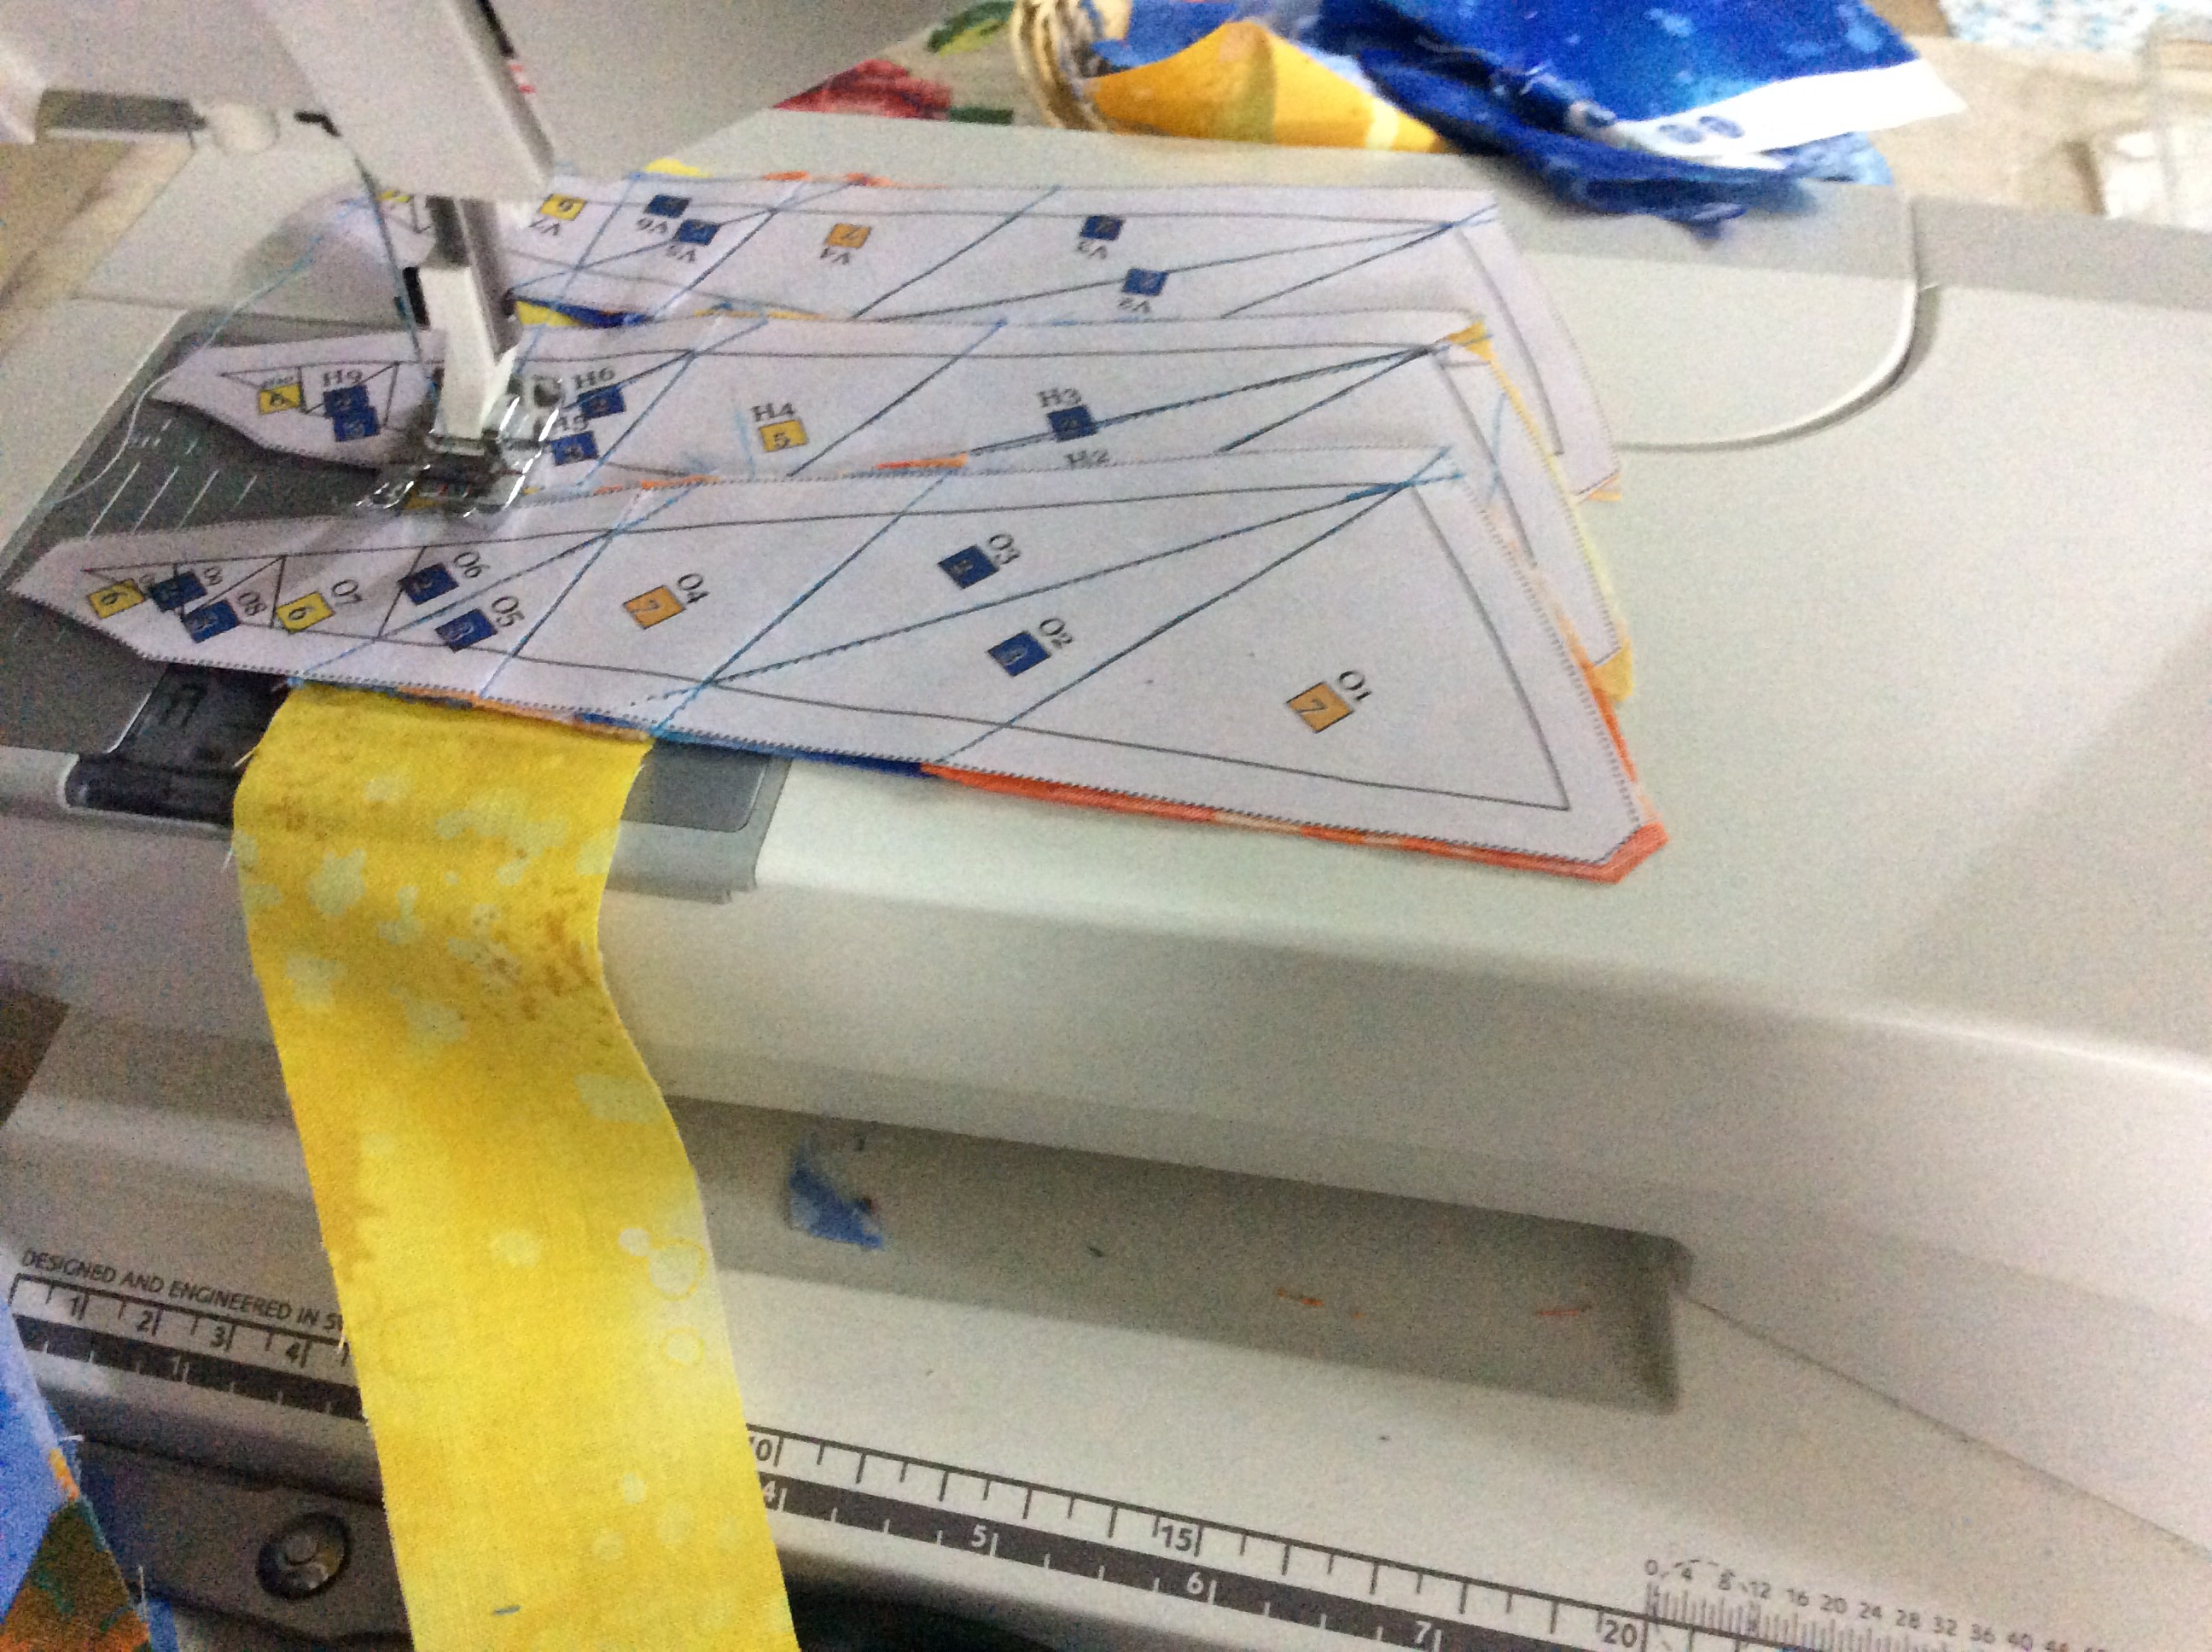
Once we have reached this stage, order of piecing is not important. We are ready to add Piece#5 to all these templates, for which we can use the trimmings from Piece#2. Similarly, trimmings from piece#3 can be used for piece#6. This upcoming pic shows the spoke templates pieced till piece#6.
Here comes the strip which will occupy space at piece#7.
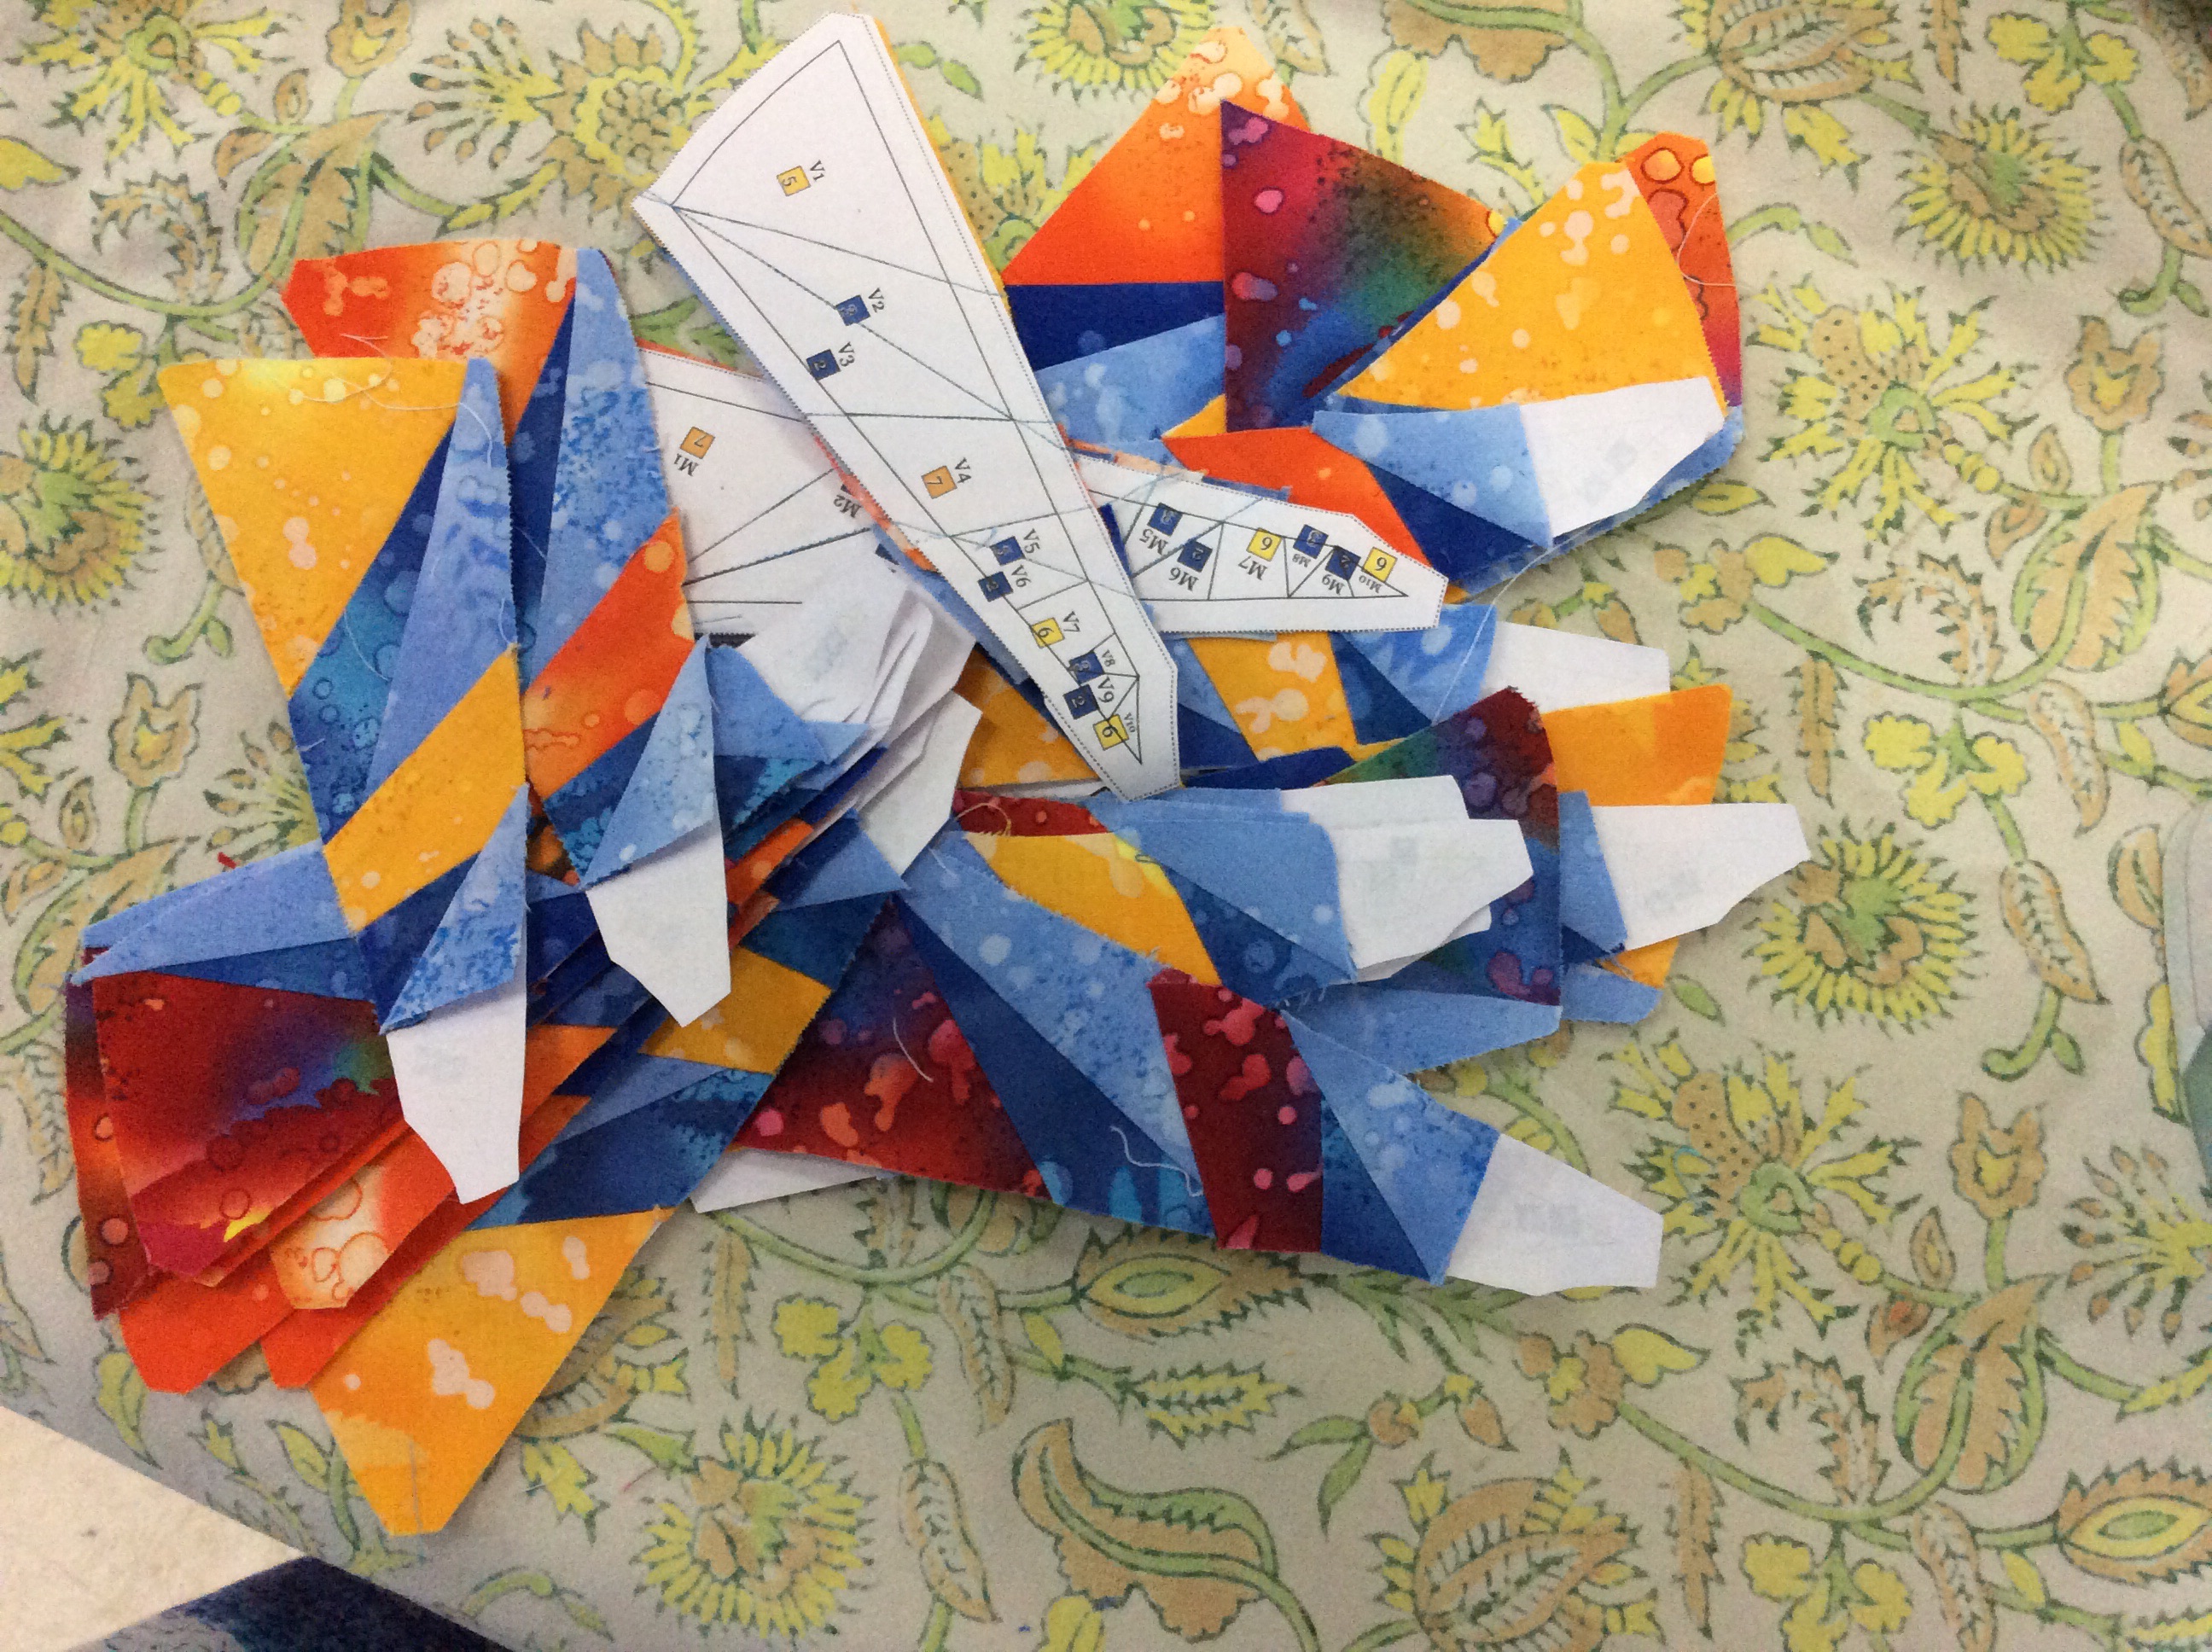
You will see that the broader portion of the templates are overlapping. The important thing is to maintain about 1/2″ distance between the seam you are sewing on one template and the next.  Time for a break and a little bit of fun!
 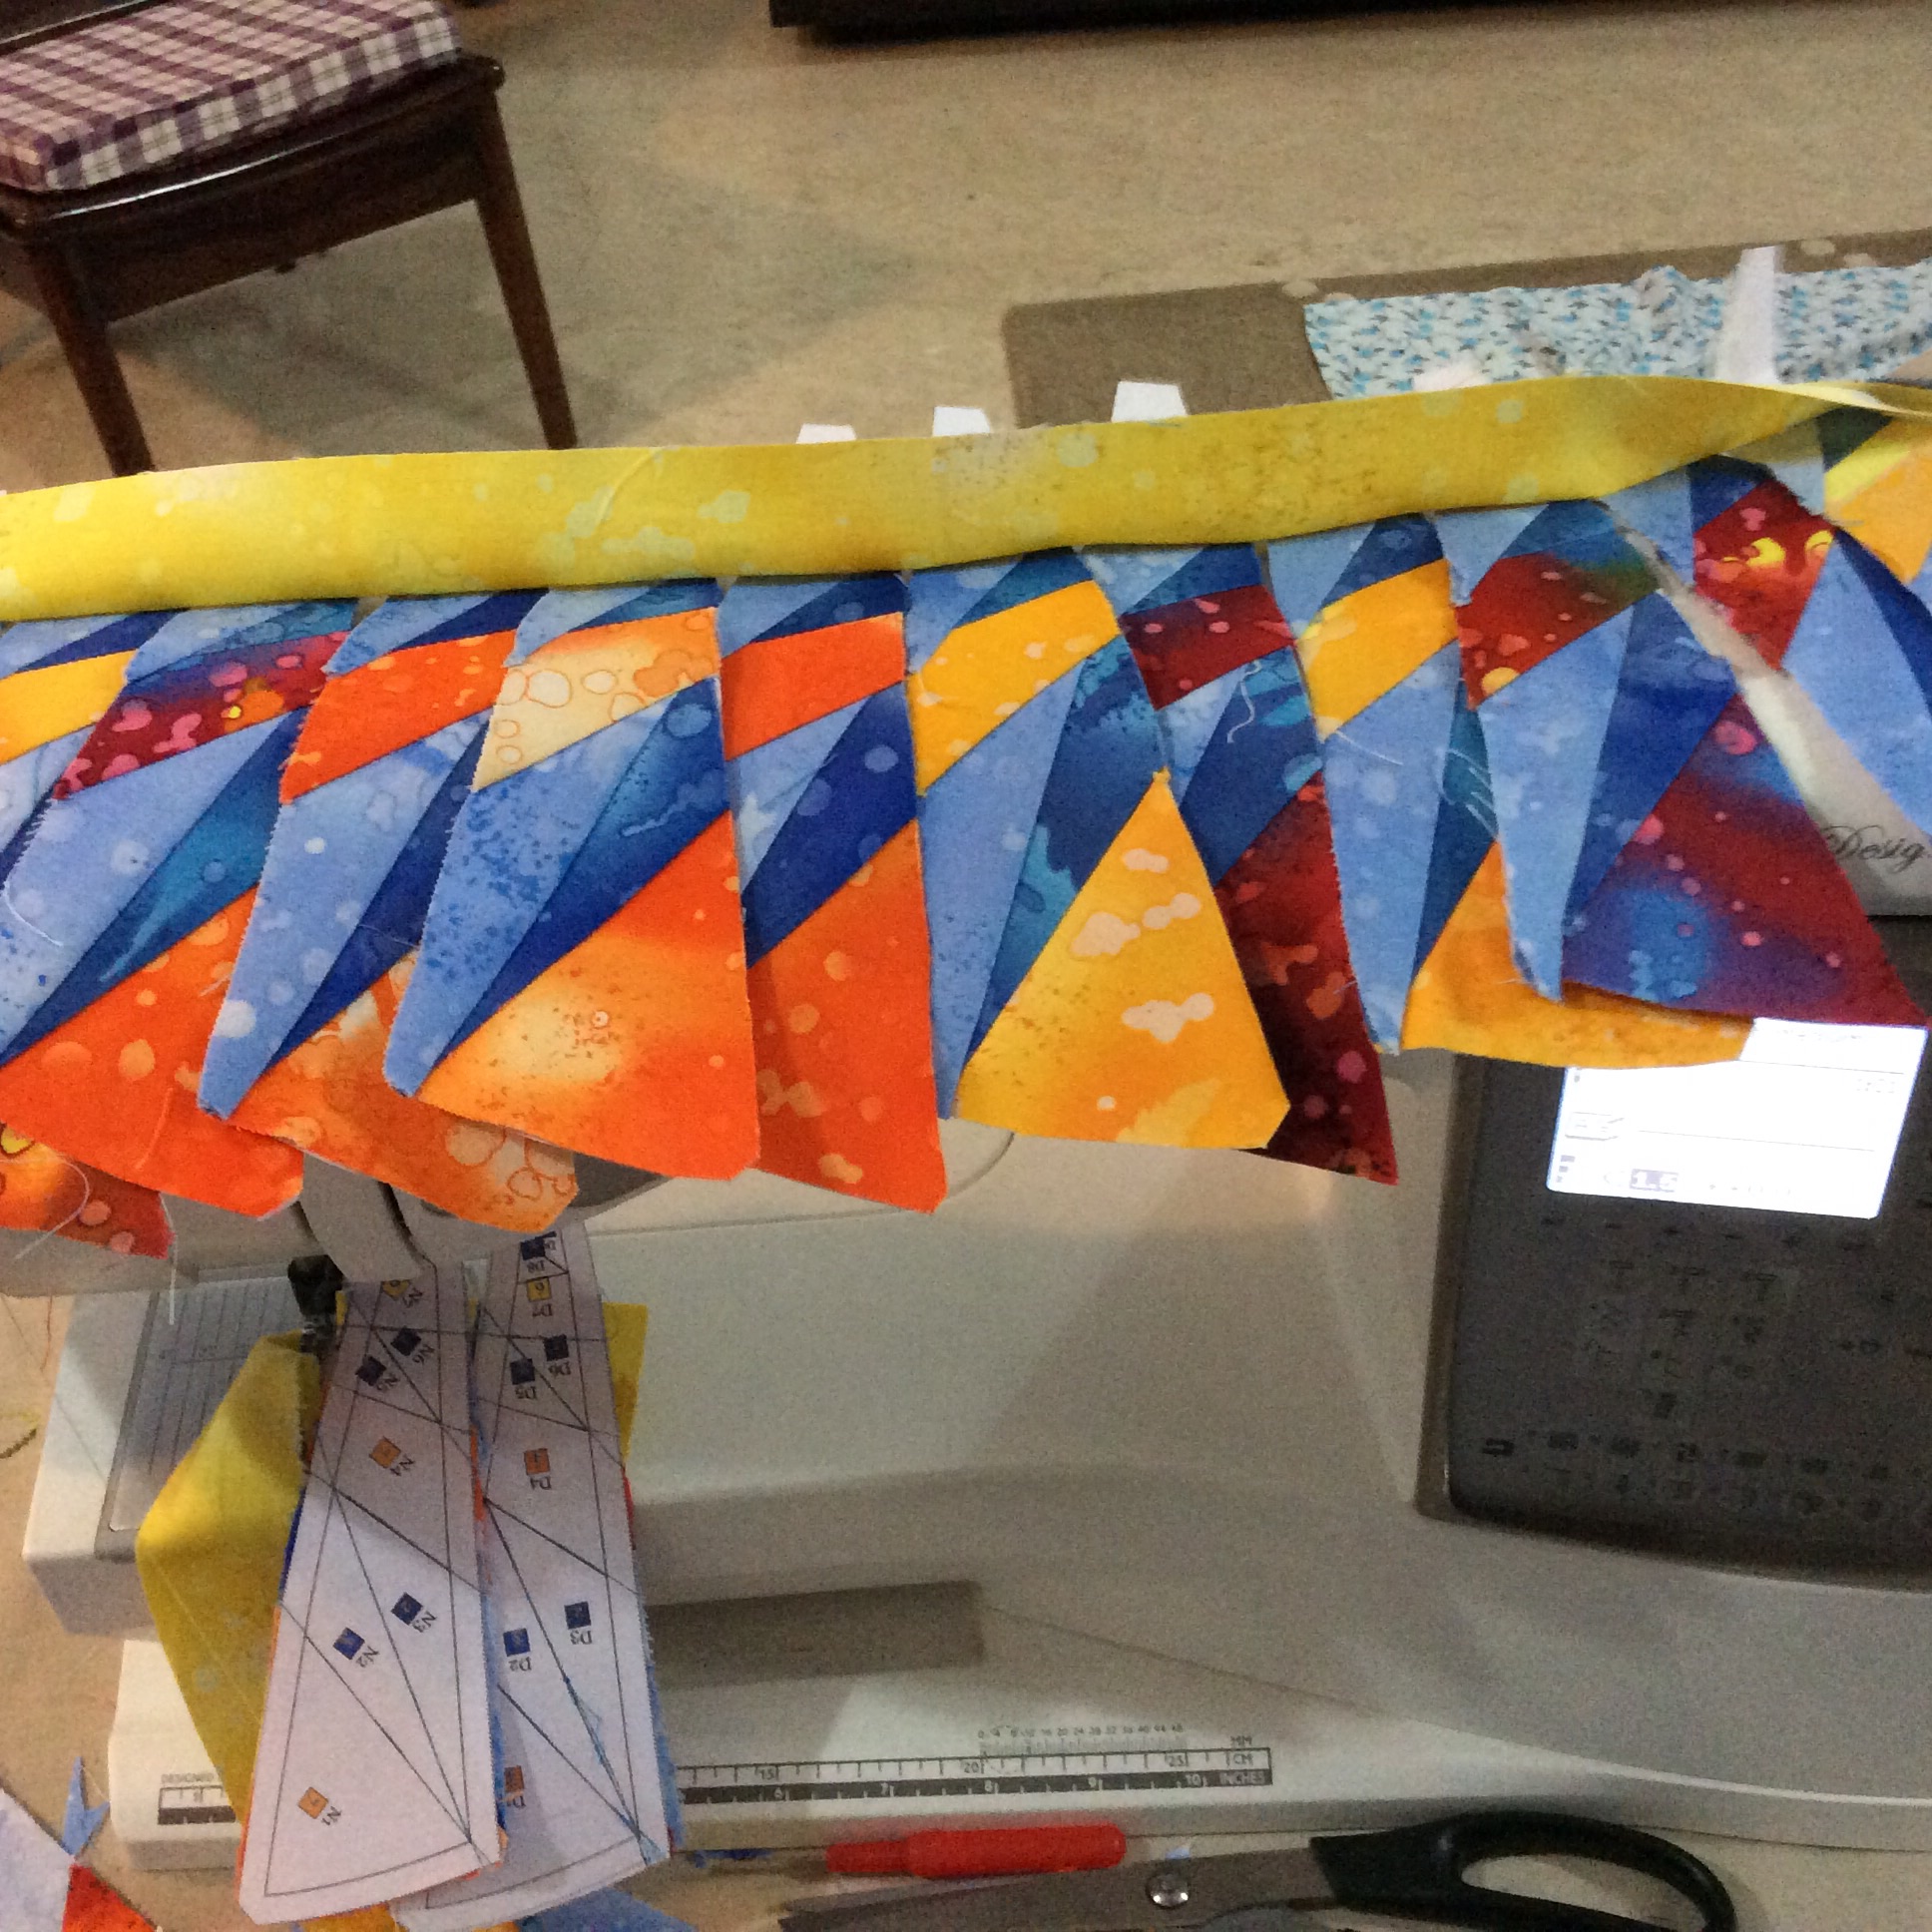 ALWAYS, remember to press open the strip you have sewn before cutting apart the templates. Also trim the seams, and the fabric just sewn to 1/4″ inch or so, beyond the upcoming seam line. I used scraps for pieces #8, 9 and 10, where I could. When I ran out of scraps, I used strips. Here is the final strip coming up!
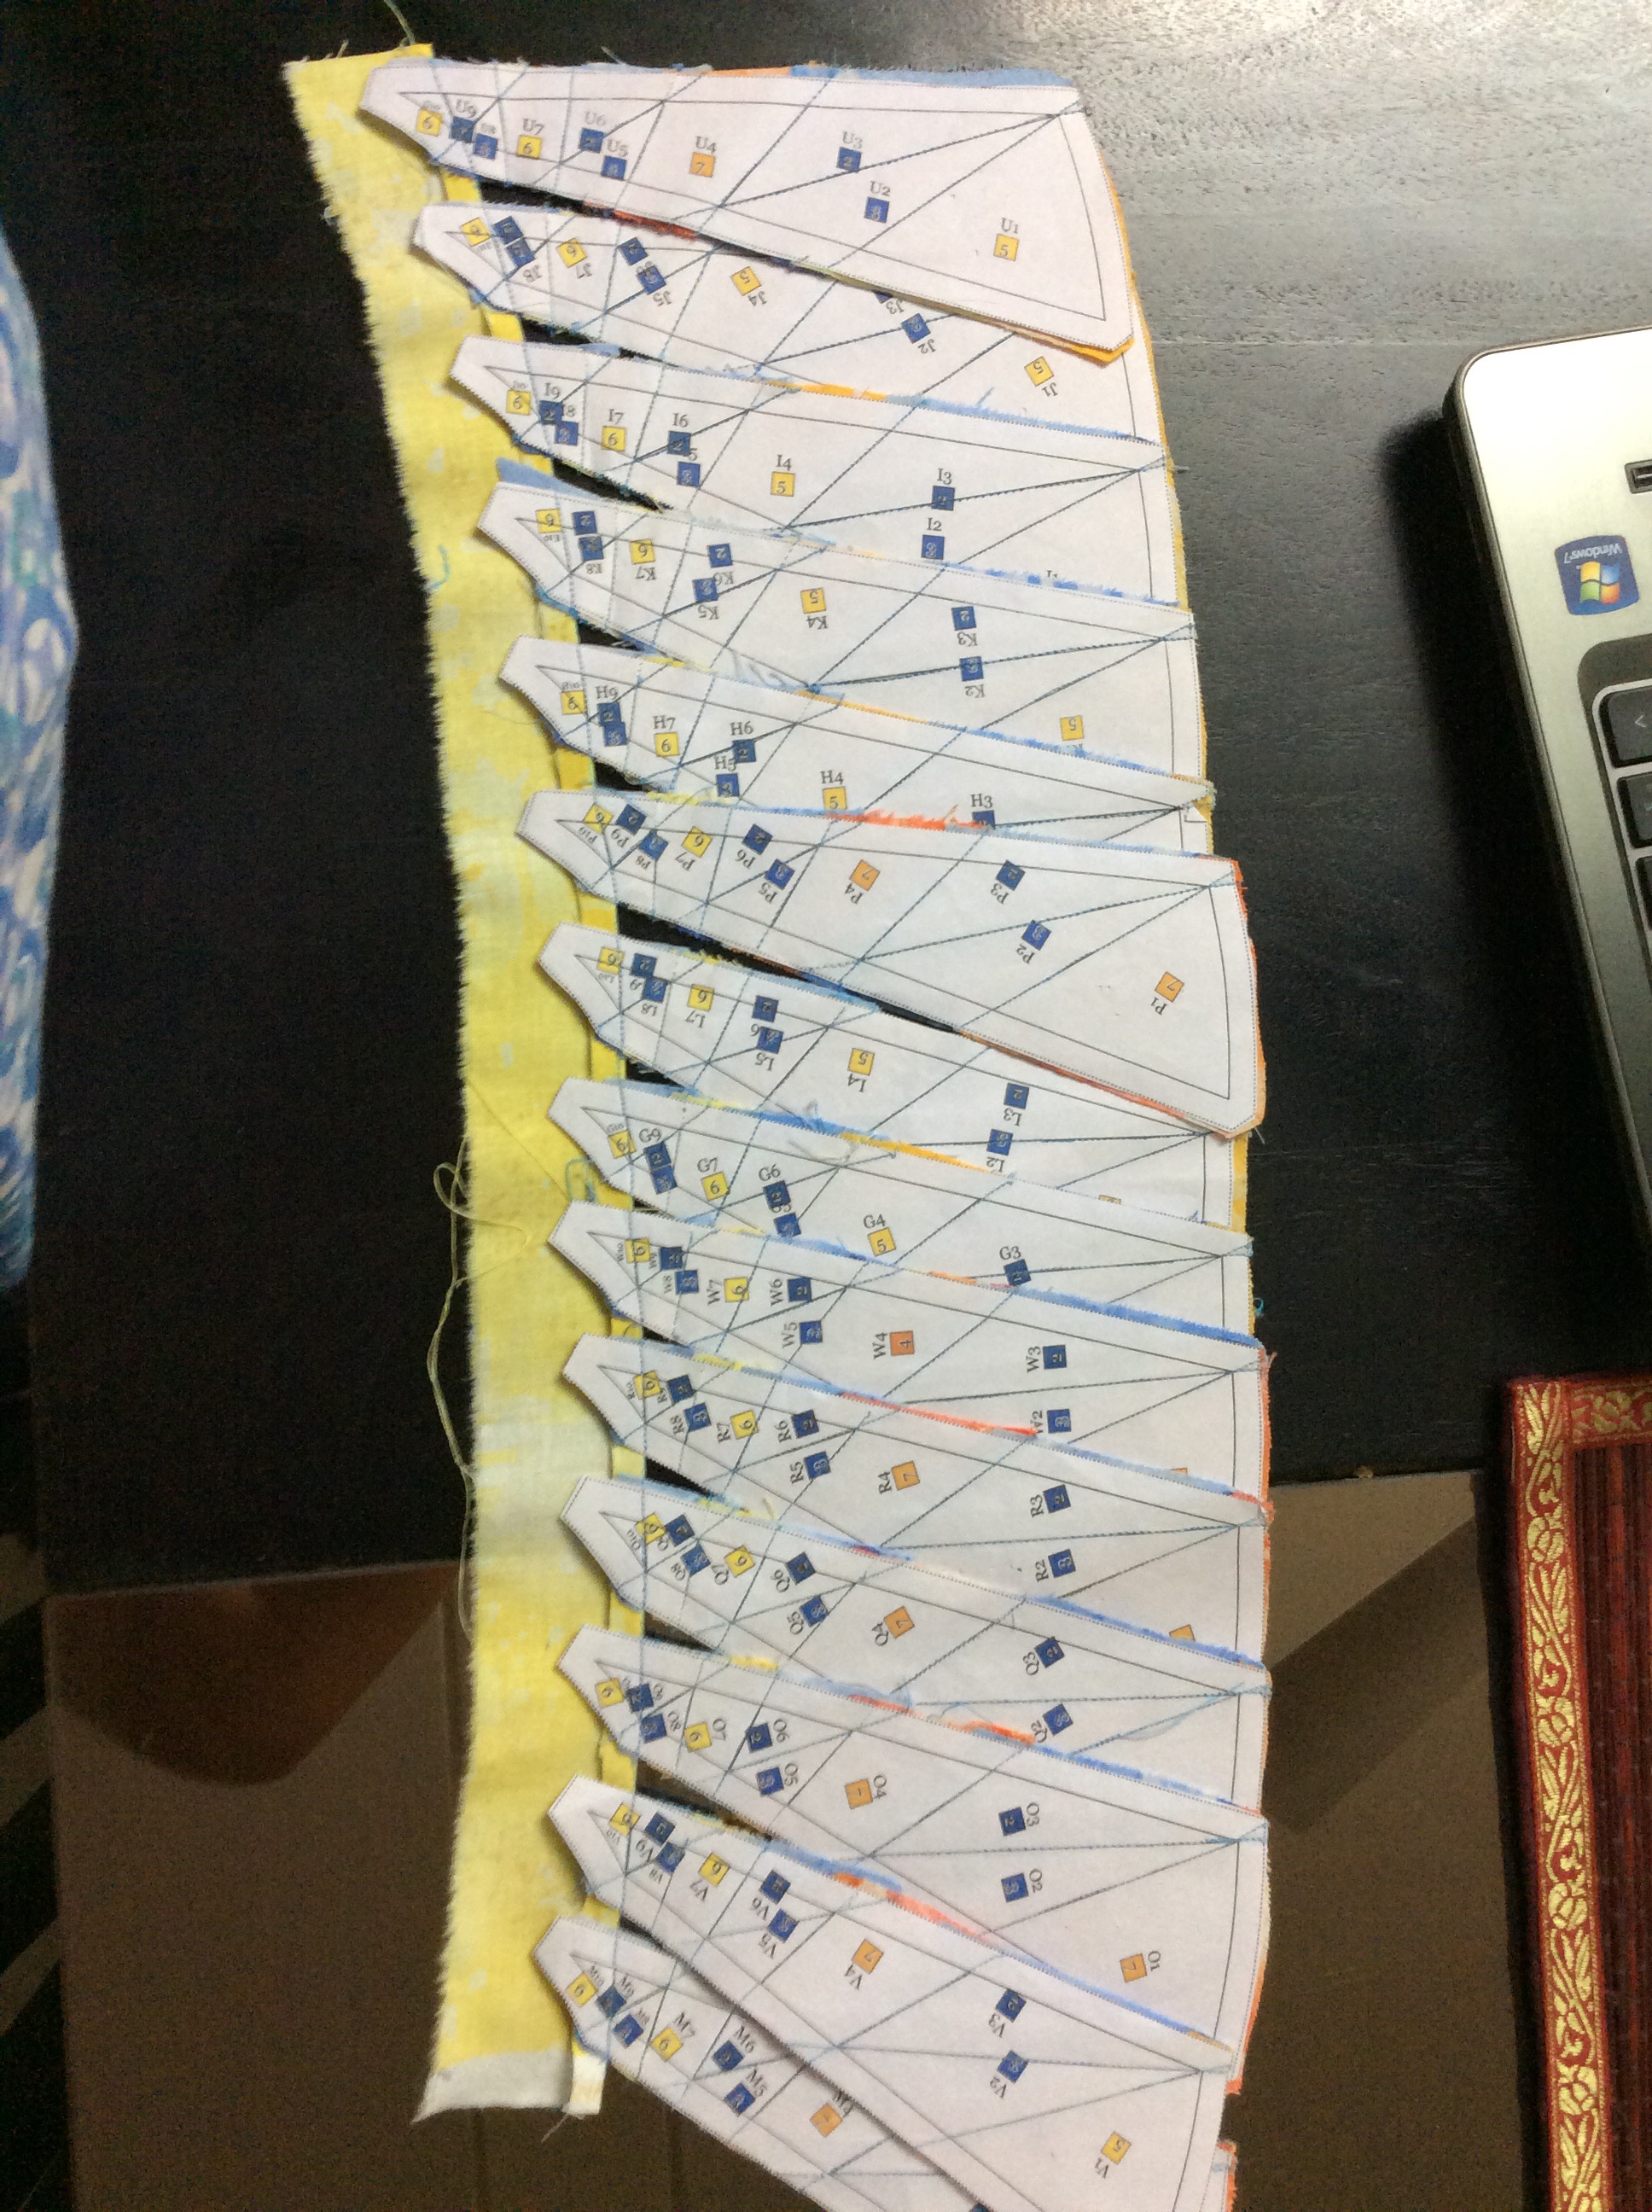
Trim and put them aside, ready for assembly.
Inner Circle Compass
To piece the inner circle compass, piece as follows: Piece Y, Z, AA and AB. Piece AC, AD, AE and AF Use QSTs from Fabric#2 at piece#1 in all these templates.

Assembly Instructions
Use the Master Template given in the Instructions File as a guide for assembly. 
Outer Ring
I suggest you make piles of the templates as follows: A-B-C ; D-E-F; G-H-I; J-K-L; M-N-O and P-Q-R. Put aside S-T-U-V-W-X

To join the templates, pin them first at the outer, broader edge. I like to insert vertical pins, matching the seams, before pinning on the seam line.

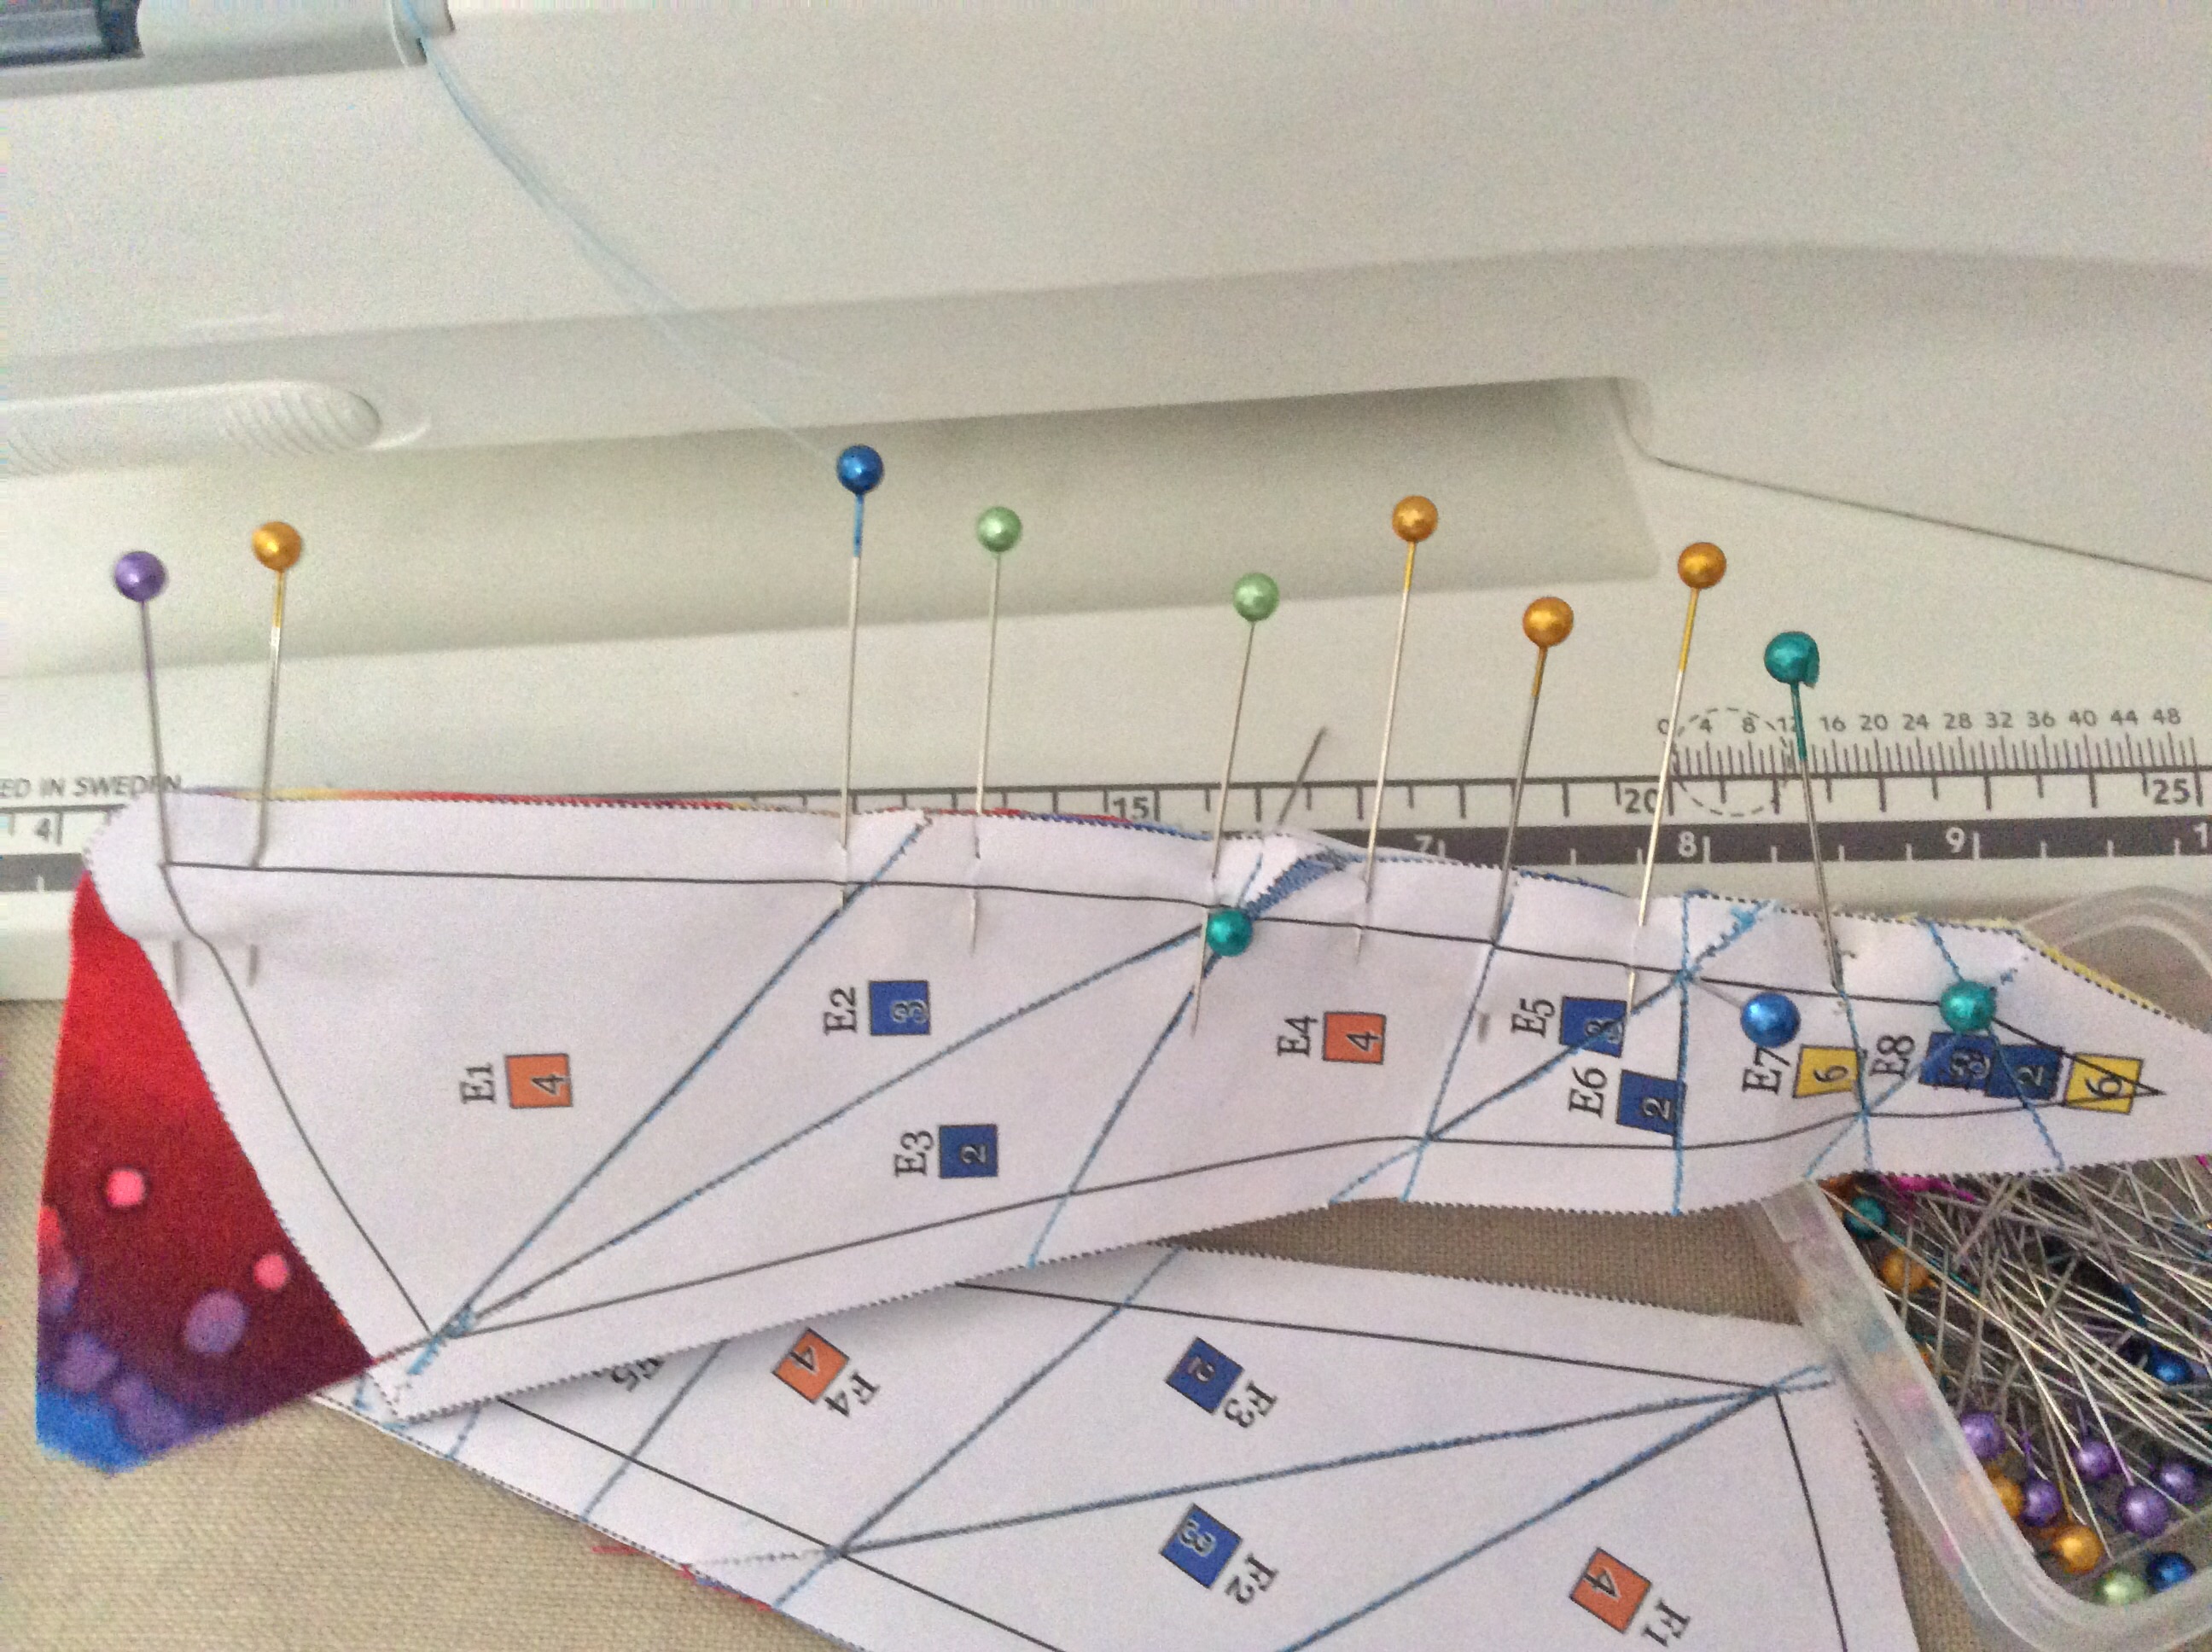
This results in perfectly matched seams and corners!

And so we sew the piles as follows ABC, DEF, GHI, JKL, MNO, PQR. Now bring on the pile S-T..X and add these, following the master template.

So you have 6 sets of partly assembled templates as follows: ABCS, DEFT, GHIU, JKLV, MNOX and PQRW. Remove the paper from the seams. You may like to press the seams open; I like to press them in one direction; all of them then must be pressed either clockwise or anti-clockwise. I also removed the paper from the inner templates, leaving it intact only at the circumference and inner edge.  Now sew these together.


Inner Circle Assembly
Assemble the inner circle in quarters …  …then in halves. Again, I like to press the seams in one direction.
  and finally the full circle. I stitch first from one edge to the centre and reverse. Break thread, and stitch from the other edge to the centre. I then rip open a bit of the crossover seam at the centre to give the seams a ‘twirl’.
Final Assembly
I have not assembled the final block as of now. But this is how I suggest it be done: Join the ring to the square using your favourite method. Finally, appliqué the centre circle. Another look at the block and what inspired it.

I hope you will love making this block! I assure you the result is well worth the effort. Take it easy, enjoy every seam and then savour all the oohs and aahs your work receives! I have also, more or less, finalised the layout I am going to use for these blocks. I shall share it with you soon.
This is where you download the instructions and templates for the block. You would need Adobe Reader ( download for free online) to be able to read these PDF files.
1.BLOCK16 MARINER24 Instructions
2.BLOCK16 MARINER24 Paper Piecing Templates
Please note that the downloadable patterns with paper piecing templates and instruction files for the Dreamcatcher Round the Year quilt blocks are being migrated to my store MadsPatch and will not be available for download for free from 15th November 2020 onwards.

I love this pattern – used it for a traditional blocks made modern challenge my guild is doing – you can see it at https://www.instagram.com/p/BR_ITkPAS8-/ Thanks for giving this to us for free!
Thank you! I absolutely lovvve your interpretation! You have made it very, very special indeed and totally your own.
Do you mind sharing it on my Facebook page ‘Patchwork of My Life’?
The templates do not include AH AI or AJ, do I just repeat AG for this?
Yes, please. I think I remember that the same is the case with all the blocks. There did not seem to be any point in wasting paper to print the same template 4 times, so I have given it only once! 😊
hello! i can`t find the pattern in the shop! please can someone help me?