An original quilt block inspired by the lovely Aster flower…
The Aster is another original 18″ Quilt block with an inset 15″ circle flower, designed by me for the Dreamcatcher Quilt.
I have always loved the Aster-such a pretty flower, which is also the Birth Flower for September! Did you know it gets its name from Greek, meaning ‘star’, because the flowers resemble stars? In Greek mythology, it became a symbol of love when it was placed on the altars for the Gods. I included it as the eleventh block in the DreamcatcherRound the Year quilt…to coincide with Valentine’s Day in my Block of the Month Quilt. Asters also symbolize wisdom, faith, colour, besides patience, daintiness and charm.
My Aster comes in blue-the blue blooms are not only rare but also extremely lovely-the colour ranging from a light through deep blue to purples. The block is really easy to piece and comes up very quickly. To make it more challenging, I added y-seams to the centre. Of course, you could applique a simple circle as the centre, or try out any of these options!
The printable PDF files instructions and templates for the block are now available on my MadsPatch store on Ecwid.
Four shades of the main colour (blue) totalling about 1/3 yard and small scraps of yellow, gold, light and deep orange – are used here. My Aster is blue to go with Dreamcatcher Quilt, but you could make yours in any of these colours -pink, purple, red or yellow.
Please note that this in a digital pattern, you will receive only a link to download the .PDF files on your computer/device. A paper pattern WILL NOT be snail-mailed to you. The links expire in 72 hours, so you would be well-advised to download the files on a permanent location on your PC/ Mac / Notepad asap.
You need Adobe Acrobat Reader Software, downloadable for free at the Adobe site, to read the files. Print from the saved files; do not print directly from the mail/ link. The patterns are designed for printing on A4 size paper, but letter size 8.5″ x 11.5″ will be fine. Set your printer to ‘Actual Size’ or 100% setting before printing.
All patterns are for your personal use only. Please do not share with others or use for teaching/ workshops etc without my prior permission! The 4 files will include:
Instructions File – contains these instructions including the fabric requirement, piecing order and Master Template to be used as a guide for assembling the block.
FPP Templates File containing foundation paper piecing templates.
Master Template that will help you in assembling the block – remember this is is a mirror image. You can also try out your own colours on the outline block.
Bonus: I also include a bonus file with the pattern, these are tips for paper-piecing you can print and keep with you always!
So what do you plan to make your Aster Block into? A round Christmas table runner?
Like every other quilter, I also always had Mariner’s Compass on my bucket list!
So, when I was designing the DreamcatcherRound the Year , I included it as the seventh block in the quilt, albeit a little different.
This off-centre Mariner’s Compass is a variation of the block, which is traditionally hand pieced or English paper pieced. However, this pattern employs a number of techniques, including foundation paper piecing, machine piecing and appliqué. It finishes at 18″ square, with a 15″ pieced circle.
The printable PDF files instructions and templates for the block are now available on my MadsPatch store on Ecwid.
This is the Dusk colourway, the rays of the setting sun lighting up the needles on the right, as the darkness gathers from the East on the left. The name of the block came about as the pattern originally had a circle of geese , receding in size, flying upwards from both sides – I dropped them to simplify the design.
Fabric Requirement
Fabric Colour Code – Block Seven Southward Bound
Four shades of the main colour (blue) and four in a contrast colour way – yellow, gold, light and deep orange – are used here.
The fabric requirements given in my pattern are quite generous (according to me!), but you may want to cut fabric as you go along.
Please note that this in a digital purchase of a pattern, you will receive only a link to download the .PDF files on your computer/device. A paper pattern WILL NOT be mailed to you.
2. On purchase, you will immediately receive a mail confirming receipt of the order, followed by a second mail with download links. If you do not see the mails in your inbox, please check your Spam folder. Please do not click the links repeatedly as each click is treated as a download and number of downloads is limited.
3. It is advisable to access the files on your laptop or notepad where you can save them, rather than on your smartphone.
The links expire in 72 hours, so you would be well-advised to download the files on a permanent location on your PC/ Mac / Notepad asap.
4. You will need to download the software Adobe Acrobat Reader (free)at Adobe site to be able read the files.
5. Download the files on your device/ computer; do not print directly from the mail/ link. The patterns are designed for printing on A4 size paper, but letter size 8.5″ x 11.5″ will be fine. Set your printer to ‘Actual Size’ or 100 % setting before printing.
All patterns are for your, the buyer’s personal use only. Please do not share with others or use for teaching/ workshops etc without my prior permission! The files will include:
Instructions File – contains these instructions including the fabric requirement, piecing order and Master Template to be used as a guide for assembling the block.
Template File.1 containing paper piecing templates A to P . Print at actual size or 100% in portrait mode
Template File.2 containing templates Q to X and Z . I suggest you print these on freezer paper, if available, at 100% or actual size. These are odd shaped pieces with circular edges, and I personally like to use freezer paper for accuracy for cutting these.
Master Template
This diagram is the Master Template that will help you in assembling the block – remember this is is a mirror image. It is also included with the files. You can also try out your own colours on it.
Printing and Templates
I printed the templates on Freezer Paper.
If you don’t have freezer paper printer sheets, what do you do? Cut the freezer paper to your regular printer paper size (A4 or letter – approximately 8.5″ x 11″). Iron just the edges of the freezer paper (about ¼”) to a regular printer sheet, so that they are joined evenly, without any creases. Print as usual, taking care to insert the joined sheets in the printer so that the printing is on the freezer paper.
Place freezer paper, sticky side down on regular printer sheet. Iron about a 1/4″ on all edges. Print the double sheet as usual.
Piecing
The block is partly foundation paper pieced. I have blogged about the paper piecing patterns for this quilt earlier, and also given a few paper piecing tips here. In case you are too lazy to go through those ( I would be, I know!) here is a quick checklist before you begin! I also include a bonus with the pattern, these tips in a file you can print and keep with you always!
Paper Piecing Checklist
Have the fabrics been colour coded?
Has the machine stitch length been reduced?
Are the templates in order specified in the instructions?
Have you picked up the correct fabric pieces or strip/s? The fabric code number is printed on each piece position. It is a good idea to check that once in a while.
When you start, is your piece #1 placed on position #1 on the templates?
Is the wrong side of the fabric piece touching the paper?
Is the incoming piece placed right sides touching the previous one?
If strip chain piecing the templates, have you sufficient space between one template and the next?
Once done with the piecing, and before you start assembly, you may like to refer to this checklist!
TemplateAssembly Checklist
Have you a print out of the Master Template in front of you?
Avoid removing paper pieces before your template is ready to actually go under the machine! Arrange the templates, printed side up, using the Master Template as a guide.
If you do remove the paper, ensure you have the template (alphabet) name pinned to wrong side of the pieced template, to guide you during assembly.
At all times, keep the printed/ wrong side up, pick up the templates to be assembled, (remove the paper, if you wish to) sew them together. Put back in place, wrong side up. Go on to the next. At all times, remember to keep track of template names
Refer to the Master template at all times during assembly to ensure all is in order! Reminder: If you take off the paper before assembly, remember to stick a post-it note or pin a piece of paper with the template name on the pieced template.
Before I sign off, here is a look at the Rainbow version of the block. The templates and instructions are available my Ecwid online store, Madspatch.
I had promised you a guest blogpost from Sobana Sundar, who has squared up all the circles for her BOM blocks! If you have not seen her beautiful blocks, you must!
Without much ado, I hand this over to Sobana Sundar :
Any jewel is defined by its setting – so too your blocks need that final touch of being set into squares before they can become a quilt top or wall hanging. The Round the Year block circles measure 15.5 inches and are to be set into squares that are 18.5 sq.inches.
The following blocks can be set using the ‘squircle’ templates provided by Madhu along with each block. They are all not identically set as some finish up with six pieces, some four but they join up easily as long as you patiently pin them and sew slowly using 1/4″ seam. (I copied out the template to freezer paper to avoid repeated tracing on the fabric.)
Block 2- An Evening at the Pond,
Block 4 -Sapphire Fire,
Block 5- Venus,
Block 12- Dozens Squared,
Block 13- Feathered Star and
Block 14- Fractal Mandala
The rest are circles and have to be appliqued to the square, if you have a lot of patience and time to do that. Personally I can never be happy with my stitches when I applique, be it button hole or a hem and I definitely do not have the inclination to spend long hours hand appliqueing the circles to the squares.
So I chose a method that I have used before using Freezer paper, a method where there is very minimal sewing and still one gets a lovely block. I learnt it from this tute here– and did this whole quilt with it .
Another bonus about using the freezer paper method is that one can square up all the blocks using the square template if one does not have a 18.5″ square ruler. I have only a 12.5″ square ruler and hate making the bigger size blocks for fear of ruining them while squaring with a smaller ruler. And here I just pressed the freezer paper template and trimmed away the extra fabric on the blocks I finished using Madhu’s templates.
There are some adaptations to be made to use it – for simplicity sake I will call it the port hole method (as named by Desi Quilter Tina Katwal) – for our finished circles. This method is normally used to make Drunkard’s Path quadrants and once the background circle is prepped, one attaches a piece of fabric that is generously bigger than the circle. However, here we have already finished circles so some attention is required to properly attach the square and the circle.
And here is a photo trail to explain the how-to…
Start by cutting a 18.5″ square from your freezer paper. The paper rolls available in the market are usually 18 inches broad so you will have to cut out another piece of freezer paper that is 18.5 x 1 inch and iron/ glue it to get it to the size we require. Fold it in four find the centre and then draw a circle with a diameter of 15″ – not 15.5″ – on the paper side (as opposed to the shiny side). I used a quadrant template (that you can download from the link at the end of this post ) to mark my 15″ diameter circle and cut it out.
Cut 15″ circle from centre of 18.5″ freezer paper square. The ready template…
Iron the freezer paper to your background fabric and cut the18.5″ square.
Cut a 18.5″ square from your background fabric and iron the freezer paper on it.
Draw a circle on the fabric. This should be about 3/4″ away from the circle on the paper. See the next photo for clarity. I just followed the circle on the paper to draw this. But you could use a big plate from your kitchen. It does not need to be perfect and you will see why soon.
Draw a circle on the background fabric, approximately 3/4″ inside the `porthole’. The next step is to cut out the fabric along the lines we drew in the last step. You are going to have a lot of circles in the background fabric which you can use for another project.
Cut out the circle on the drawn line… Make little snips on the fabric as in the photo below. Do not cut till the edge of the paper. Stop when you are about 1/8 of an inch from the paper.
Snip the fabric upto 1/8″ from paper edge Apply a thin layer of glue using your glue stick along the edge of the paper and fold back the snipped fabric so that it is flush with the paper edge. Use your iron and press to keep it in place.
Apply washable glue stick on snipped edge and fold it back on to the paper.
Centre your finished circle on the freezer paper again on the wrong side, making sure it is evenly placed. Apply glue again along the edge of the folded back fabric snips and press your circle in place with your iron. I missed taking a photo of this stage. Remember to keep your finished circle right side down.
Centre the finished circle thus,.using glue stick to attach the edges to the snipped edge of background.Turn it over and ensure your placement is correct and the glue holds the two pieces of fabric together. Now at last we get to use the sewing machine. Remove the freezer paper gently pulling it away. You may have some problems if the glue has adhered too firmly but a tug will release it.
Remove freezer paper Change to zipper foot and with needle position at extreme left stitch along the crease. Make sure you cross over your starting point to secure your circle totally.
Sew on fold … This is how it looks once you are done.
Done! And after a press on both sides you have your finished block. And you can start work on the next block with the same freezer paper. I did about four blocks a day. If I had hand sewn it would have taken me two days to do a block.
Easy and perfect!
The beauty of the freezer paper is that you can reuse it. I did all my blocks with that one freezer paper and also trimmed the other blocks not made this way to size. And I think I will preserve it for the next 18″ block I make! Here are some of the finished blocks made with freezer paper.
Some of the blocks finished using freezer paper method.
Sobana
These are gorgeous, Sobana!
Thank you so much, Sobana! That sounds simple enough! You can view more of Sobana’s work on her blog, The Quilt Bug.
I have still not got my background fabric, so am doing other stuff these days…And, as promised, here is the template for a 7.5″ radius circle! Happy Quilting.
Am I excited and relieved at the same time, or what, to present the sixteenth and final block of the DreamcatcherRound the Year Quilt !?! This 24-spoke Mariner’s Compass is foundation paper pieced and is, like the other blocks of this Block of the Month quilt, drafted as a 15″ (finished) circle set in an 18″ (finished) square. I learnt to draft this block from a workshop by Adina Sullivan, “Mastering the Maddening Mariner” in “Quiltskills – Workshops from The Quilters’ Guild Australia” (published by The Patchwork Place, 1998). Adina has the most fabulous quilts based on the Mariner’s Compass and I had been gathering the courage to attempt these since the last six years or so, when I bought this book. You may recall that Southward Bound was also drafted using the method taught by Adina. She uses the English paper piecing method to construct her blocks, mine is completely machine pieced!
Please note that the downloadable patterns with paper piecing templates and instruction files for the Dreamcatcher Round the Year quilt blocks are being migrated to my store MadsPatch and will not be available for download for free from 15th November 2020 onwards.
I used Quilt Assistant, a great free quilt design software for designing the block. The pattern instructions and paper piecing templates can be downloaded in PDF format from the links at the end of this post.
Fabric Requirement
Fabric Code for Mariner24
This block uses 2 shades of blue and 4 contrasting colours in the yellow-gold-light orange spectrum for the Compass, set in a third shade of blue for the background.
Trivia – This block contains 269 pieces! But don’t worry, we will be working with strips, so that you need not worry about cutting dozens of pieces.
Fabric Code
Colour
Fabric Required
Cutting Instructions
1
Pale Blue
19″ square*
2
Medium Blue
6″ WOF
Cut 3 strips WOF 2″ wide
2 squares 4.5″
Cut along both diagonals to get 8 QSTs
3
Deep Blue
6″ WOF
Cut 3 strips WOF 2″ wide
4
Deep Orange
3″ x 30″
5
Gold
3″ x 30″
6
Yellow
3.25″ x 30″
Cut into strips 2″ x 30″
1.25″ x 30″
7
Light Orange
3″ x 24″
*I have given a template for joining the background by piecing, but for this block I suggest appliqueing the compass on a square.
Do remember to spray starch and press your fabric before cutting it. I do not have access to spray starch, so I make my own by adding two capfuls of the locally available liquid fabric stiffener (sold by the name of Revive) to 100ml of water in a spray bottle.
Your best friend when piecing – spray starch!
Printing Instructions
Print the Templates File at 100% / actual size in portrait mode. Cut out the templates. I suggest you ignore the background template AG( in two parts), as we will be appliqueing the compass on a background square. It may prove useful for marking the circle on the background fabric.
Print the Instructions File, which includes the Fabric Requirement chart and Master Template, and keep at hand for piecing and assembly.
Step by Step Piecing Instructions
If you are attempting a block from this quilt for the first time, or even if you have not foundation paper pieced for a while, you may like to see this blogpost for decoding the paper piecing patterns for this BOM and this one, which reminds you of certain do’s and don’ts for paper piecing these blocks. If you are new to paper piecing itself, there are several great tutes online on the subject!
Outer Ring
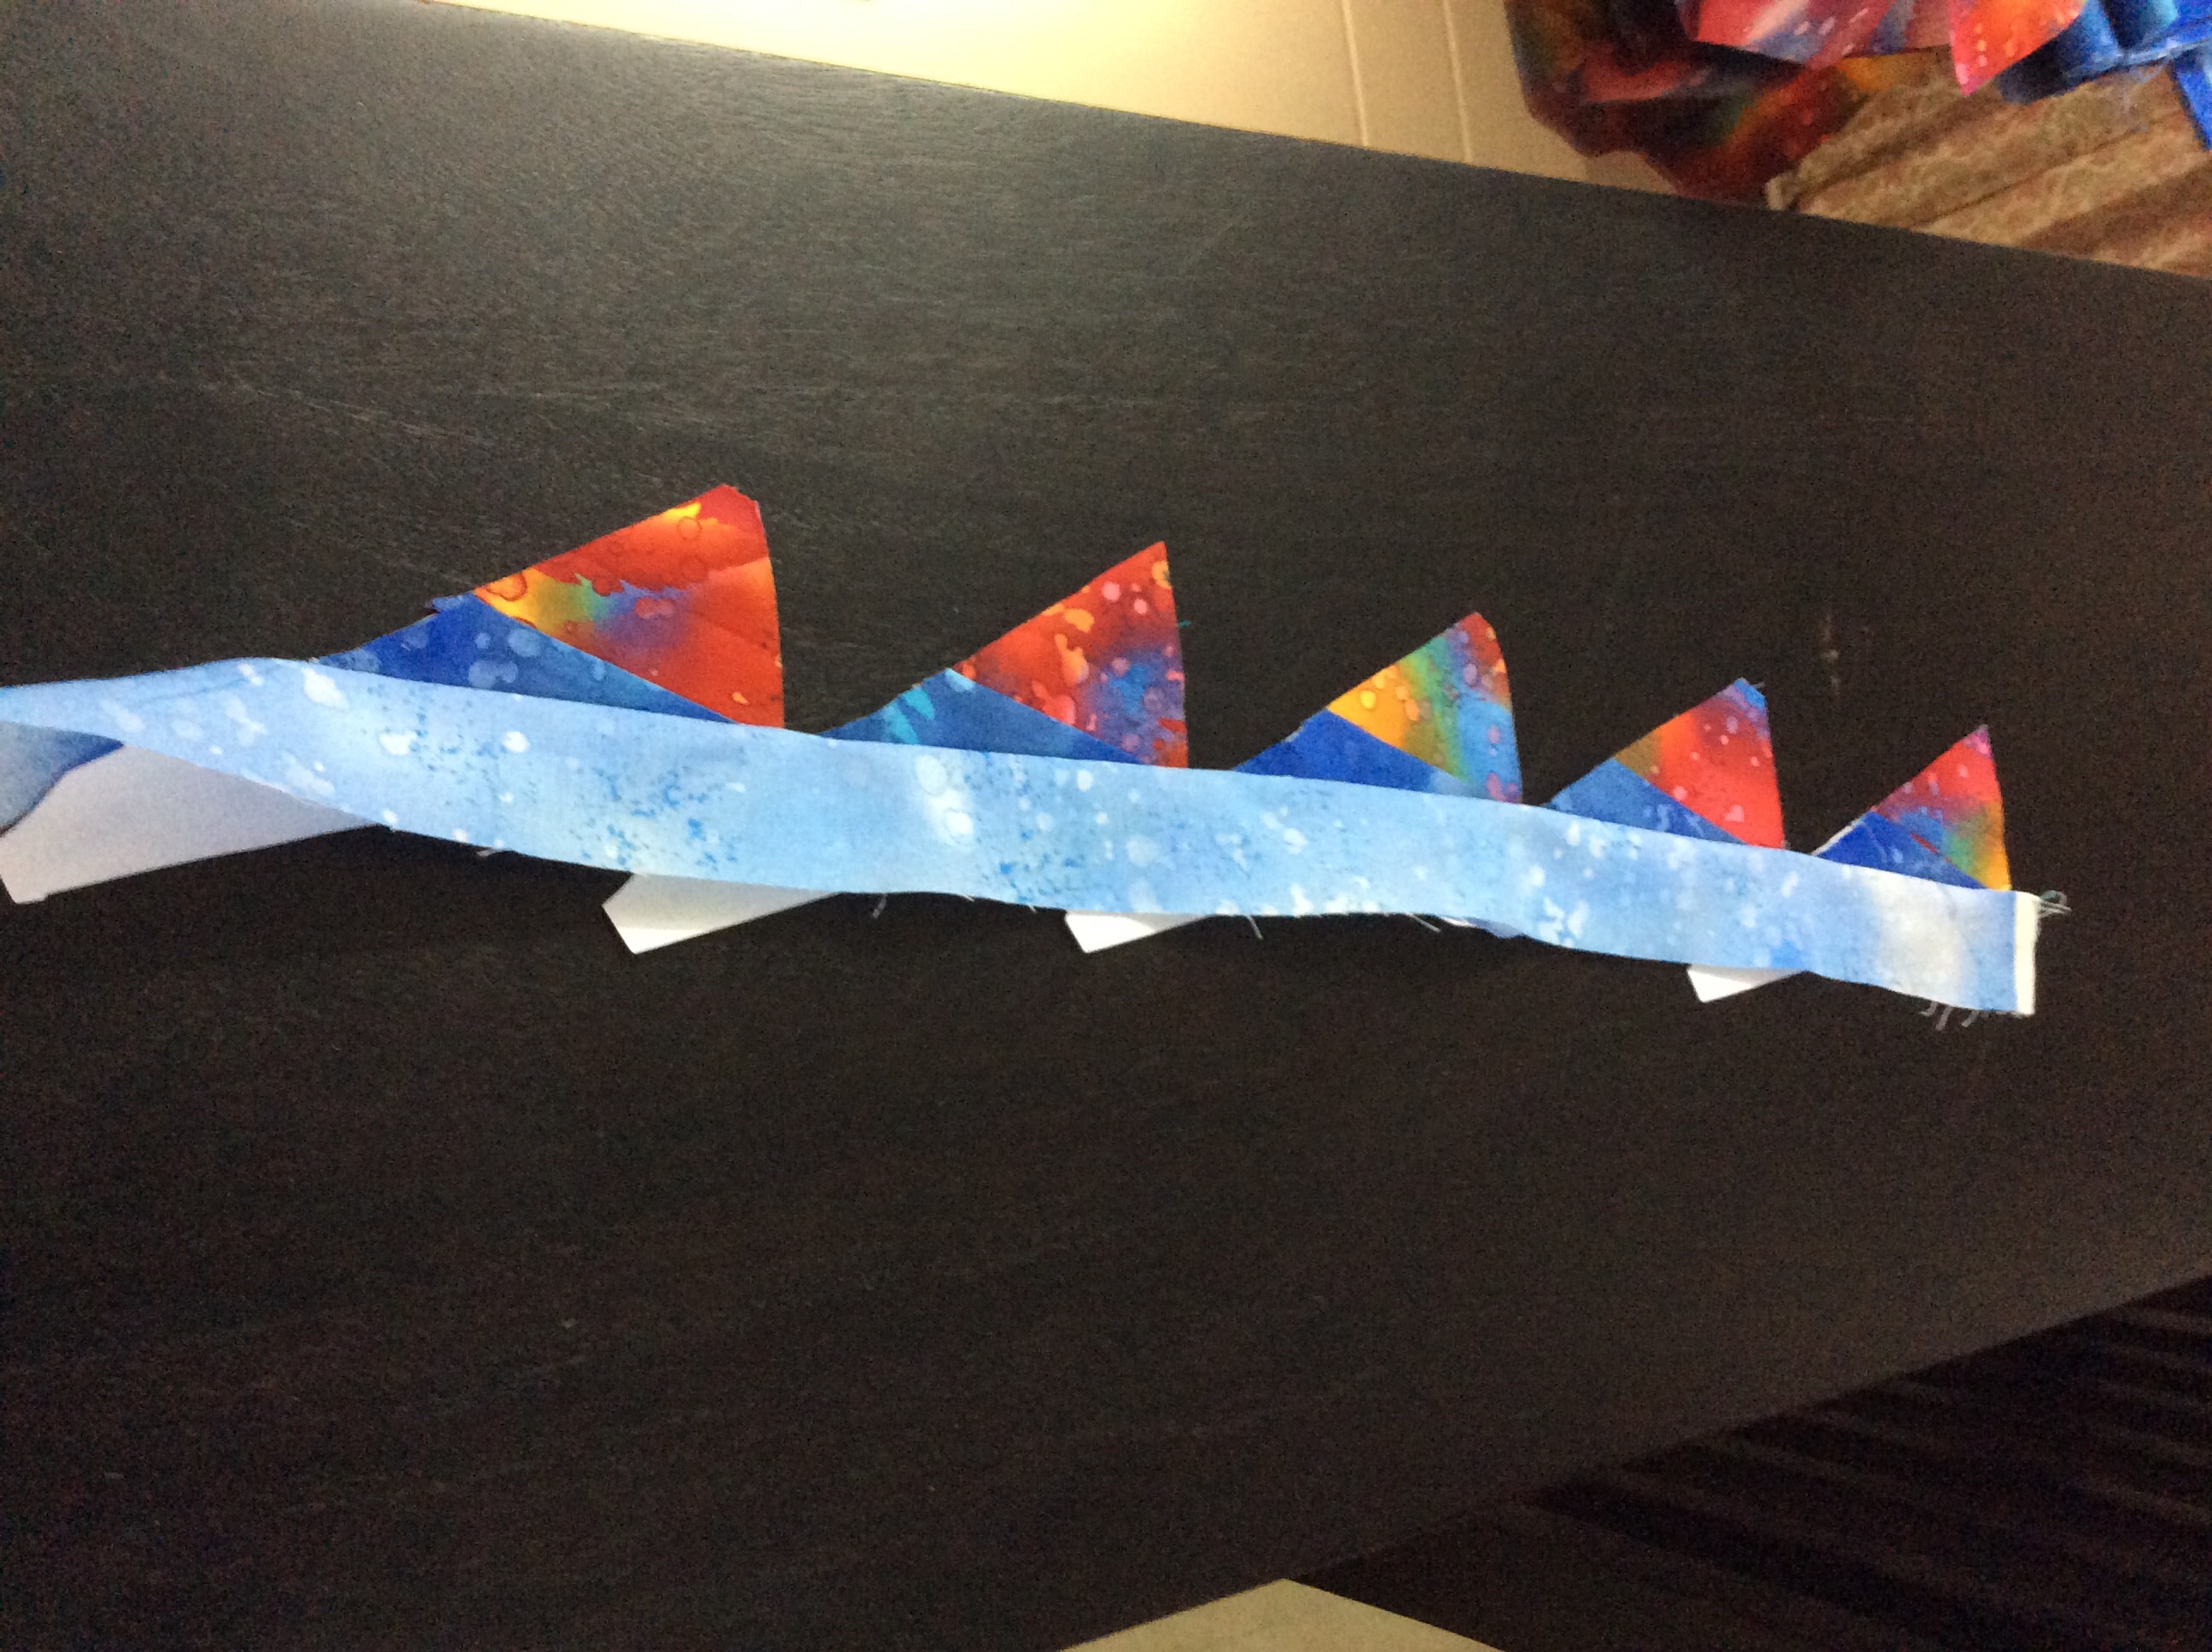
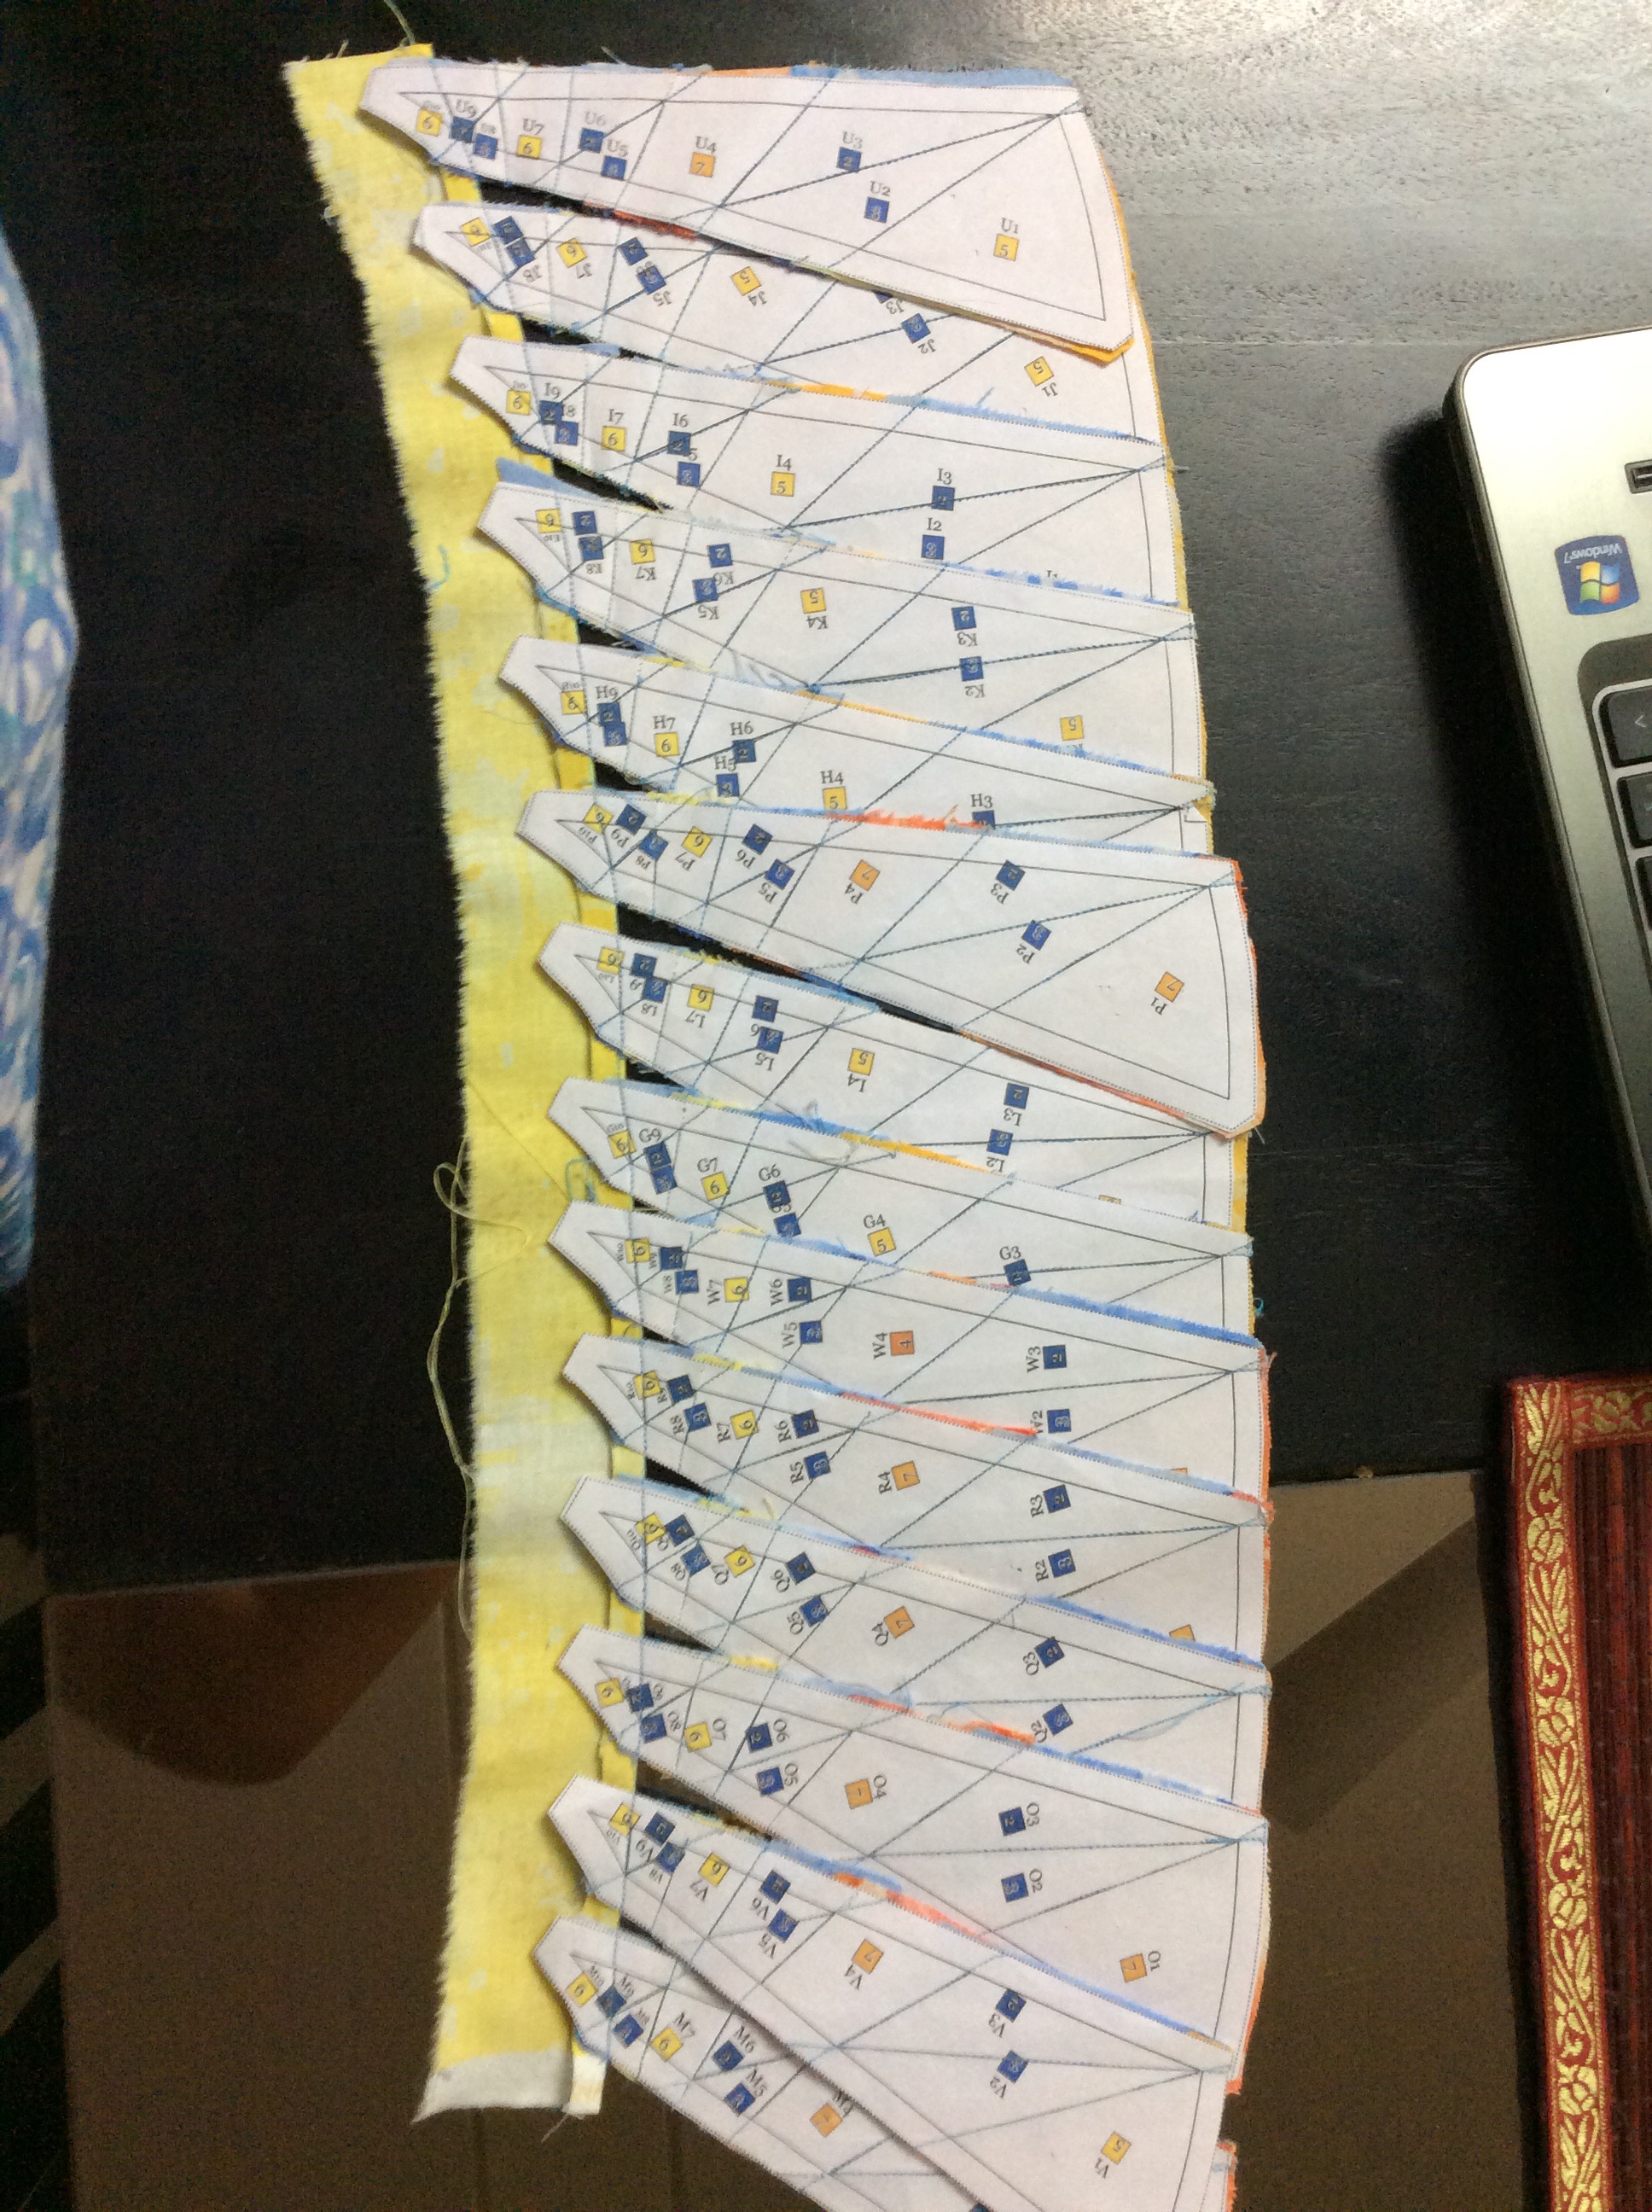
First we piece the spokes of the outer ring (Templates A to X), using (majorly) the chain strip piecing method, that we have used for several earlier blocks. To avoid confusion and efficient use of fabric, the following order of piecing is suggested. We start with templates A to F and fabric strips which will come at piece#1 and piece#2 ( Fabric Codes#4 and #3 respectively). The following photos will explain how we chain piece the templates to the strip pair.
Align the edges of strips for A1 (Fabric#4 and Fabric #3) and place the template A ready for the first seam.
Template B will be aligned just below template A, leaving some space in between the two.
This shows Templates A to F … first set of seams done and strip for piece#2 pressed open.
Cut to separate the templates…
Trim the excess fabric up to paper template. Preserve the trimmings!
Fold back the paper template on seam line and trim the seam to 1/4″
Now fold the paper template at seam line between piece#2 and piece#3. Trim the fabric (Strip#2) 1/4″ beyond this seam line.
How templates A to F will look after the first two pieces are in place…
…All these trimmings will be used…
We are now ready to add the strip which will come in at Piece#3 (Fabric Code#2).
Chain piece the templates to strip for piece #3 and press open before cutting apart.
Trim the seam allowance to 1/4″ and the fabric on piece#3 to 1/4″ beyond seam line between piece#3 and piece#4
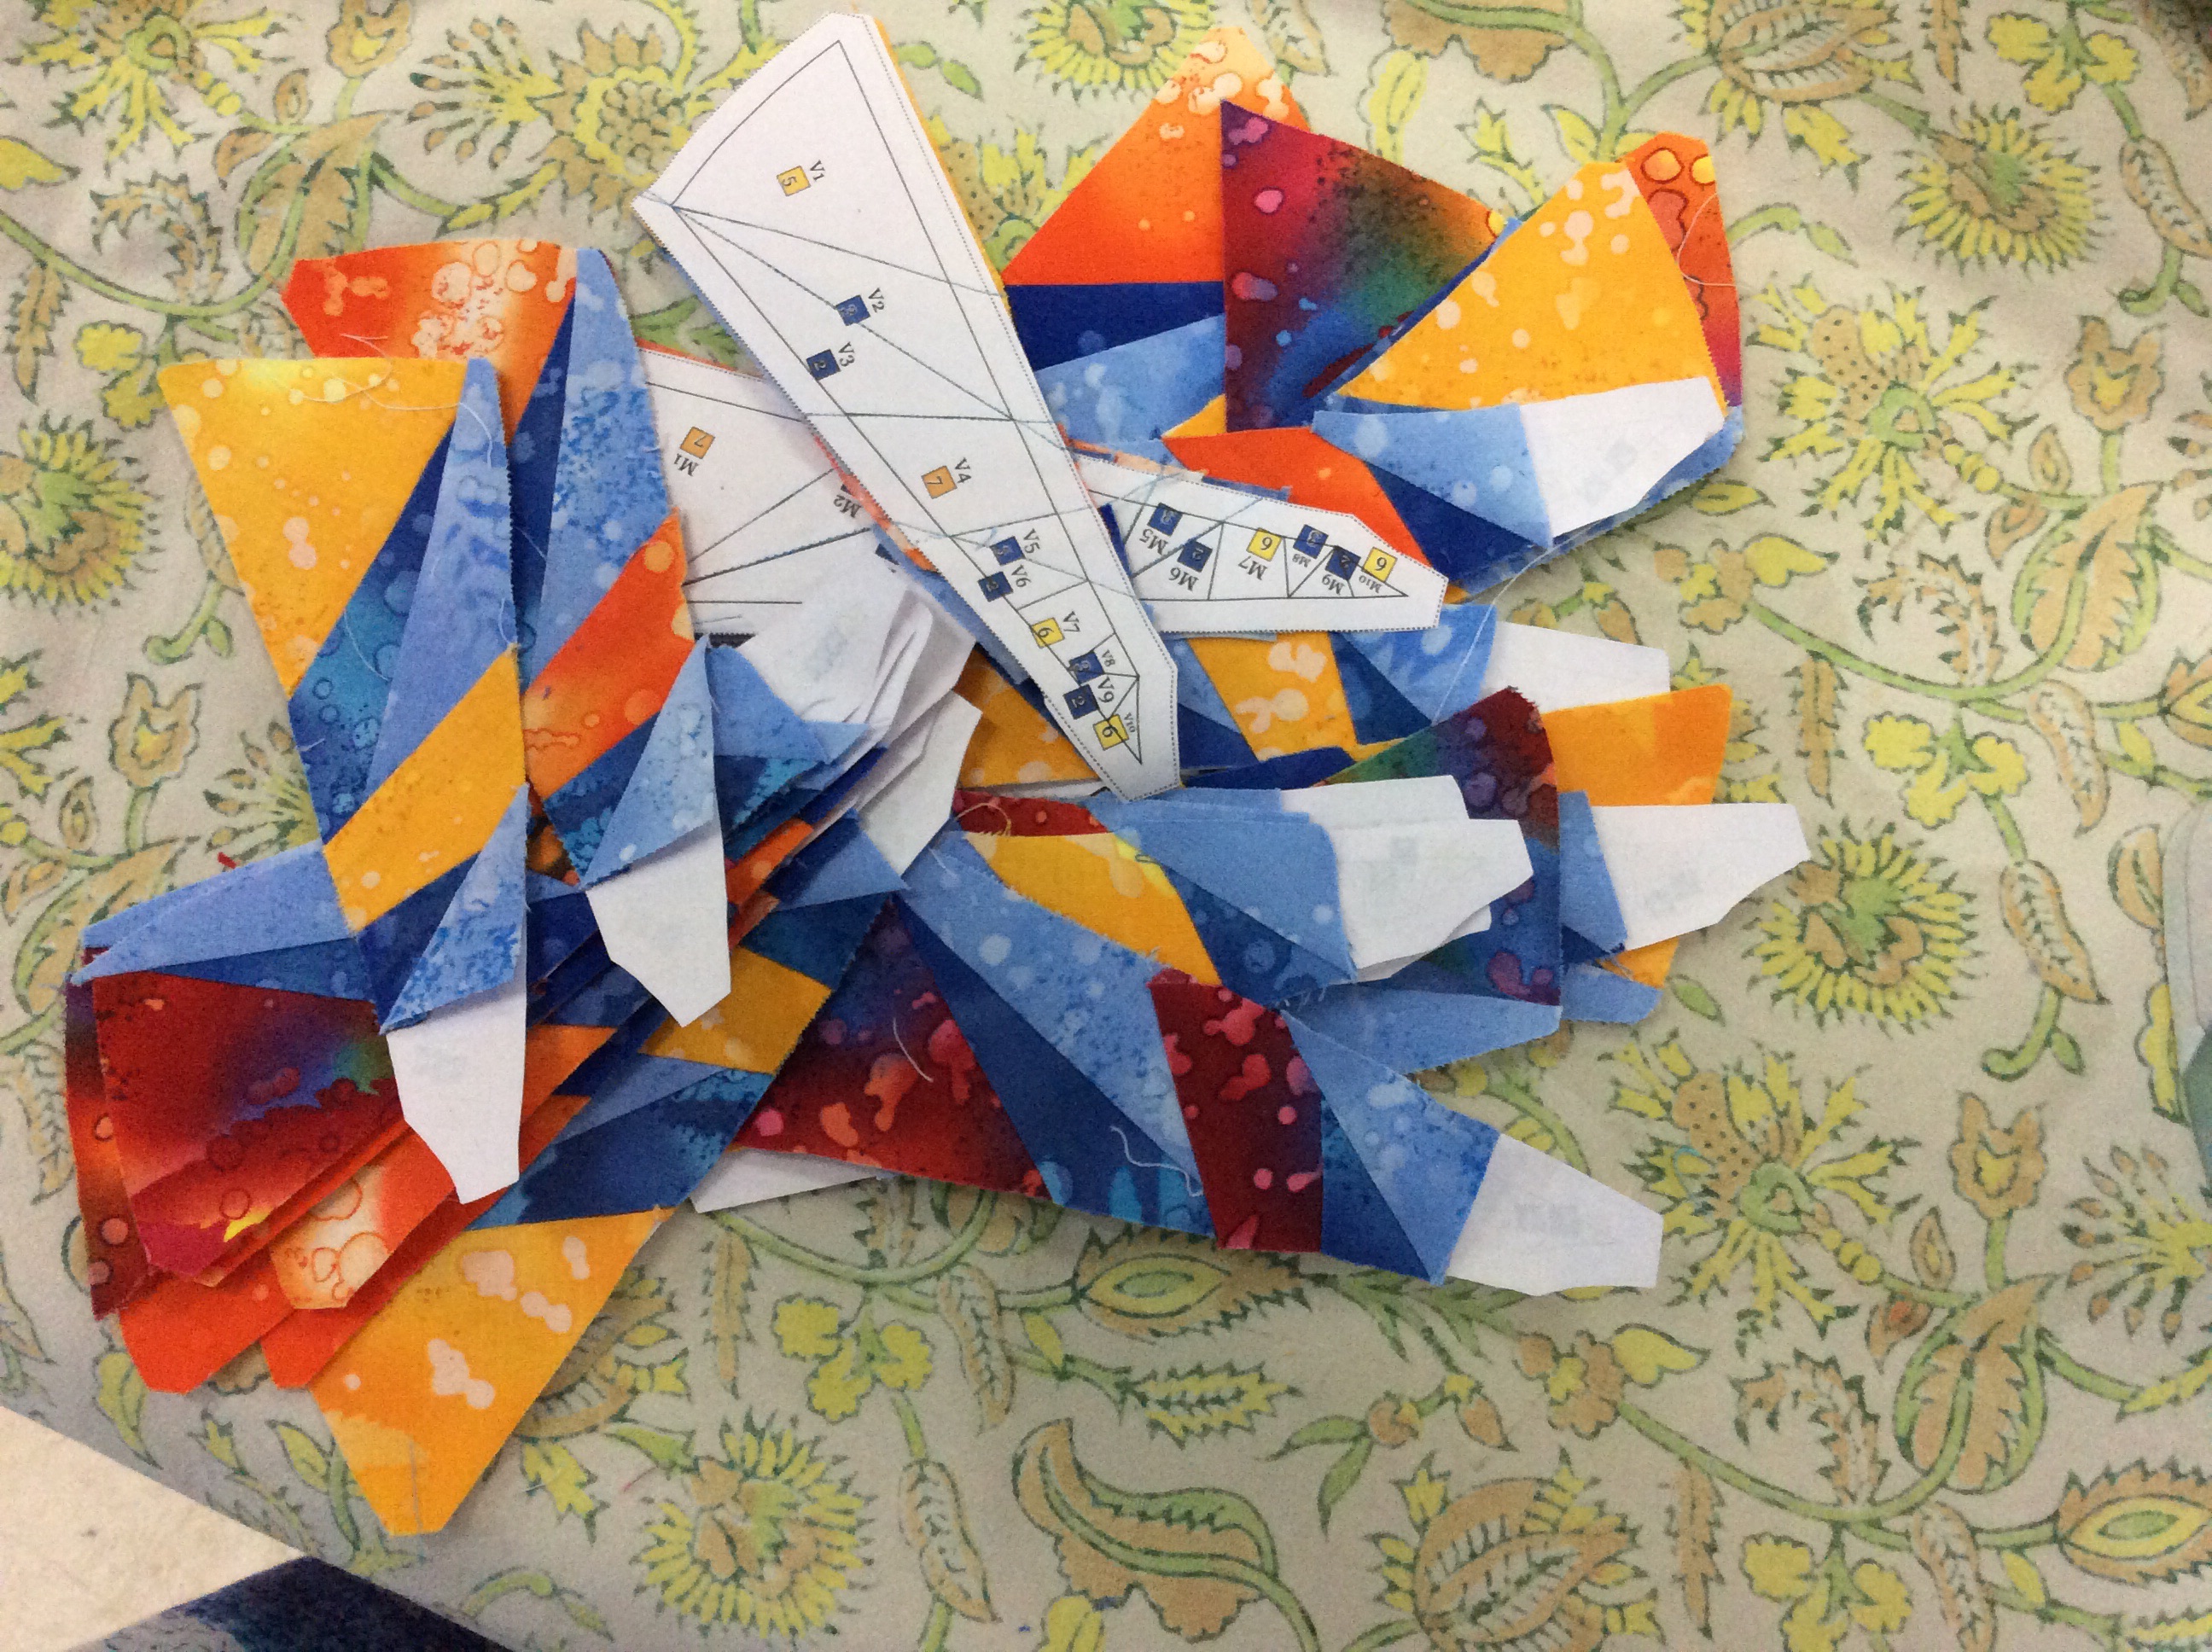
We are ready to add piece #4, for which we can use the trimmings from before! Similarly, piece templates G to L up to piece#4, i.e G1 to G4, H1 to H4…L1 to L4. Piece templates M to R up to piece#4, i.e M1 to M4, N1 to N4…R1 to R4.Piece templates S and T up to piece#4 Piece templates U and V up to piece#4 Piece templates W and X up to piece#4 Now, all our templates for the outer ring our pieced up to Piece#4.
Once we have reached this stage, order of piecing is not important. We are ready to add Piece#5 to all these templates, for which we can use the trimmings from Piece#2. Similarly, trimmings from piece#3 can be used for piece#6. This upcoming pic shows the spoke templates pieced till piece#6.
Templates A to X pieced up to Piece#6…
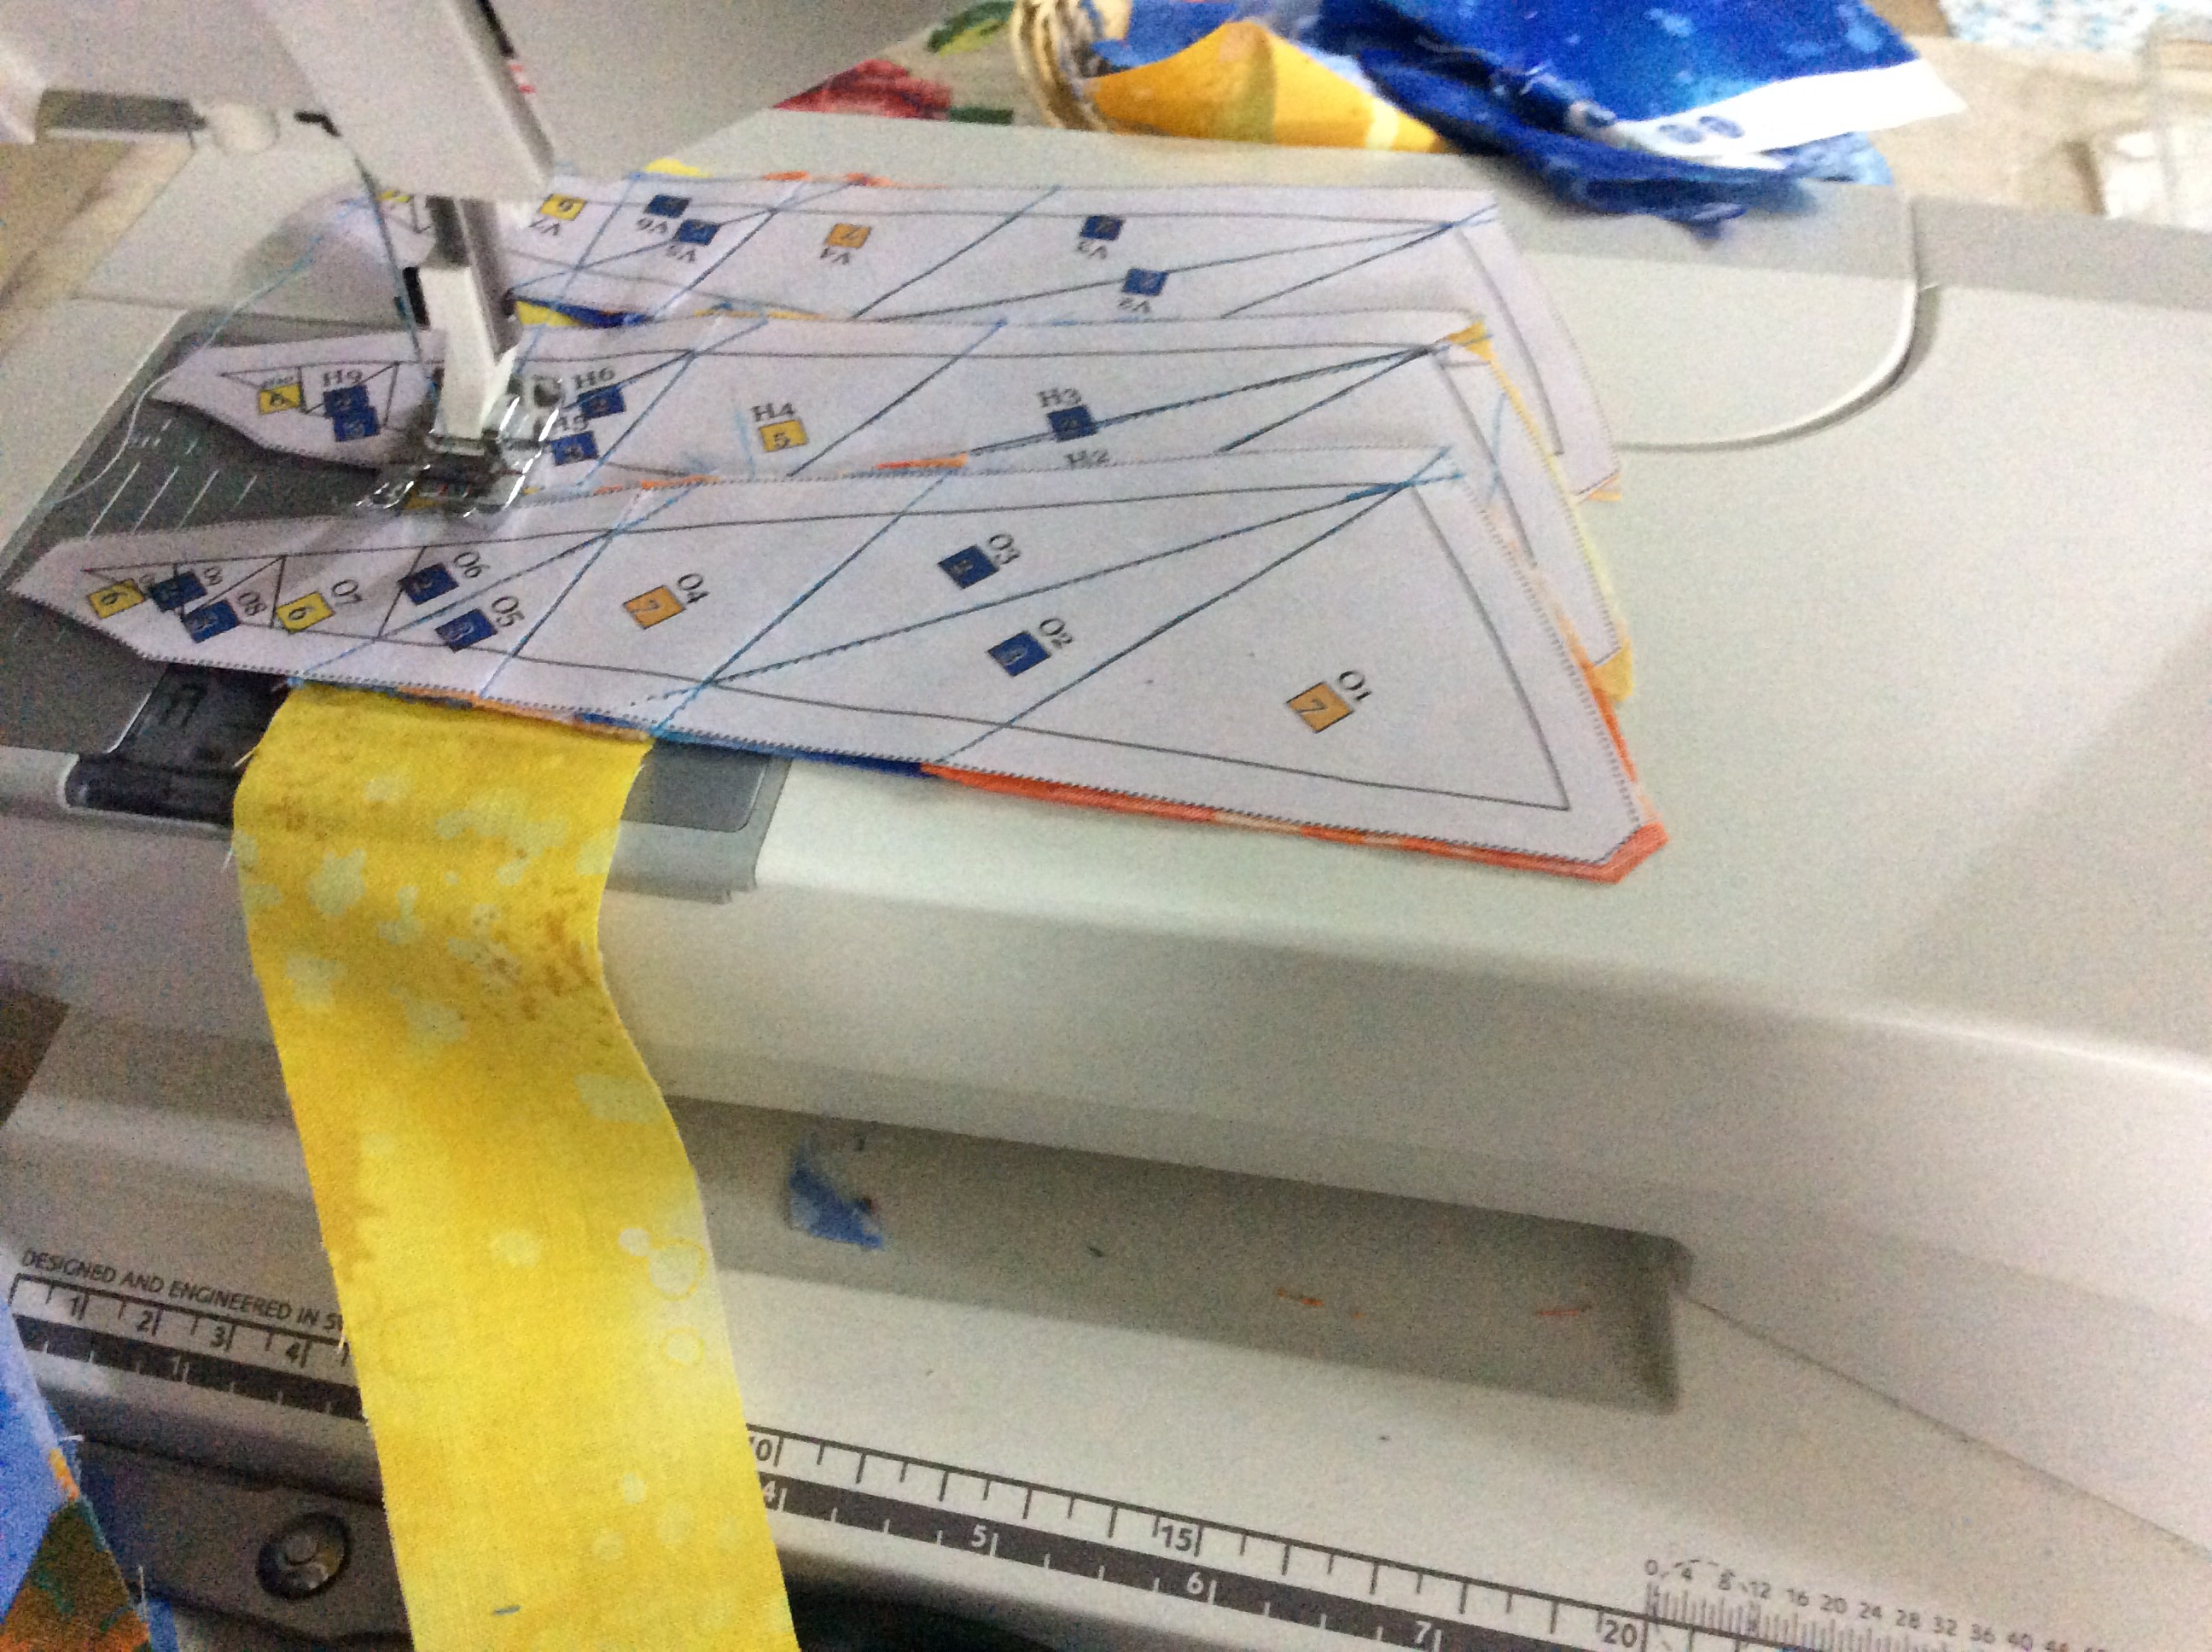
Here comes the strip which will occupy space at piece#7.
Piece#7 coming up.
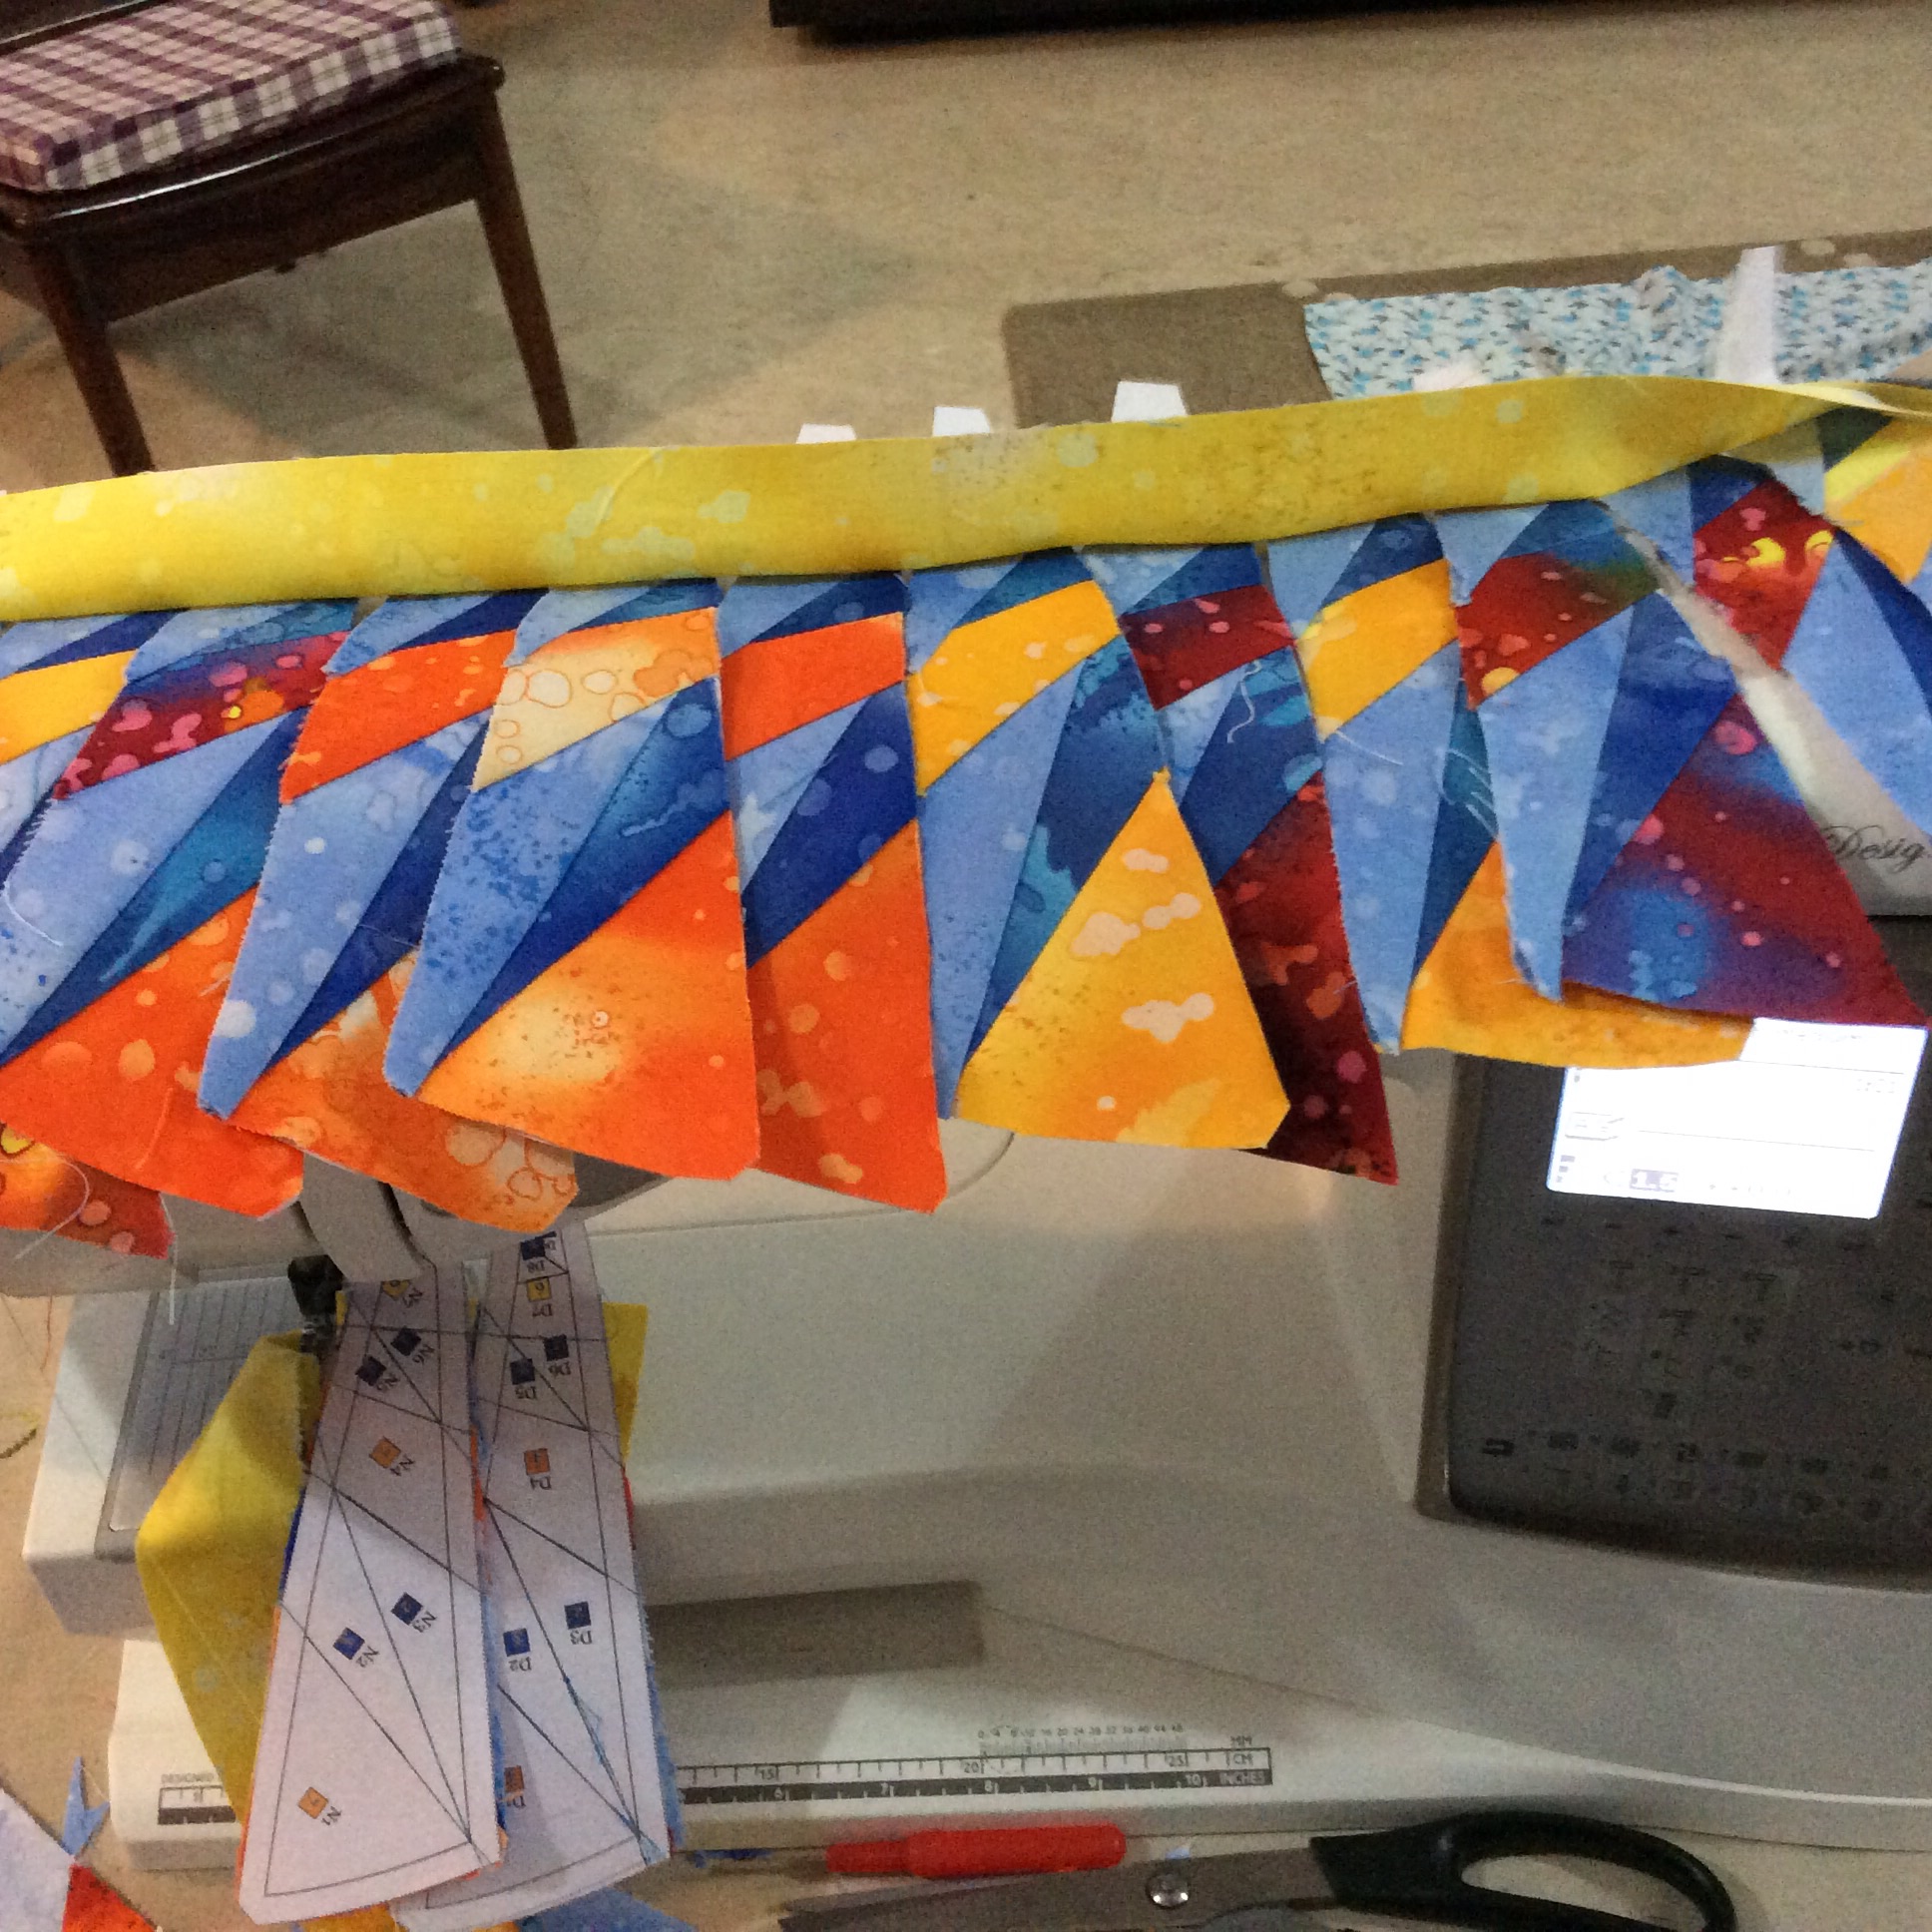
You will see that the broader portion of the templates are overlapping. The important thing is to maintain about 1/2″ distance between the seam you are sewing on one template and the next. Time for a break and a little bit of fun! ALWAYS, remember to press open the strip you have sewn before cutting apart the templates. Also trim the seams, and the fabric just sewn to 1/4″ inch or so, beyond the upcoming seam line. I used scraps for pieces #8, 9 and 10, where I could. When I ran out of scraps, I used strips. Here is the final strip coming up!
Final strip sewn and pressed open, ready to be trimmed!
Trim and put them aside, ready for assembly.
Inner Circle Compass
To piece the inner circle compass, piece as follows: Piece Y, Z, AA and AB. Piece AC, AD, AE and AF Use QSTs from Fabric#2 at piece#1 in all these templates.
The inner circle templates pieced. ( I have added an additional 1/4″ beyond the outer trim line, as I am going to try out something new for joining this to the ring.)
Assembly Instructions
Use the Master Template given in the Instructions File as a guide for assembly.
Outer Ring
I suggest you make piles of the templates as follows: A-B-C ; D-E-F; G-H-I; J-K-L; M-N-O and P-Q-R. Put aside S-T-U-V-W-X
Templates in piles…
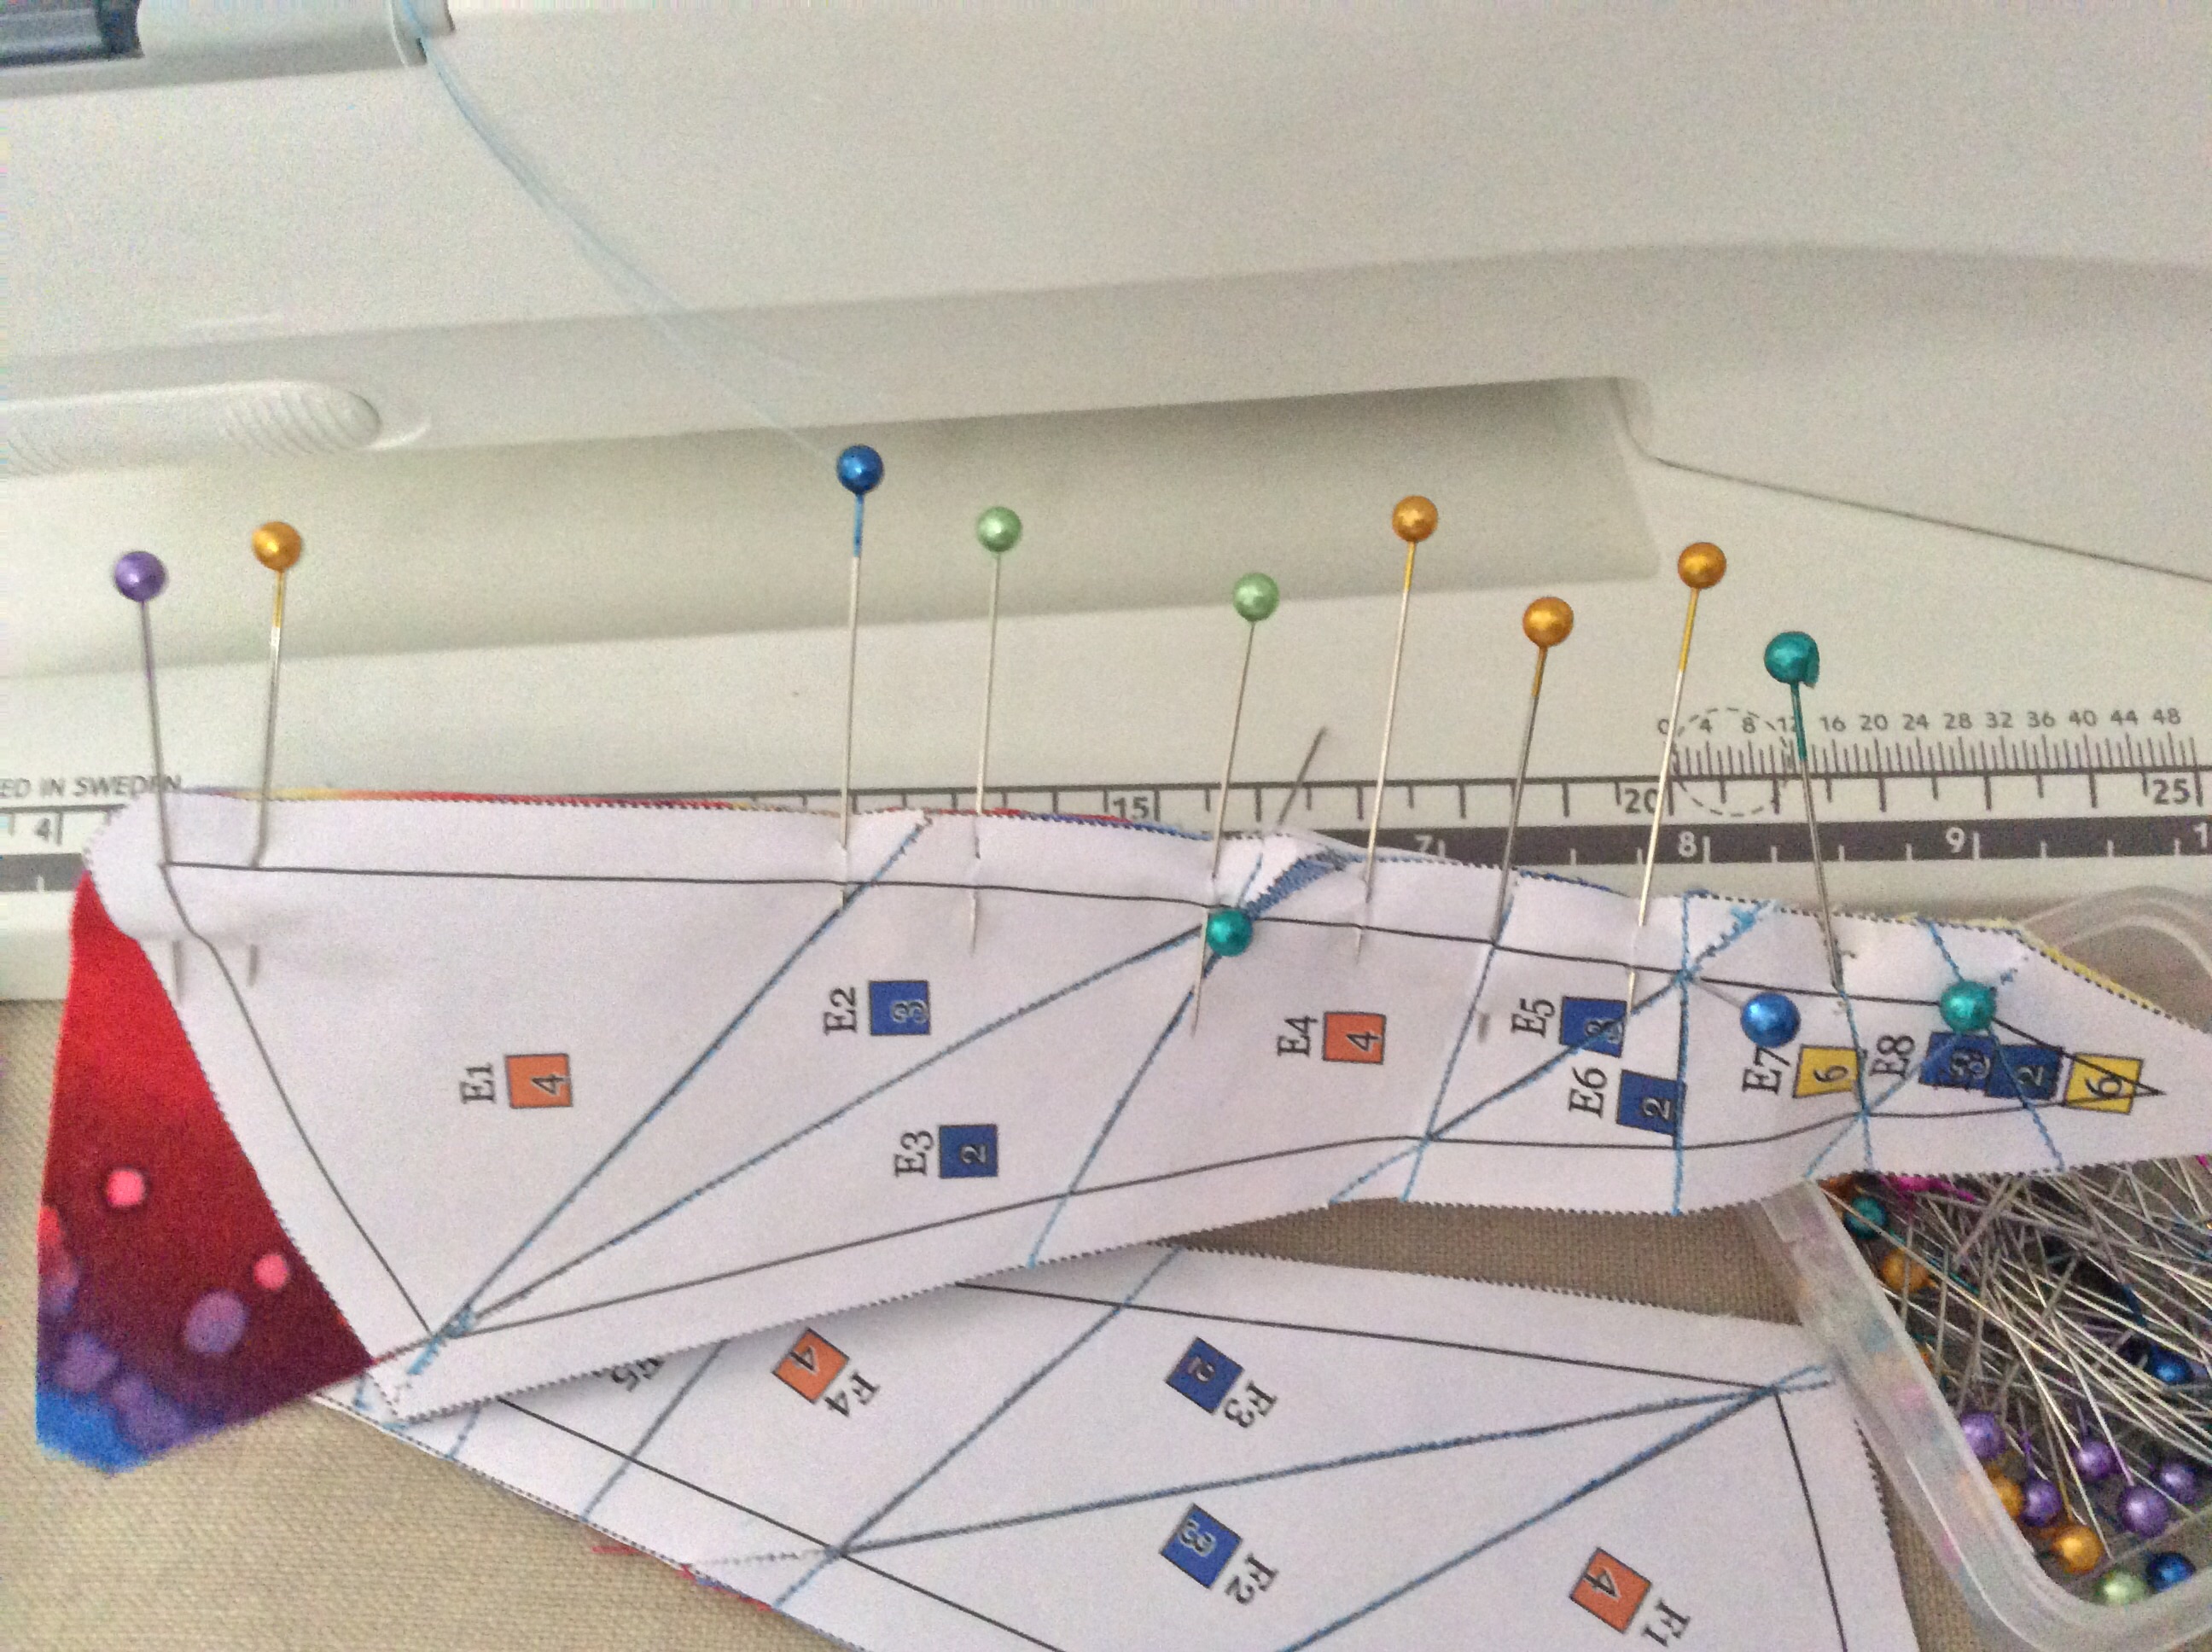
To join the templates, pin them first at the outer, broader edge. I like to insert vertical pins, matching the seams, before pinning on the seam line.
Vertical pins where seams will meet.
Horizontal pins on seam line; the vertical pins are now being removed.
This results in perfectly matched seams and corners!
Perfecto!
And so we sew the piles as follows ABC, DEF, GHI, JKL, MNO, PQR. Now bring on the pile S-T..X and add these, following the master template.
Work with the Master Template! Do not let the mirror image confuse you.
So you have 6 sets of partly assembled templates as follows: ABCS, DEFT, GHIU, JKLV, MNOX and PQRW. Remove the paper from the seams. You may like to press the seams open; I like to press them in one direction; all of them then must be pressed either clockwise or anti-clockwise. I also removed the paper from the inner templates, leaving it intact only at the circumference and inner edge. Now sew these together.
The ‘ring’ from the back…
… and from the front!
Inner Circle Assembly
Assemble the inner circle in quarters ……then in halves. Again, I like to press the seams in one direction. and finally the full circle. I stitch first from one edge to the centre and reverse. Break thread, and stitch from the other edge to the centre. I then rip open a bit of the crossover seam at the centre to give the seams a ‘twirl’.
Final Assembly
I have not assembled the final block as of now. But this is how I suggest it be done: Join the ring to the square using your favourite method. Finally, appliqué the centre circle. Another look at the block and what inspired it.
The Inspiration and the Block!
I hope you will love making this block! I assure you the result is well worth the effort. Take it easy, enjoy every seam and then savour all the oohs and aahs your work receives! I have also, more or less, finalised the layout I am going to use for these blocks. I shall share it with you soon.
This is where you download the instructions and templates for the block. You would need Adobe Reader ( download for free online) to be able to read these PDF files.
1.BLOCK16 MARINER24 Instructions
2.BLOCK16 MARINER24 Paper Piecing Templates
Please note that the downloadable patterns with paper piecing templates and instruction files for the Dreamcatcher Round the Year quilt blocks are being migrated to my store MadsPatch and will not be available for download for free from 15th November 2020 onwards.
The Winding Ways Wheel , Block 15 of the Round the Year Quilt
Can you believe this is the last but one block the DreamcatcherRound the Year Block of the Month Quilt? I was in two minds whether to include this beautiful traditional pieced block in this quilt, where all the other blocks are majorly paper pieced. You decided it for me and I couldn’t be happier!
I first made up this block almost 4 years ago, when I was quite new to quilting, using the winding ways block. I drafted it using this great tutorial by Kathy Somers. Partly pieced by hand and partly by machine, it finished at 4.5″ including the seams! I plan to include it in the next major project I embark on, a quilt made with miniature 4″ blocks including, perhaps, a few Dear Jane and Nearly Insane quilt blocks and some of my very own.
To get back to Block Fifteen, it finishes at 18.5″ square with the seam allowances. The inset circle is 15″ plus 1/2″ seam allowance. I have drafted this on free quilt design software Quilt Assistant, which I have used to draft all the blocks of this quilt!
The block looks difficult, but the curves are really gentle and if you cut accurately, and pin carefully, it is a breeze to piece!
Fabric Requirement
Winding Ways Wheel – Fabric Code and Colour Pattern
This block will be appliquéd to the background square. You will need a 19″ square in Fabric#1 .
Printing Instructions
1. Print the Instructions File and Templates File on A4 size paper with your printer settings on 100% or Actual Size in portrait mode. I used freezer paper to print the templates. I just press it on the fabric and cut around it!
To print on freezer paper, cut A4 size freezer paper and lightly iron the edges on to regular printer paper. Print as usual on freezer paper side . Use a paper knife to separate.
Prepare the freezer paper for printing by pressing the edges lightly on regular printing paper.
2. Cut the templates A, B and C . I cut 2 sets of the templates to make the fabric cutting faster. You could also print them on ordinary paper, paste on stiff card and cut out to make reusable templates.
Cutting and Piecing Instructions
Please starch your fabric before cutting, to ensure accuracy and crispness in your block.
As you cut the fabric, use the alignment markers on the templates to mark the centre of each side of the fabric pieces. I have made notches as markers. I also marked the corners with a pencil on each of the pieces. I learnt the hard way that you save a lot of heartburn by taking time at this stage.
Follow the colour diagram and arrange all the fabric pieces where you do not need to disturb them.
The block will be pieced in different sections, numbered 1 to 7 here, as shown here and then assembled. Please follow pressing instructions, they are very important in this block! Trust me, I have made a whole quilt with these blocks.
Piecing and assembly diagram
Referring to the colour pattern, align the curved side of B on top of concave side of A, for all sets of A and B. Pin at the centre notch. I pinned them with the pin on the fabric and had to repin with the pin sticking out before sewing!
Do not pin like this! The pin should face the other way, stick out!
When piecing, you need only two pins. Match the blunt ends of the two pieces one at the corner where you begin, pin. The other pin is at the centre notch.
You need only two pins…
Once you are past the centre notch, use a pair of small forceps/ tweezers to gently align the fabric and finish the curve.
Use a pair of tweezers to ease fabric and match corners neatly
Piece all A-B sets. Press seam towards B.
Press seams towards B
Add piece C to one set of A-B in each of the sections # 1, 2, 4, 5, 6 and 7. Place C on top, match notches, pin. The other pin aligns the corner points at the narrow end, where we begin the seam.
Two pins – one at narrow end and other at centre notch.
Press seam towards A.
Do not skip on the pressing after each stage, if you want a pretty block.
Sew other set of AB from the section to corresponding ABC just sewn. Again, begin with narrow end of C on top. You will have to change your machine needle settings; in my machine, ¼” seam is at needle setting 1.8, so I shift it to -1.8 when doing this step. The seam will be on the left and fabric on the right as you face the machine!
I adjusted my needle position, so that the 1/4″ seam is on the left and the fabric on the right! On my Husqvarna VIking Topaz 20, this position is -1.8
Again, press the seam towards A.
Getting there! Note the seams…
Section#3 has just two C pieces. Reduce seam length, fix the seam at both ends. Join them at the narrow end and finger press open the seam.
Use a smaller stitch length, fix the thread ends. Finger press open.
Join the corner B pieces to Sections#6 and #7 and press seam open.
Sections #6 and # 7 – press the seam open after joining corner pieces
All our sections are pieced!
Assembly Instructions
First we assemble the centre square. (This is the basic winding ways block!) This is the crucial step which will determine the beauty of the block.
Carefully pin Section 3 centre seam to centre of Section 1.
Do not be in a hurry here!
Next, match the notch on the long side of C to notch on A and pin. Start sewing from centre outwards on one side, then the other. This way you can check if your centre points are matched or not!
Press seams toward A, away from the narrow section 3.
Similarly pin Section#2 to just assembled Section#1-3 and sew. Again press seam away from Section#3.
Not perfect . I ripped a few cms and re-did it!
Ready for final assembly…
Now we sew Section#4 and #5 to centre square 123. Match notches and corresponding seams and pin.
The seams are REALLY bulky and you may need to use a lot of maneuvering to get them right!
Those seams are nasty!
Sew. Press seams open.
I like that!
We are on the last step already! AS usual, match all intersecting seams and notches and join sections#6 and #7 to 12345. Press seams open.
Neat?
I am quite happy with my block!
All that remains is to appliqué it to the 19″ background square and trim it to 18.5″. I am planning to use the freezer paper method to do so. What is your favourite method to appliqué a circle to a square?
I would love to see the blocks you come up with – on my Facebook page.
The pretty, pretty Winding Ways Wheel Block!
The sixteenth and last block will be up on May 1st! Like I told you, my mind is already on a fast forward mode, planning what is coming up next – perhaps, to a quilt with miniature blocks?! I do hope I will have the patience to finish this Round the Year quilt before that!
Please note that the downloadable patterns with paper piecing templates and instruction files for the Dreamcatcher Round the Year quilt blocks are being migrated to my store MadsPatch and will not be available for download for free from 15th November 2020 onwards.


You must be logged in to post a comment.