By definition, Mughal gardens – built by the Mughal emperors in the Persian style and are ‘rigidly formal’, says Wikipedia. They also have a ‘highly disciplined geometry’, it goes on to elaborate.
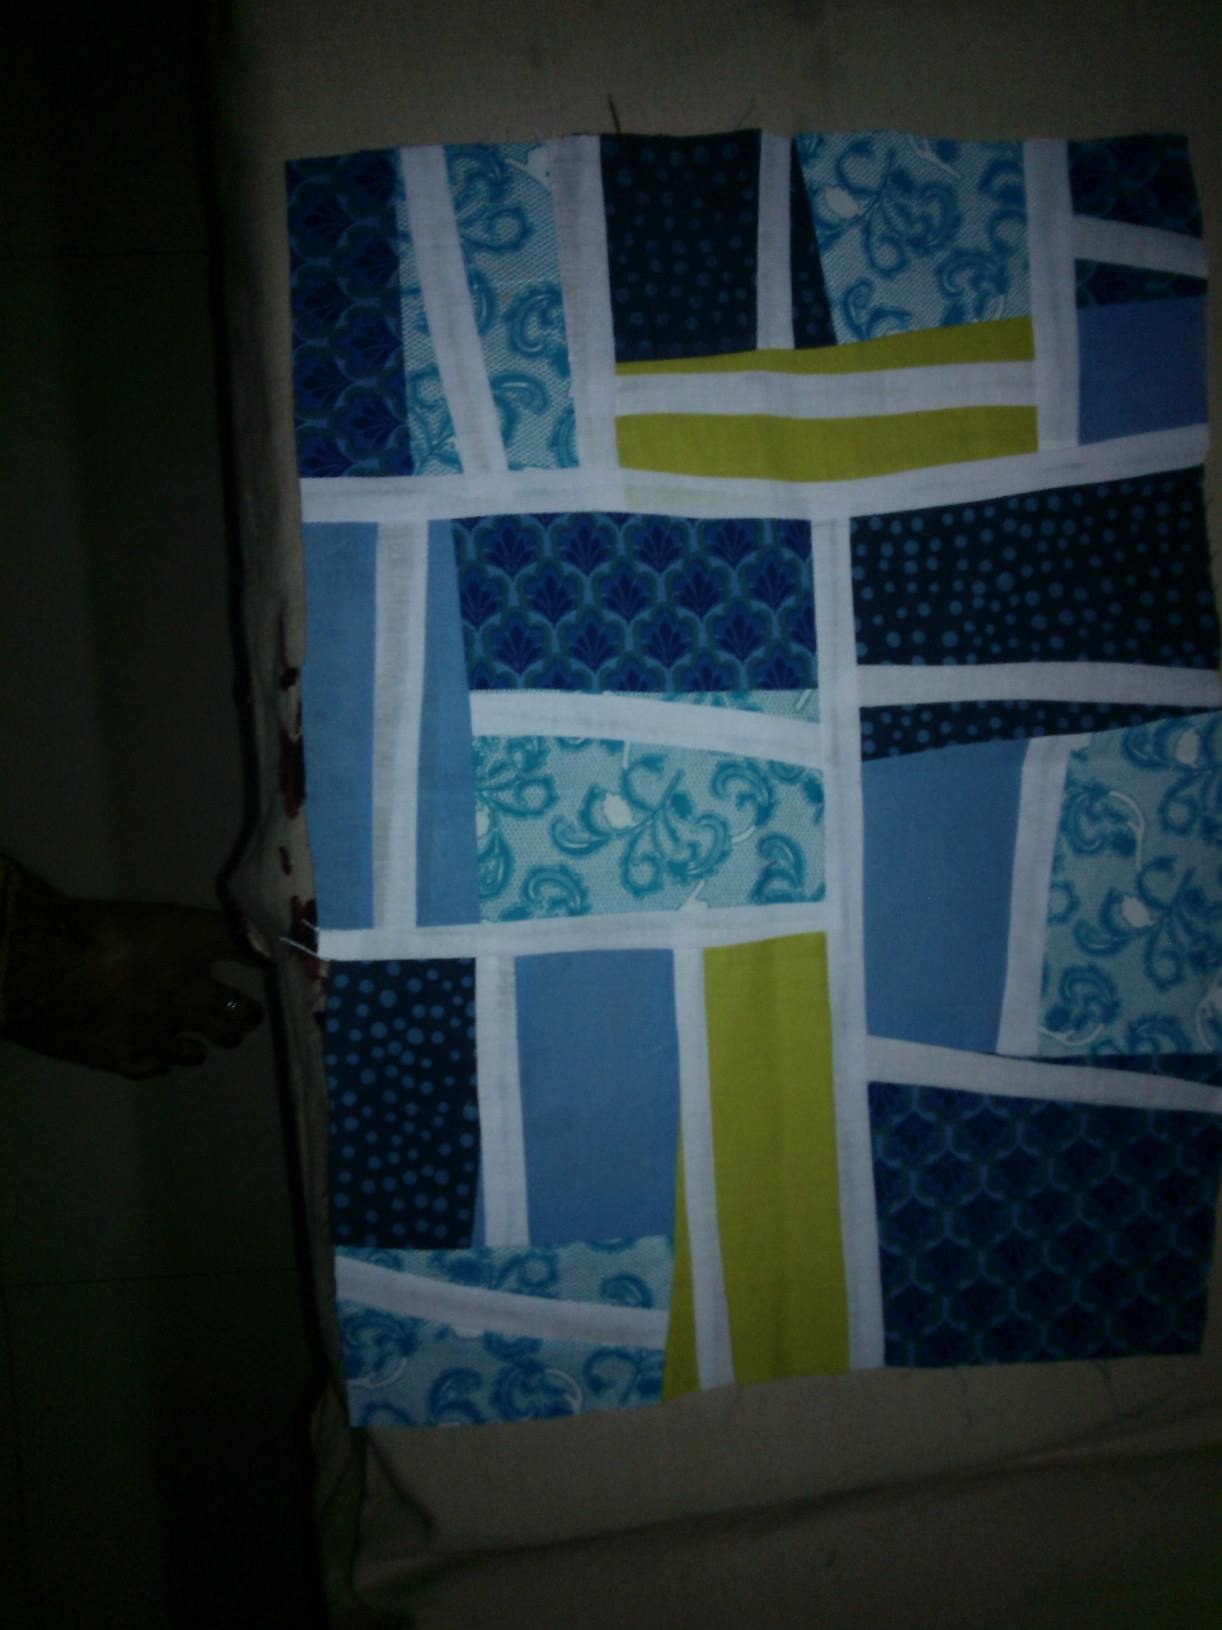
One look at the quilt below, and you know why it could never be your Mughal garden!Tana’s Quilt – Not Your Mughal Garden – no, not by a long stretch!
This quilt – made for my daughter, Tana, has been in the making for three and a half years now. It started off as a block party but I got involved in other projects… My resolution this year is to complete all my UFOs( unfinished objects for those uninitiated into quilting lingo), before I start any new quilt. I also wanted to practice more free motion quilting before I start quilting my Round the Year quilt.
The quilt was built up in 5 quilt as you go (QAYG) panels, joined together with the 1″ red sashing in front and no sashing at the back. It needed a bit of calculation, but turned out fine. It is difficult to make out that this is QAYG, which I like!
In several of these blocks, I just followed the floral print outlines, to gain confidence. I am quite happy with the result! Here are the individual blocks and the quilting on each. What do you think?
Block 1 Tana’s Quilt – Block 1The quilting followed the print pattern, as in most blocks
Block 2 Block 2 and Block 1 formed one qayg panel. Block 3
Blocks 3 and 4 were another panel, quilted together I quilted spirals on the flowers
Block 4
The fabric for block 4 was a synthetic mix and gave me much trouble!To compound the problems , a square was added to the backing fabric!
Block 5
This block was the same difficult fabric as block 4…
…this also had a square at the back! Block 6
…this was in the same panel as Block 5 Again, followed the print pattern in quilting
Block 7
blocks 7, 8, 9 were a single vertical panel backed with red fabric. I quilted flowers to join the dots
Block 8
This was the centre block in the qayg panelQuilted following the printed flowers, more or less!
Block 9
A pretty print here! this was the first block i quilted – pretty satisfying!
Block 10
Blocks 10, 11 and 12 formed the bottom qayg panel – block 10 was different from the others!
followed the print pattern! this is pretty!
Block 11
block 11 tried some free motion quilting roses…
Block 12
block 12 poppies from tute by lori kennedy of the inboxjaunt.com
Here are some more pics of the whole quilt!
The back ! it is actually prettier than the front i think!Here’s another view of the back. Block 1 is at top left corner.
I finished this quilt about a couple of weeks ago. I am certainly more confident about free motion quilting at the end of this exercise! Happy quilting to you all till I share with you what I am doing right now.
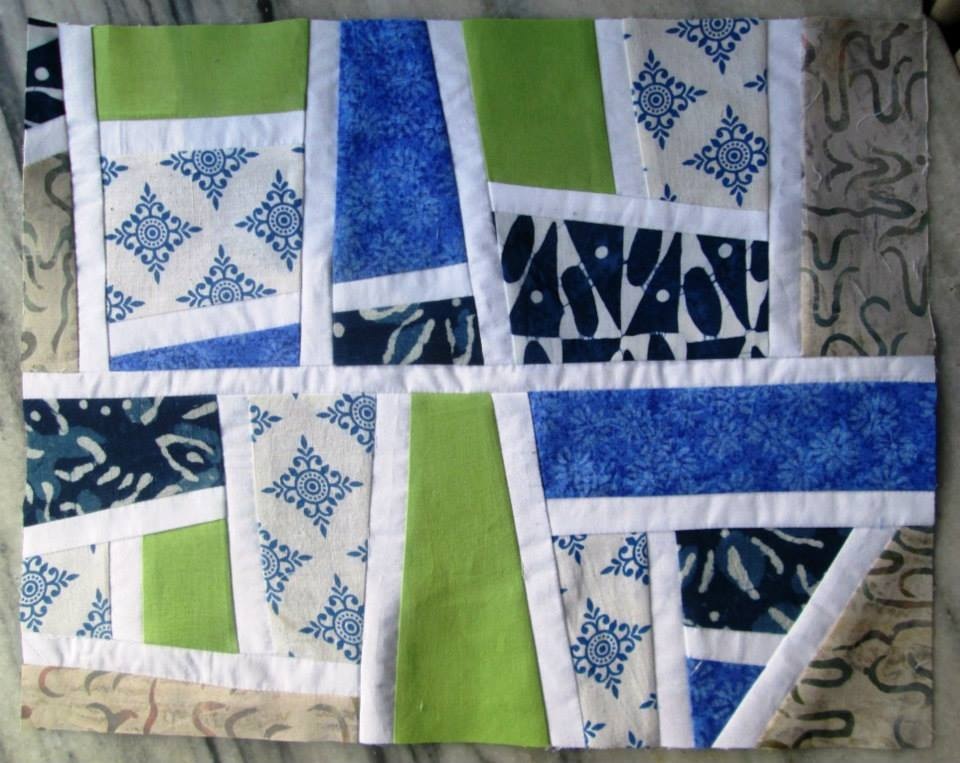
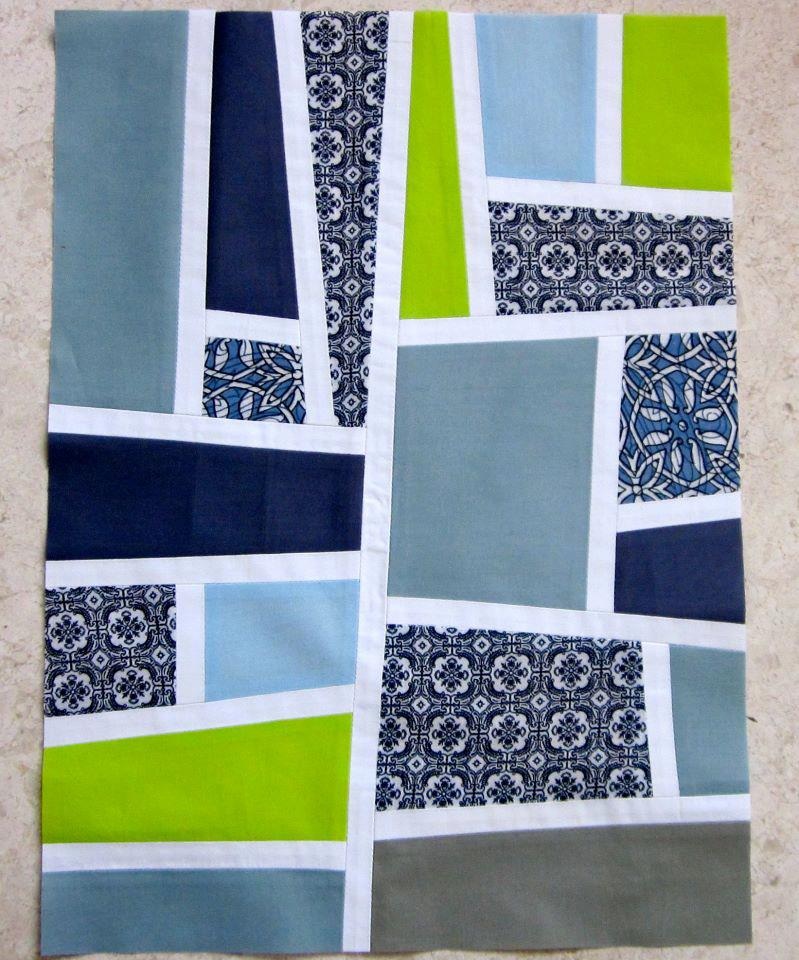
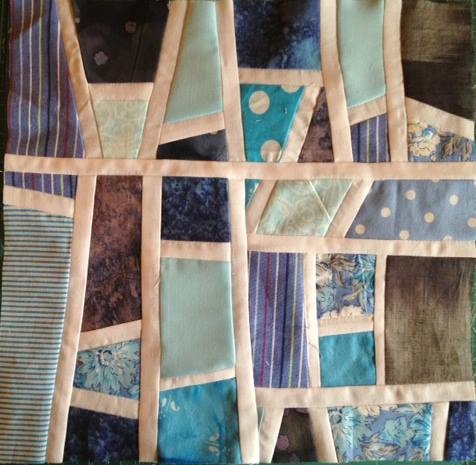
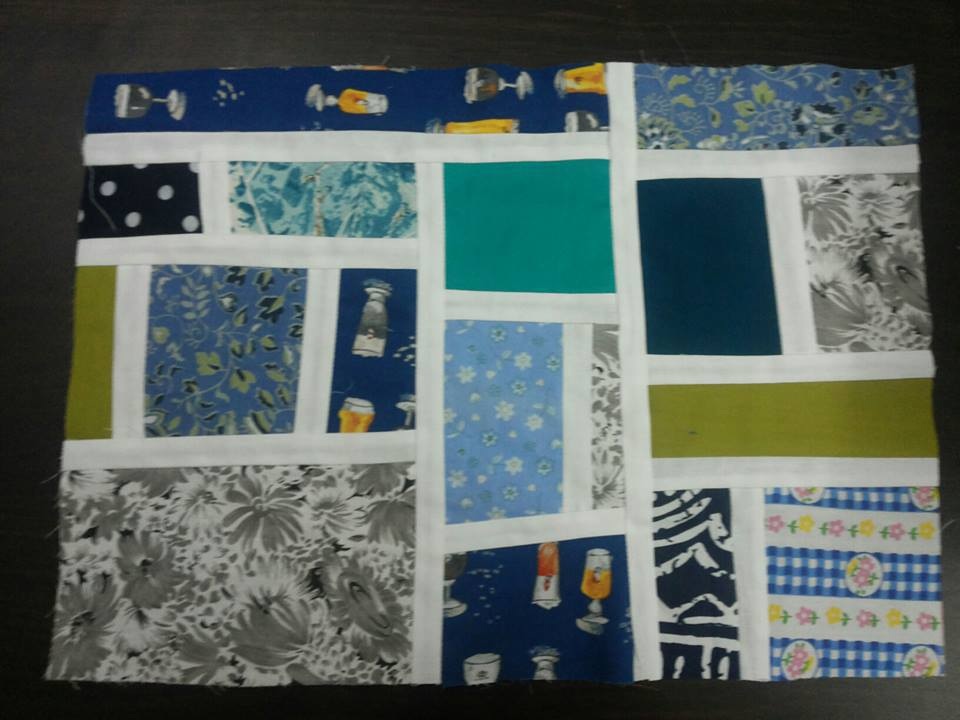
Tina’s block in muted grey, blue and aquaBrinda’s Block with an ethnic Indian touchVidya’s stunning finish in navy and limeElvira’s ‘reindeer’ blockVeena’s stripes and polka dots…Sandhya’s perfect finishNirmala’s lovely blues with a hint of limeThe champagne block! By Shalini
There is something so fascinating about bee blocks! My son had got engaged at the time these blocks were being sewn. How appropriate that they should go into a quilt for him and his wife on their anniversary! I thought about the difficult time our family was going through with my daughter critically ill, around the same time. Somewhere, the love and care that each quilter poured into each of these blocks reached out to me and my family… As for the blocks themselves, as I quilted them I wondered about the story behind each print. I thought of a quilter generously cutting up some favourite new fabric to put into her block. Or were they scraps left over from a dress made for a daughter or a grand daughter? A much loved cushion? Or even a quilt? Who was using them now ? The child scraps, travelling miles away from their home to be made into a quilt which will now go all the way across the oceans to America…How very special bee blocks are!
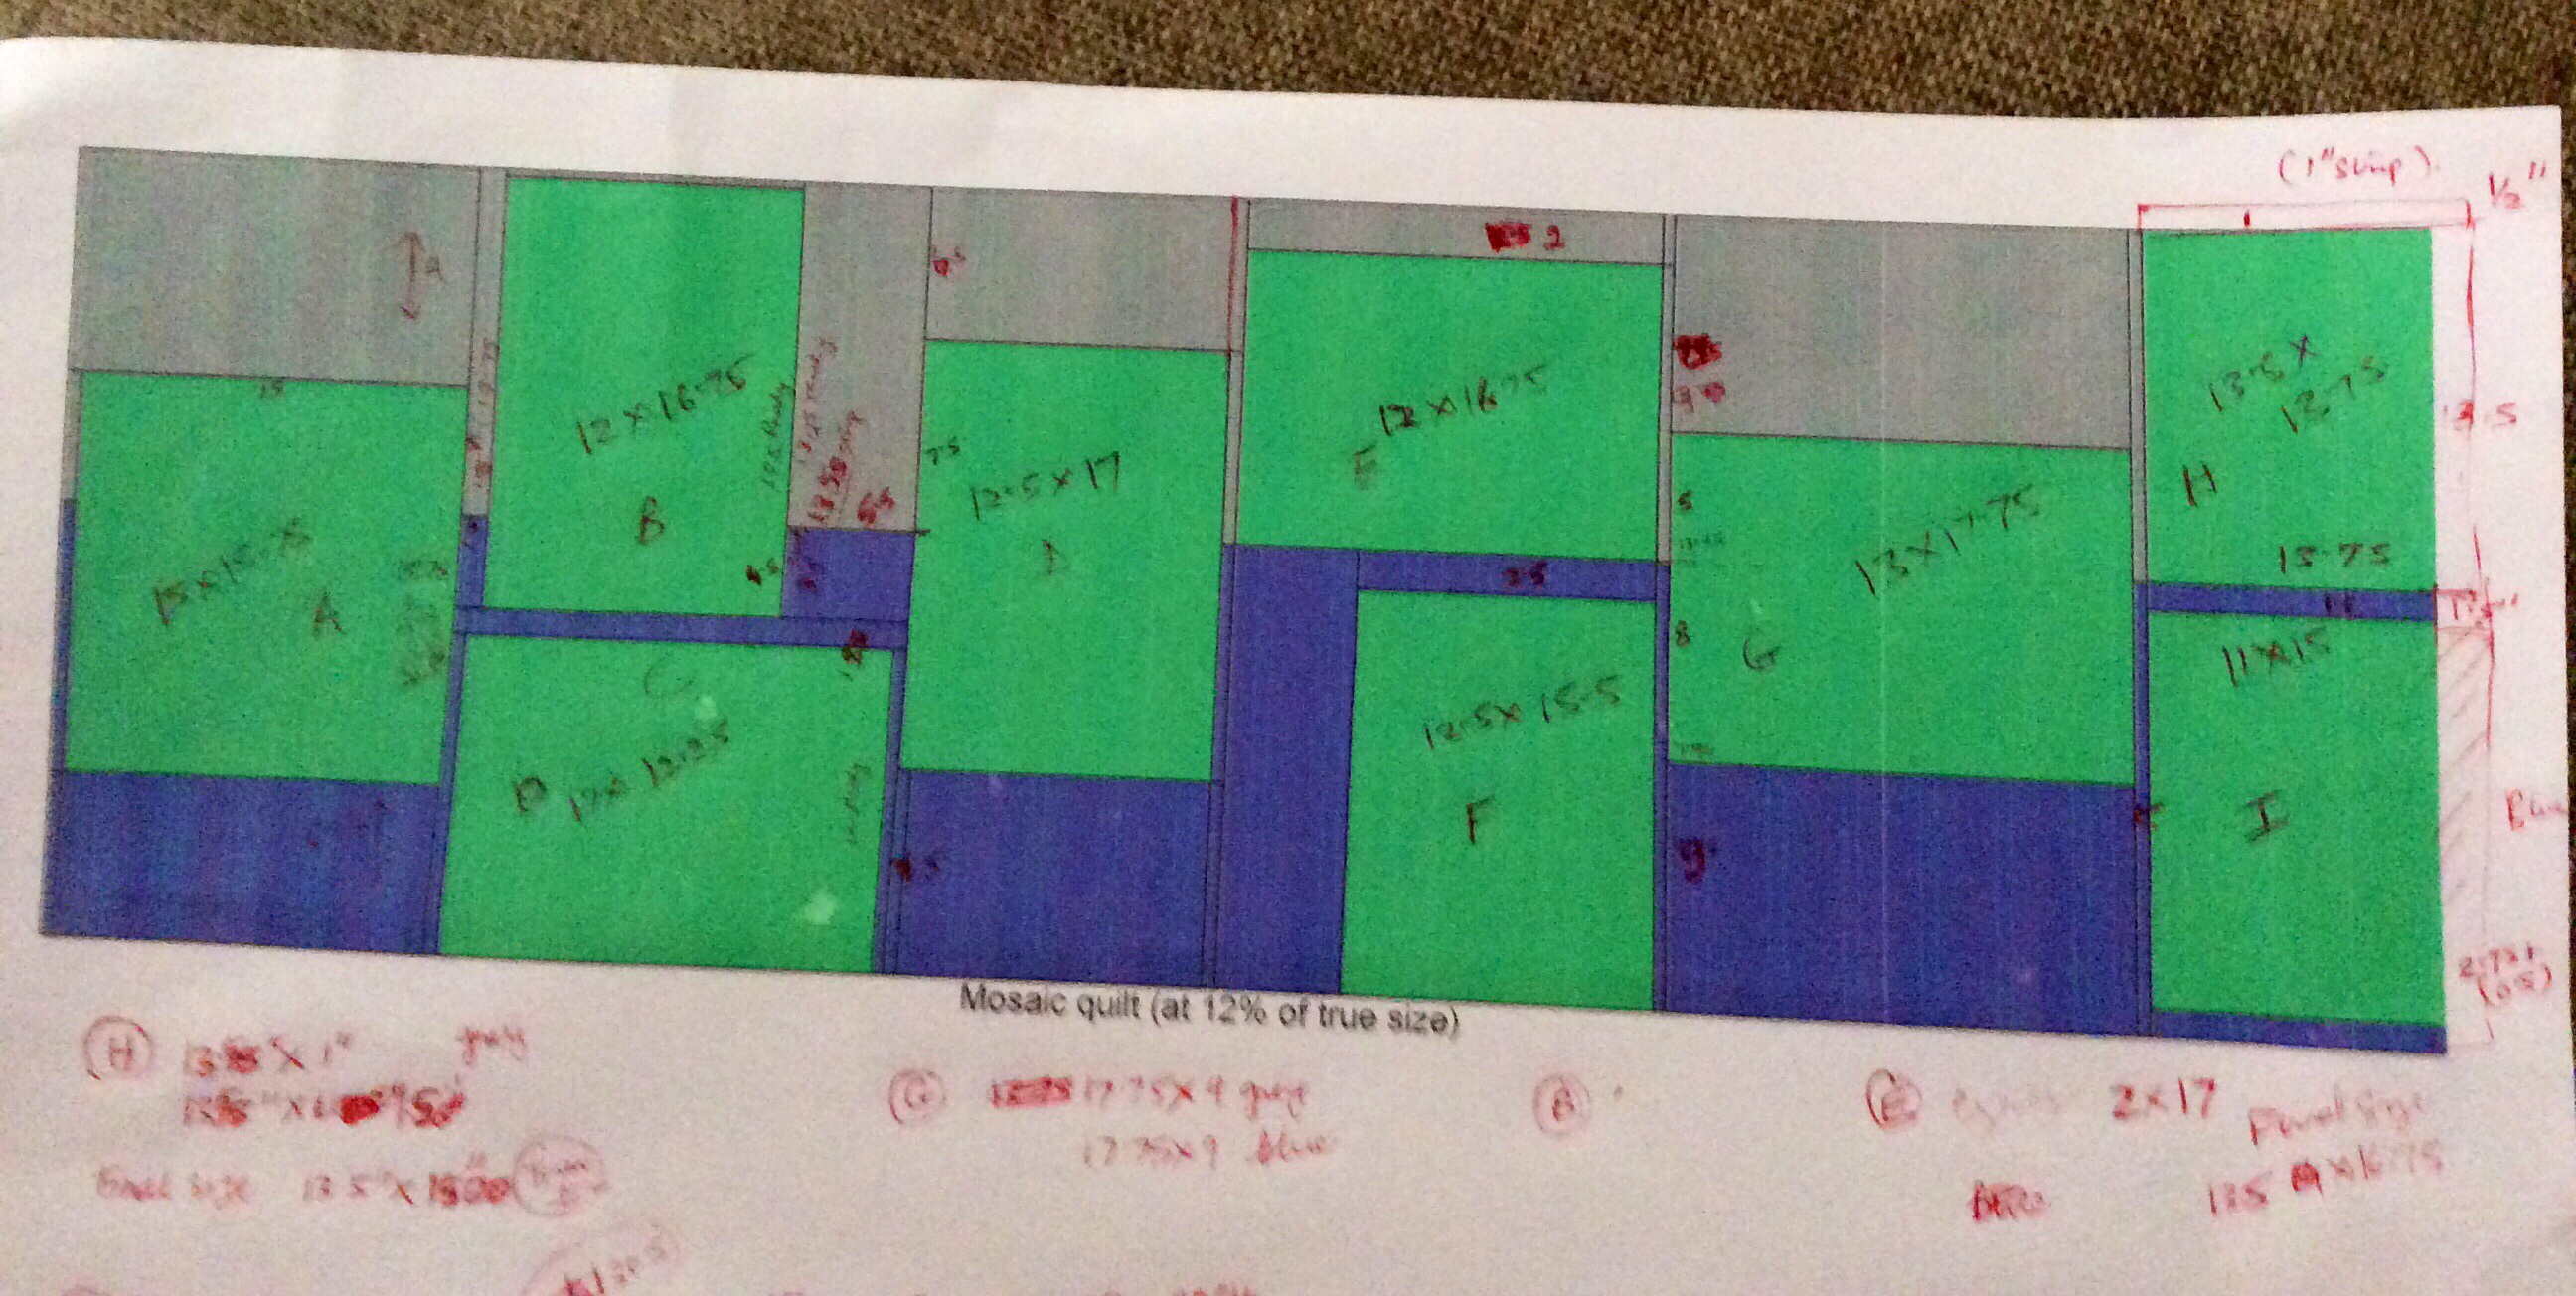
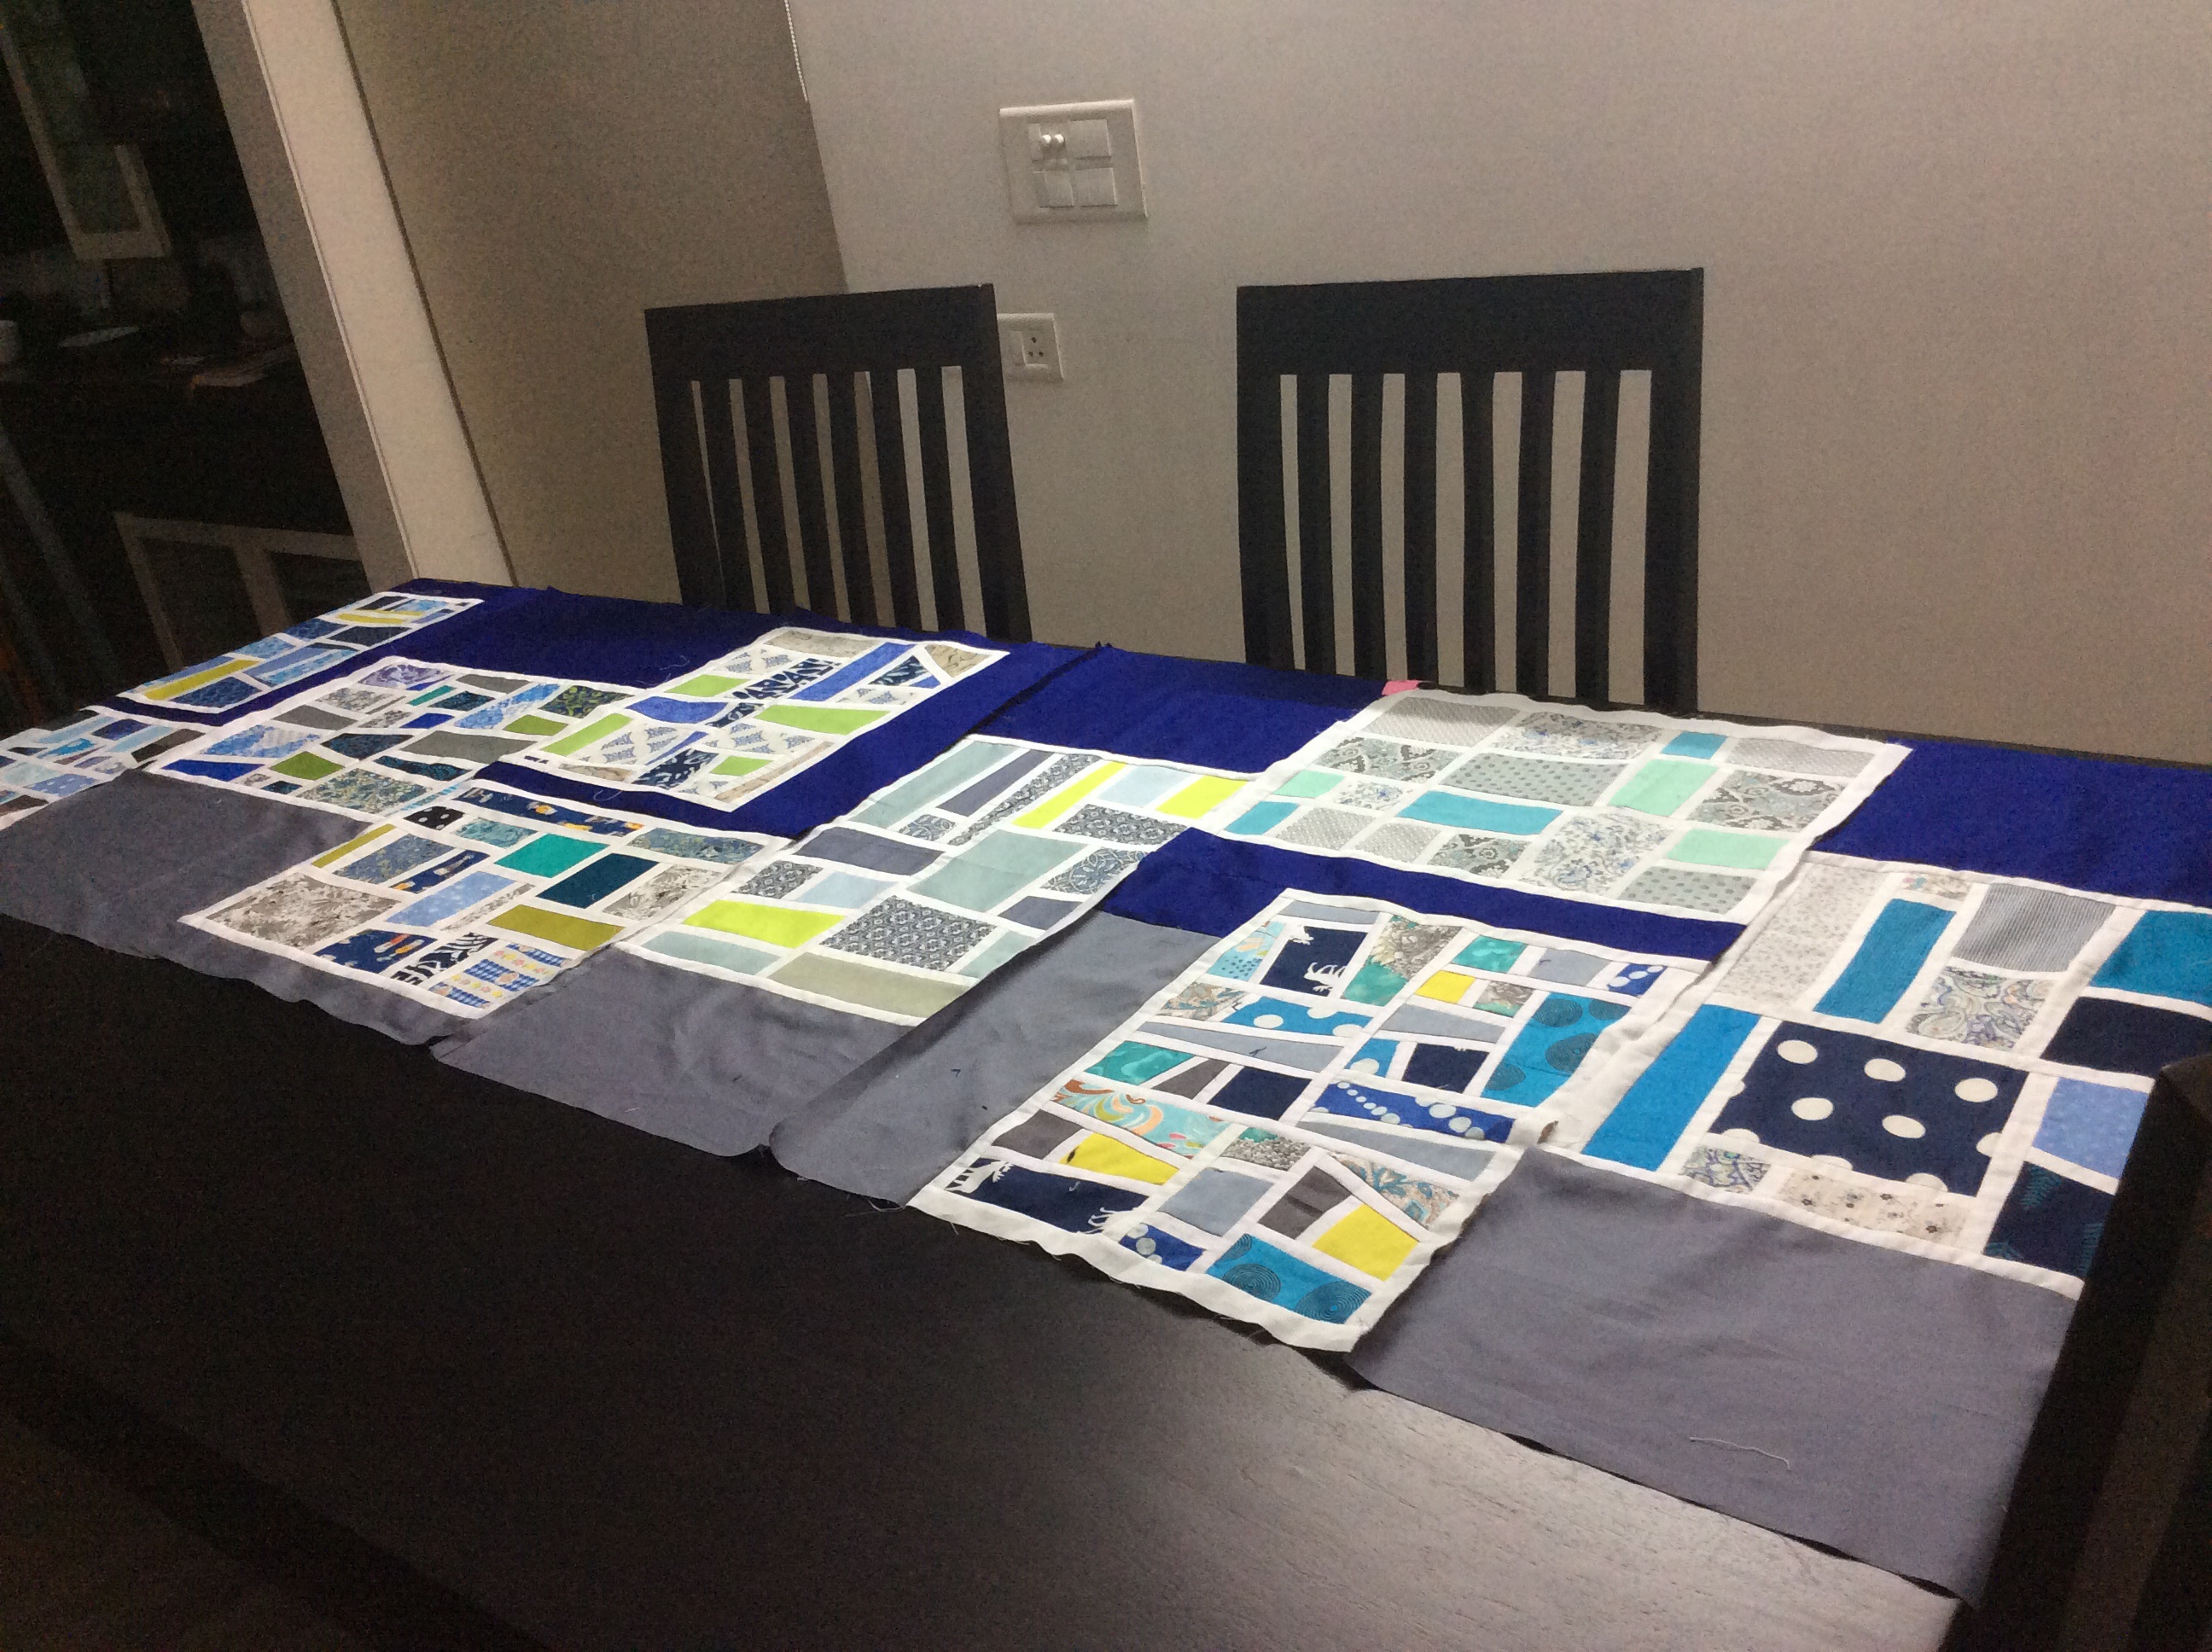
I had a total of 9 blocks, all of different sizes and putting them together to make a whole quilt was impossible. To cut a long story short, I decided to put the blocks together in a horizontal row of 30″ with grey above and royal blue below! Then began the calculations as I wanted a straight line across where blue met grey! I worked on the free quilt design software, QuiltAssistant and came up with this!
9 Blocks arranged in a 30″ row
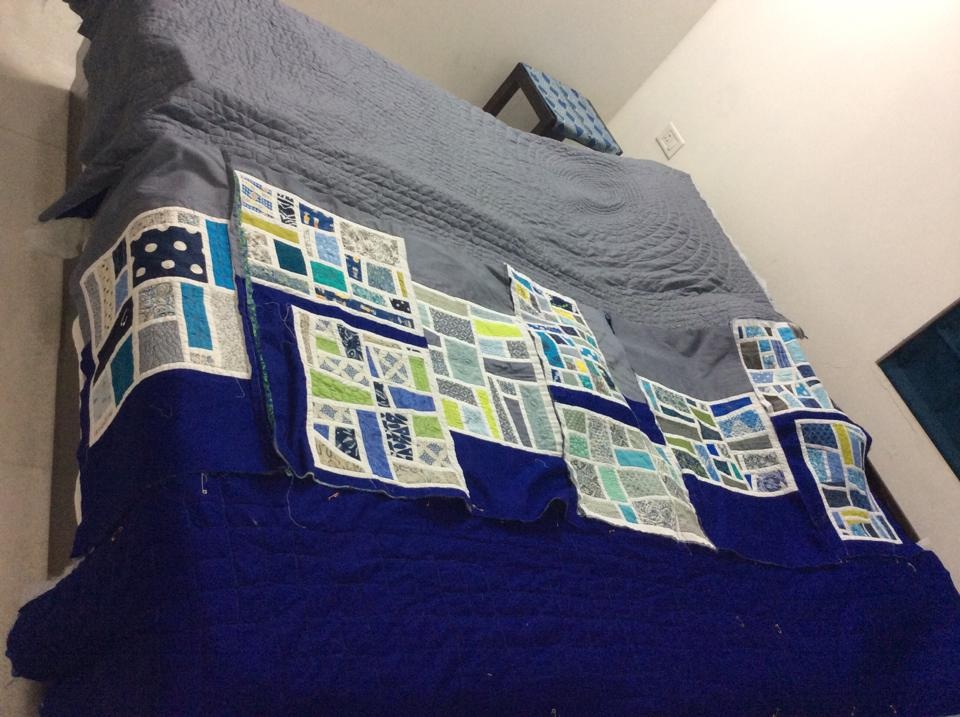
Each giant block was a different width and quilt as you go (qayg) seemed to be the only option for putting it together! I used a great tute at the Quilting Edge, but I hated the qayg! The quilt came together in 3 panels, finally.
I used a cambric print in royal blue for the backing, joining up the qayg blocks and panels with narrow strips of a blue and lime green fabric. The batting was a thin 120gsm polyfibre.
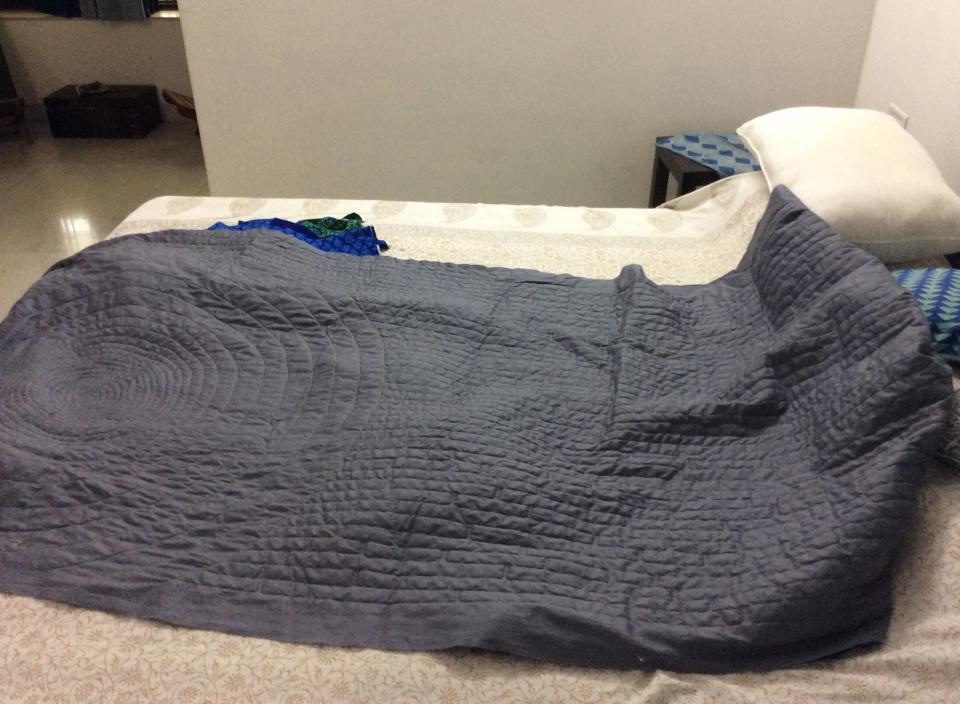
The 46″ wide grey was quilted with a giant spiral covering almost the width of the panel, in a variegated grey thread in the centre and lime green on the outer circles. The rest of the panel was majorly filled up with a boxy version of the “etch and sketch”” filler stitch by Leah Day, petering out into wavy lines ending in tiny spirals on the left edge. To do this, I drew lines 1″ apart on the top and worked on that. Here, the quilting was in lime green thread near the spiral and a dark grey matching the fabric in the rest.
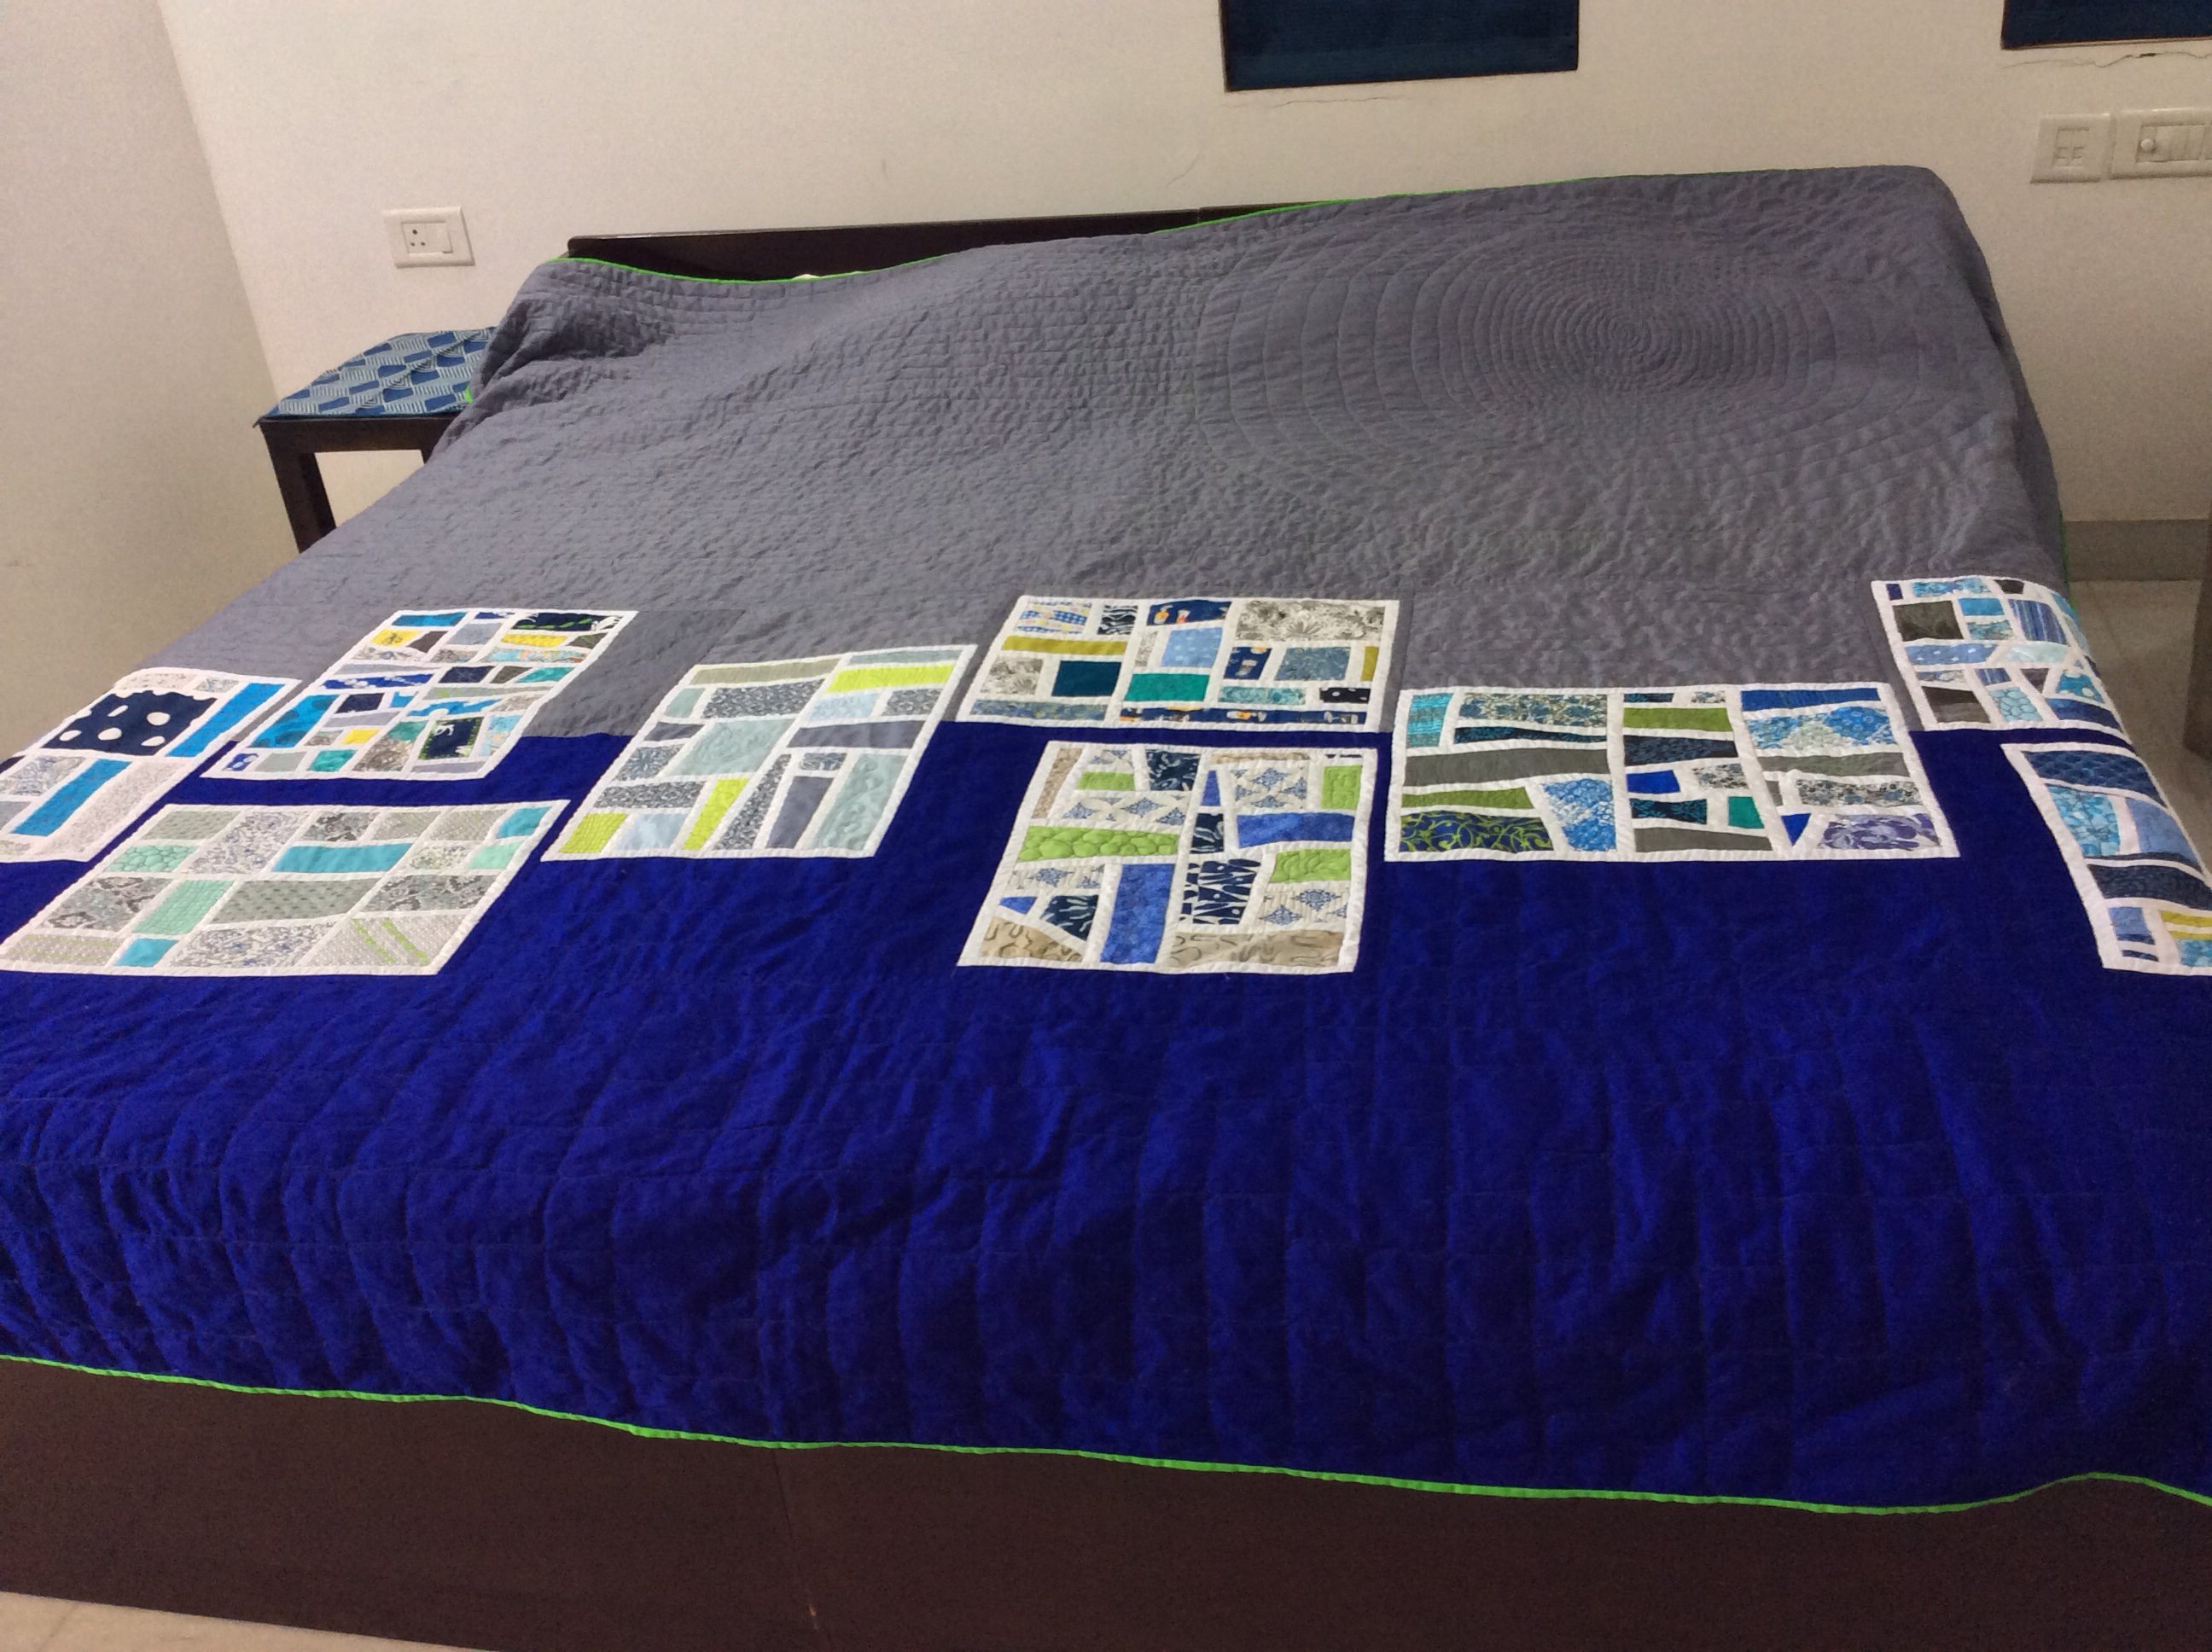
For the royal blue, I used Leah Day’s ‘cubic ripples’ as an inspiration, but gave them more structure and developed it into a ‘Tetris’ game like pattern. I drew lines at 2″ apart vertically on the 16″ row and quilted 2″ and 4″ squares and 2″x 4″ rectangles. This was a fun design, as I challenged myself not to stack up similar ’tiles’ in close proximity.
For the binding I chose a lime green to brighten up the drab grey which made up half the quilt. I cut the binding the wrong width – just 1.5″ but there was no way I was going to waste 400″ inches of binding. And I had already sewn half a side before it struck me what I was doing! So I decided to go ahead with it; I do want to think the 1/4″ binding adds a touch of elegance to the quilt – so “not over the top”!
All the quilting was done on my Husqavarna Viking Topaz 20 with its inbuilt auto sensor system for fabric thickness. I had some problems initially when using the spring action fmq foot, but when I switched to the echo quilting foot, I soon got the hang of the right rhythm and everything went smoothly – like a dream!
So here are the pictures, I’ll shut up and let them do the talking…
Mod Mosaic blocks in a row – the rightmost is the ninth – made by Sandhya S!A giant spiral 38″ in diameter to offset and soften the rectangular blocks. The lines were added to accentuate the horizontal panels.The quilted blocks being assembled through QAYGA dash of lime to brighten up the proceedings“Tetris” tiles quilted on the blue panelThe quilt is a square, may be used either way?The spiral circle spacing gradually increases from 1/2″ on inner circles to 2″ outsideNow to pack it up!
Ready for packing? Not before one last look at it!
With blessings and love, from Ma!
Thank you, all you beautiful ladies, who made the blocks for this quilt!
I added an additional row of the garden fabric to her block as I wanted a 15″ block!
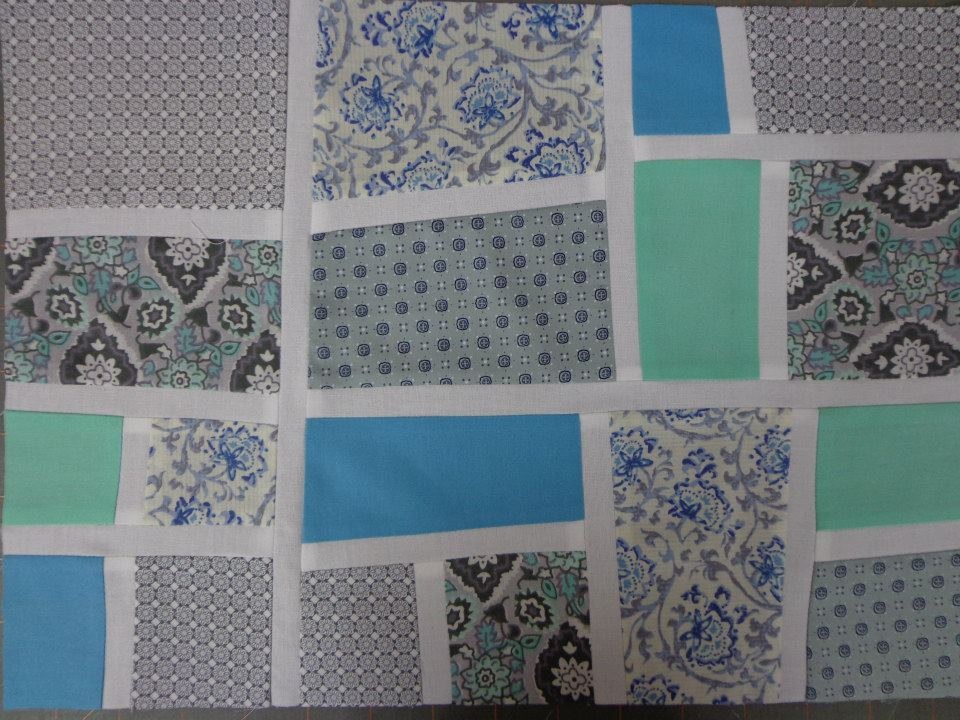
I had seven different prints in red, white and grey. I chose a grey `fencing’ and a red focus fabric and sent out 9 blocks to my partners:-)
I gave them the choice of making the block chosen by me, or any other block if the fabric so inspired them! My basic block used only the garden and the fence fabric, they could use the red if they wanted – in any which way they liked!
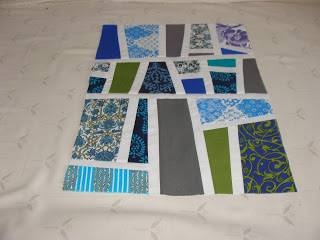
And here is a sneak peek into some of the blocks I have received
While I am waiting for 3 more blocks to arrive, I tried out many block settings on MSWord! Shall share them with you soon:)
Not a very long wait! Here come my settings:
This was my first choice:
But I would have had to add a triangle to all the corners of all the blocks! Not happening! So I thought of the simplest thing you could do, while retaining the `fence’ look. This is not a very good represenatation – but you get the general idea, right?
Too `quiltish’! Again, no go! And I had this seventh print, the prettiest of them all, which I had not sent out at all. I could use it plain – as it in the centre, or do something special. So then I came up with this option :
Hmmm – nice… Then I googled (can I use it as a verb?!? cringe!) some to find a `maze pattern that i liked (Sorry, cannot remember where I found it. Shall add the credits as soon as I can trace it)
I quite love this one – the colours in the centre are supposed to be reversed. Grey fencing on the garden print, by the way.
But this is not what I am going to make. I had only 8 blocks in hand, and I wanted the quilt to be ready by DD’s birthday. And so I came up with this:
It would need an additional block but that was fine. Some of the red and grey sashing is missing from this picture – but you get the general idea! And this frames each of the blocks so lovingly made by each of my block party partners 🙂
And then… I discovered I did not have enough fabric. So, I am waiting for the rest of the blocks to arrive and I have come up with yet another pattern – which shall be the final quilt design. Not to be revealed yet …wait till November:-)
I would be happy to hear from you all – telling me which quilt block setting you like and why!


 Block 3


You must be logged in to post a comment.