
This is a hand appliqué method that works best when doing patterns that involve multiple curves and reverse appliqué. It is a carry with you project – no tedious ironing, templates, freezer paper , glue, pins…It is also very accurate!
Supplies
You will need:
- Pattern – . As a beginner, you may want to choose something that does not have too many sharp curves. A simple pattern with not too many small pieces is a good idea!
- Background fabric – Most patterns will give you details of how much fabric you will need. But remember – at least ¾” to one inch larger than finished piece/ block on each side. For a 10″ X 10″ block, take background fabric 11 1/2″ to 12″ square. Trust me, you will not regret it!
- Applique fabric – enough to fully cover the appliqué pattern completely plus approx half inch all around
- Painter’s (paper) tape
- Small, sharp scissors. Special appliqué scissors are also available!
- Thread for basting – try to pick a colour that will show up on both the background and appliqué piece
- Thread – colour matching the appliqué piece
- Small sharp fine needles – keeping a couple of extra needles threaded is always a great idea when doing hand sewing of any kind.
- Toothpicks (yes!). A knitting needle may prove useful for some patterns!
- Thimble, if you use one
-
Couple of sharpened ordinary lead pencils, or washable ink pens for fabric. You may want a white/ light coloured pencil/ pen if your fabric is dark.
-
- Method
I shall be showing different blocks through this entire quilt along, so please do not get confused L!
-
Print out or trace out your paper pattern . You may need to tape together the sheets – matching given dashes or dotted lines – if the pattern is larger than A4 (like here). The online patterns usually carry instructions on how to go about it!
-

This pattern is all taped together and ready to be used. If your pattern is symmetrical – like the one above, you need to mark the centre of the pattern.
- Trace the pattern to the wrong side of the background fabric.

Tracing the Pattern
- Tape the pattern to a light box, or glass window, sunnier the better! Here is a pattern taped on to my window . (It was so sunny that you cant really see anything in this picture!)

- Preparing the fabric: Take background fabric at least ¾” to an inch larger than your finished piece on each side . When appliquéing, the fabric gets `pulled in’ unevenly, and you will need to square it to the right dimensions, once done.
- Spray starch and iron your background fabric, so that there are no creases!
- Fold and iron (the centre part only) fabric twice to mark the centre with sharp creases.

-
Tape the background fabric, right side facing the light on top of the pattern. So now the wrong side of fabric will be visible to you …Match the centre of the fabric to the centre of pattern. And trace with fabric pen in contrasting colour. I use a lead pencil, which would not work on light coloured or white fabric.
-

-
- Now we have our pattern traced on the wrong side of the background fabric! And we are ready for the next step.

-
Pin/ tack or tape your appliqué square to the right side of the fabric, smoothing it out . Hold it against the light to ensure your pattern is completely covered, leaving a seam allowance all around.

-
Flip over to the reverse side and go over the pattern with a running stitch in contrasting thread.

-
-
- Tip: You can afford to take large stitches on wide curves and straight edges. The sharper the curve, the smaller the stitch!
-
This is done! Here it is from the right side.

-
-
Here is another block, the appliqué fabric basted in place on a corner. This is when I had just discovered that the joys of paper tape vis a vis pins!
-

-
-
-
-
Roughly trim around the pattern, leaving just about a ¼” allowance . For the time being, do not attempt to trim into sharp curves and the reverse appliqué portion!

-
A few tutes recommend skipping this step altogether, and trimming only as you go along.
-
In any case, we are ready to appliqué. Now you can carry this with you anywhere (or put it away for a year)– and take it out and finish it any time 🙂
-
Start location – Start in an area which is straight or a fairly wide or gentle curve. In my block above, I could have started on the straight basket base. I am starting on the wide handle above.
-
-
Even out the seam allowance here. A ¼ ” or less seam allowance works great on wider curves. With a washable fabric marker pen ( I’ve used a lead pencil), go over the basting line a few inches ahead of where you will be working. This will work as a guide for the seam line. As we go along, we continue to mark the seam line in this manner.
- Several tutorials suggest using the hole made by the basting as a guide. My ageing eyes prefer a drawn line!

-
- Clip the thread , remove a few stitches with your needle (or the toothpick). Turn the fabric under and start stitching! I was taught to take a few back stitches at the back when beginning a hand sewing project, so that is how I fasten my thread! More often than not, I forget to` bury’ the tail between the appliqué and the background fabric – which would look much neater. L
-
Generally one would slip stitch it ( like an invisible hem). You could also use a decorative button hole or a feather stitch …

-
- and so you go on, removing the basting ahead of you, turning in the seam allowance and joining the appliqué piece to the background! Simple, isn’t it? Use the toothpick to negotiate the more difficult parts. And remember to keep flipping over to see you are on the right track…
TIPS AND TRICKS
Seam allowance – Trim your seam allowance as you go along. Your seam allowance is not a constant. For wide, gentle curves and straight edges, keep it at ¼” . Since there are no exposed seams, for smaller pieces you can reduce the seam allowance.
Another tip is sharper the curve, the smaller the seam allowance.
Curves – Notch all curves – as you approach them.
You would generally read that it is not necessary to make notches in convex (fat) curves, and that is quite true. But I find that doing this reduces the seam bulk and gives you a smoother curve.
As for concave (hollow) curves , it is imperative to make notches. Again, the rule is, sharper the curve, the closer the notches!

Sewing sharp (pointed) outer corners – as in leaves, petals…As you approach a pointed outer corner, trim the corner seam allowance to a blunt 1/8″ or less. Notch as liberally as you dare! Remove the hand basting stitches only up to the corner.

Stitch right up to the point and fasten the thread by taking one or two back stitches on the wrong side.
Now remove the basting on the other edge. With a toothpick, ease in the fabric gently, rolling it over inside the tiny space. You may need to trim the seam allowance further as you do this.
Sewing sharp pointed inner corners – As you approach the corner, reduce the seam allowance on both the edges that meet at the corner steadily. ( I make a cut which stops just before the corner point, so that the allowance at the corner may be literally just a thread or two!)

Remove the basting on both edges . Now, with the toothpick, ease in the seam allowance on both the edges. Remember, gentle is the word!

Sharp curves (not pointed) –Make two notches on either side of the corner, instead of a single cut as for a pointed corner.

The Stitch – I’ve not come across any description of it anywhere, so I do not know what it is called. It is something like the ladder stitch, or even the blind stitch, but not quite… invented it when trying to make my appliqué stitch invisible!
- It is basically a running stitch. The lower stitch is visible on the wrong side. The upper stitch is hidden, in the fold just above the seam turning, but below the visible part of the appliqué.
- I begin by bringing the needle straight up, on the right side on the appliqué, just a thread or two inside the edge.
- Then I go right back in the same place, but not all the way to the wrong side of the fabric. I stop in the fold above the seam allowance. Travel a few millimetres in that fold and then go down to the wrong side. Take a stitch and come up to the right side again as in the previous step.
- The stitch is totally invisible on the top! Except for a tiny hole, which can be smoothed away.

On the wrong side it shows up just a thread or two inside the pattern line.


I find hand appliqué really relaxing! I am sure you will, too!
All the blocks shown are from the Just Takes 2 2012 quiltalong…and here is a great hand basting tutorial from the same site.
You can see my quilt top containing all the above completed appliqué blocks here.


 Quilt it and make into a small table topper 18″ square. Incidentally, this is a test block made by my online quilter friend Nikhat Syeda– hasn’t she done a marvellous job? Reduce the size of the square to 15″, which is a great size for cushion cover. You could make a set of cushion covers depending on how many blocks you end up with.
 Add a border, quilt it to make a stunner of a wall hanging!
 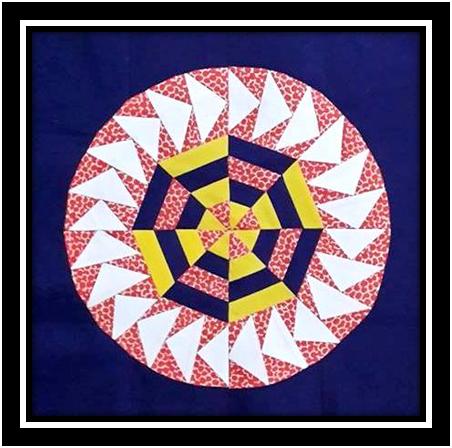 Another quilter friend Sobana tested the same block. (She has even blogged about it
 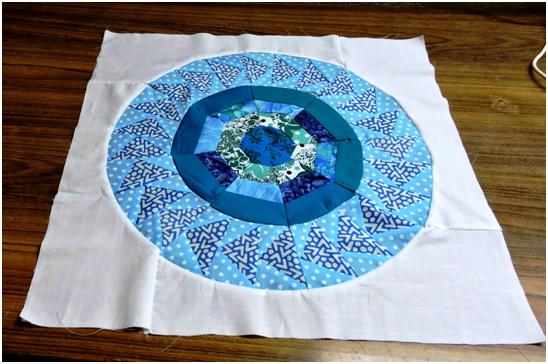 She is going to use it as the centre of a quilt she is planning! I am waiting to see what she comes up with – but this does give you an idea of what you can do with a single block! I almost forgot to remind you of what I did with a single block – in fact , with a little less than a single block… I skipped the outer square and quilted the pieced circle into a pretty, round table top.
  This is my friend Aliya Mir’s test block , which I have photoshopped to show you the look. Well, tomorrow evening I give the fabric requirements for the full quilt, do tune in! But before that, tomorrow morning I am experimenting with various quilt layouts here on this blog!


You must be logged in to post a comment.